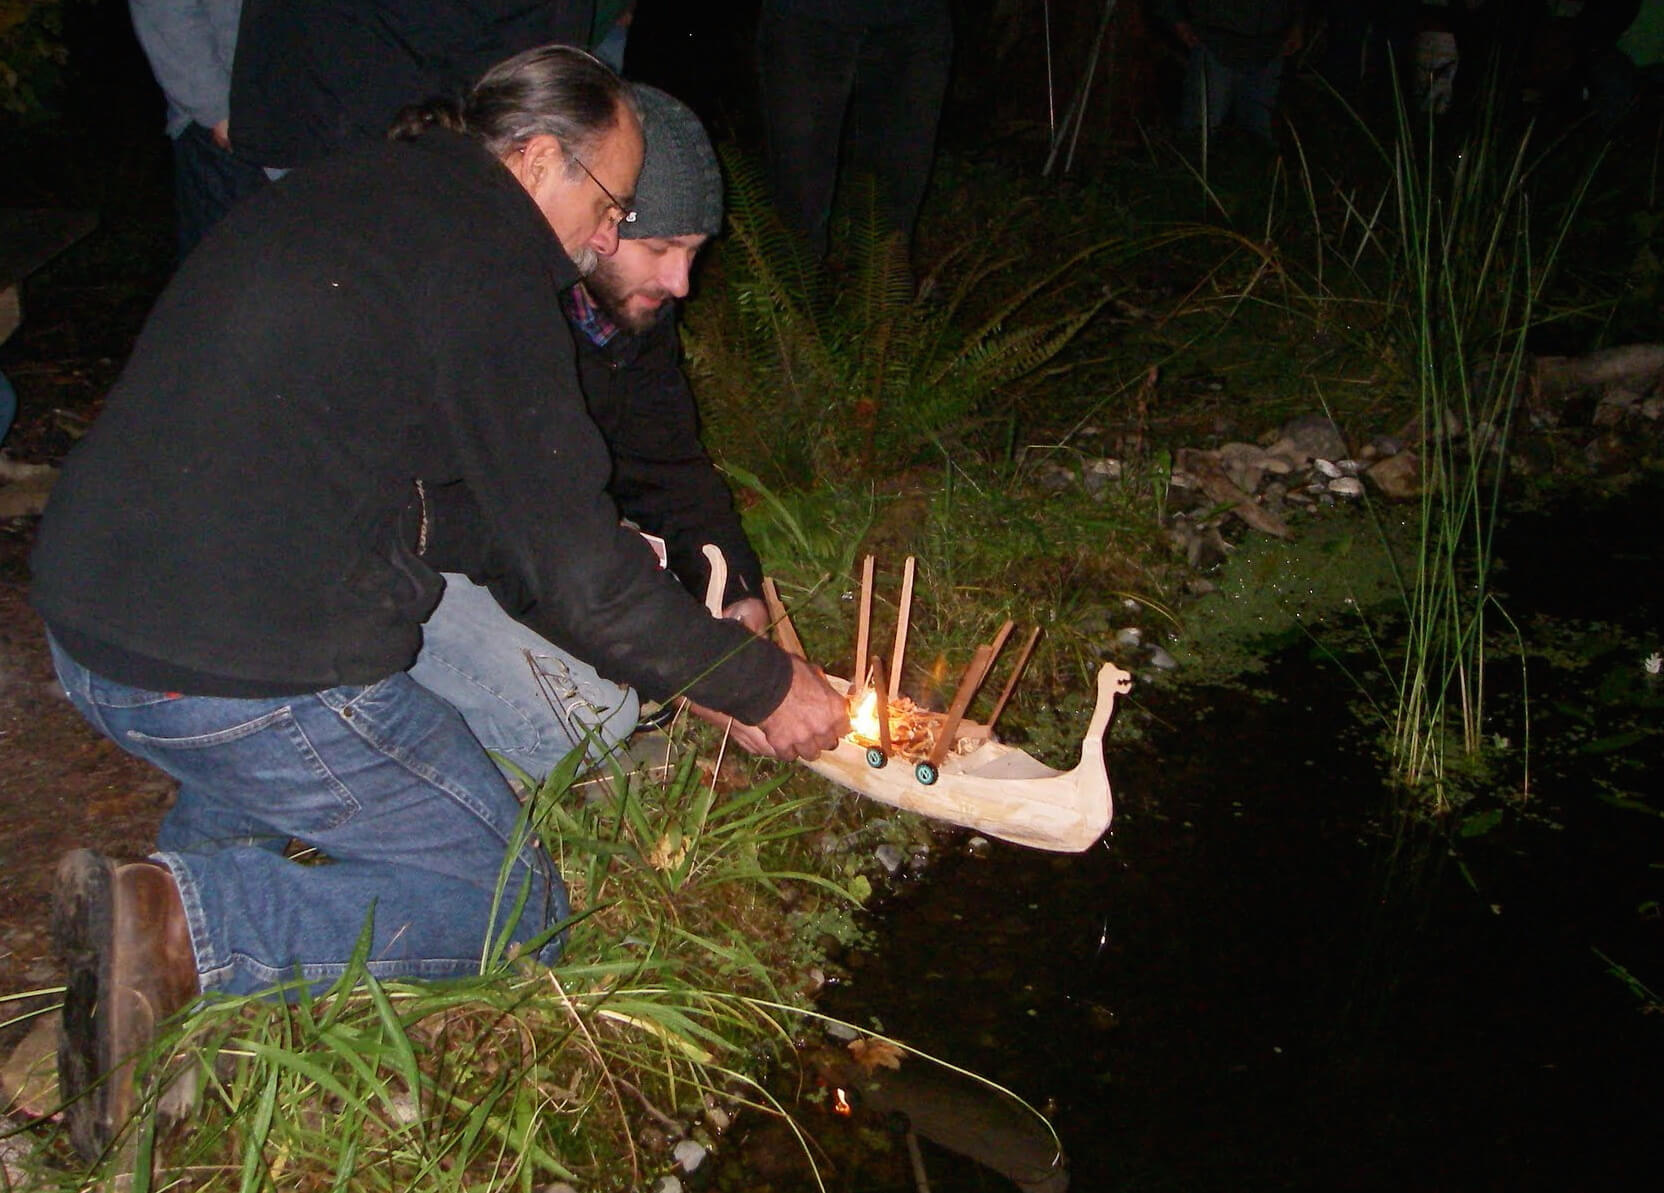
We wanted the boat to sink when it was done burning, so we added some rocks in the compartments at the bow and stern.
We also wanted to be sure Freddie burned before the boat sank, so we added a bed of wood shavings and kindling around the internal deck. We also used long pieces of cedar to look like oars raised in the sky.
We attached a wire loop to each end of the boat and then tied fishing line to the loops. This way we could easily keep the boat centered in the pond.
Adding Freddie
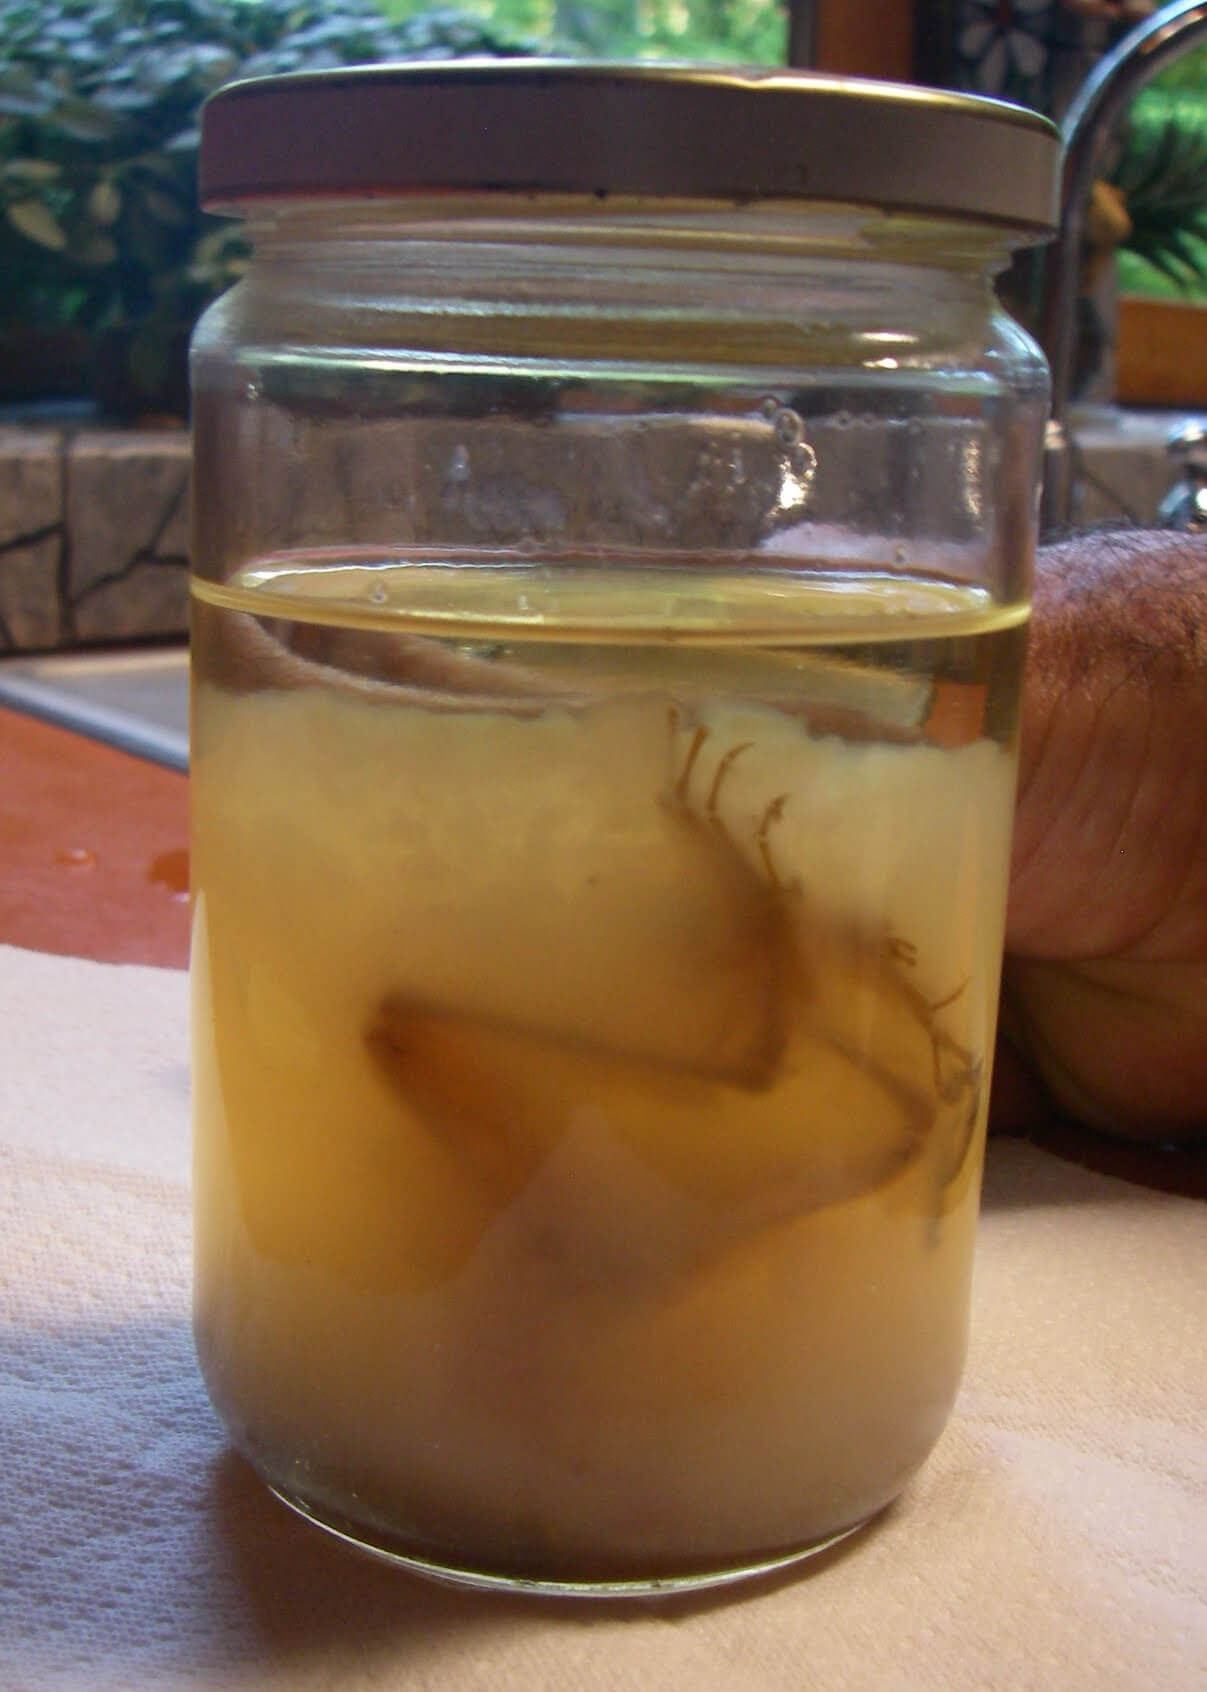
Freddie had spent the last several decades in a jar of formaldehyde and had pretty much decomposed into a cloudy solution. There were still some solid parts, so we created a net of cheesecloth with a wire hanger and poured him into it. We rinsed him off with alcohol to make him more flammable, wrapped him in the cheesecloth to create a shroud, and placed him in the boat.
Too long in a jar
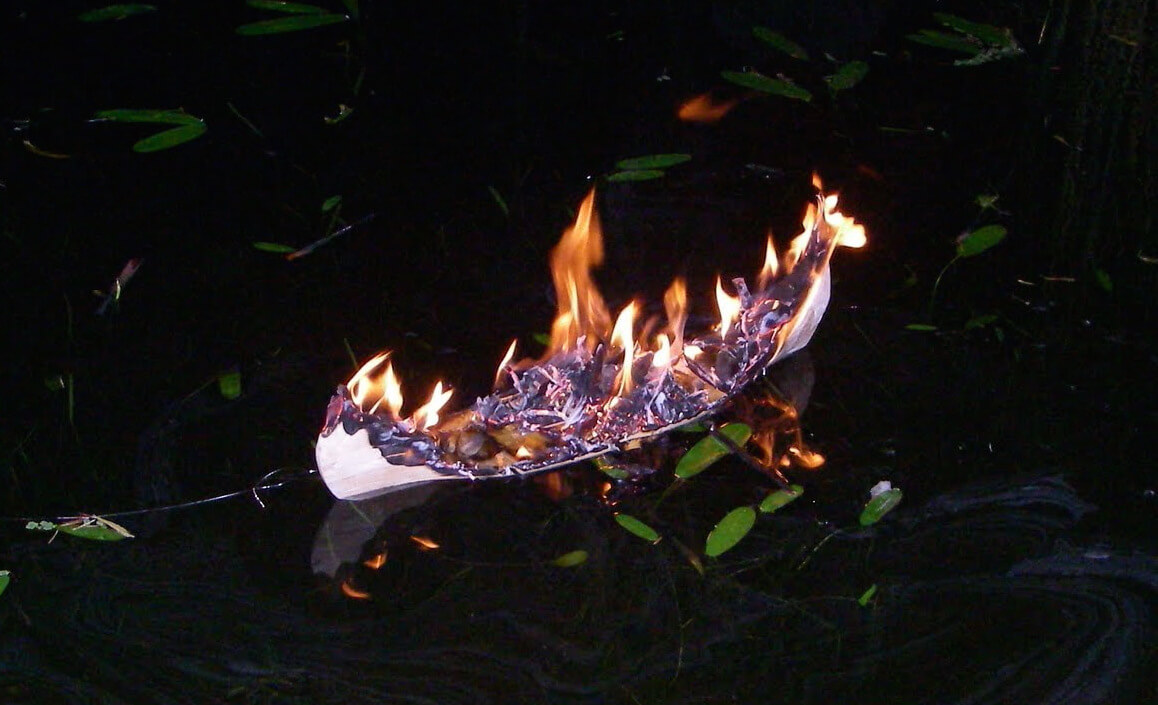
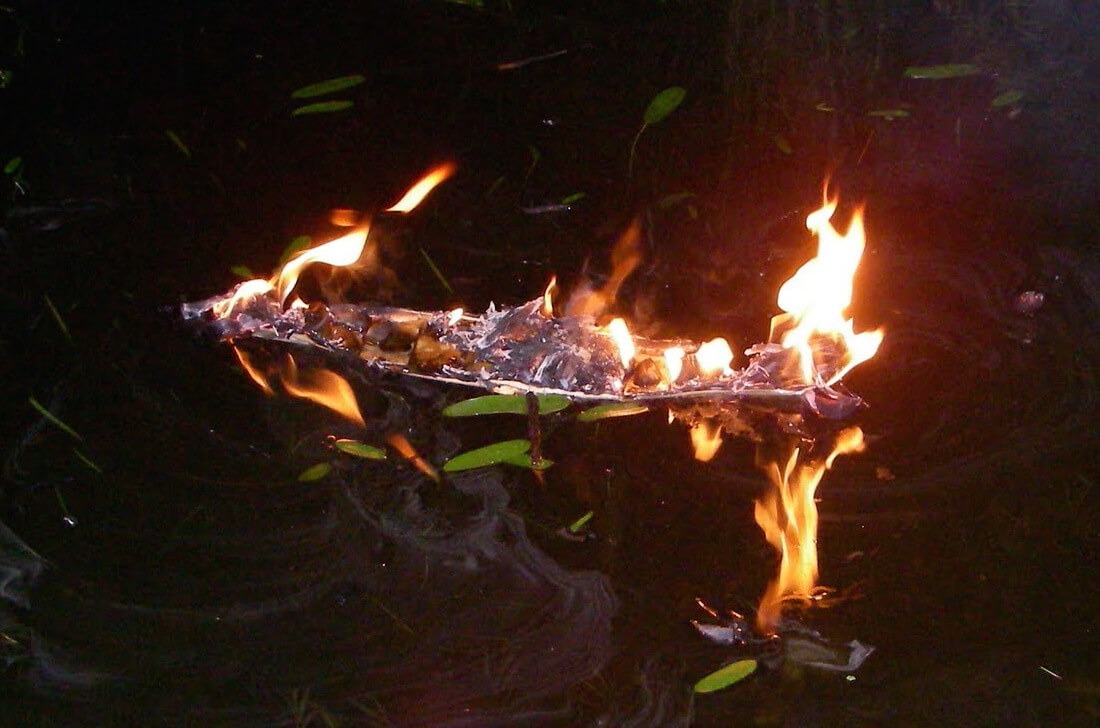
The sending off
My mom created a sound track for the funeral which included “Turn! Turn! Turn!” by The Byrds and “Joy to the World” by Three Dog Night.
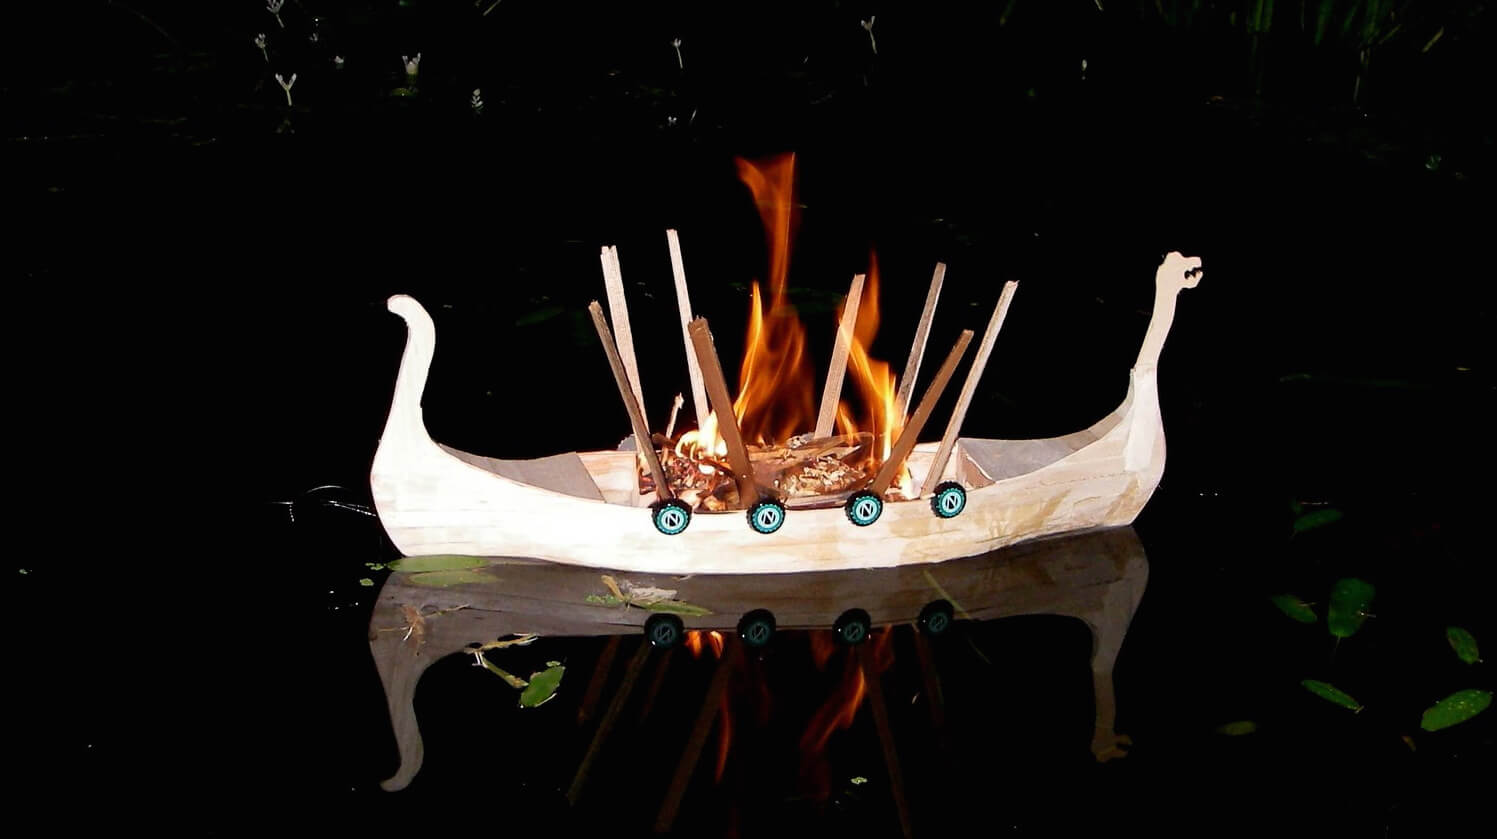
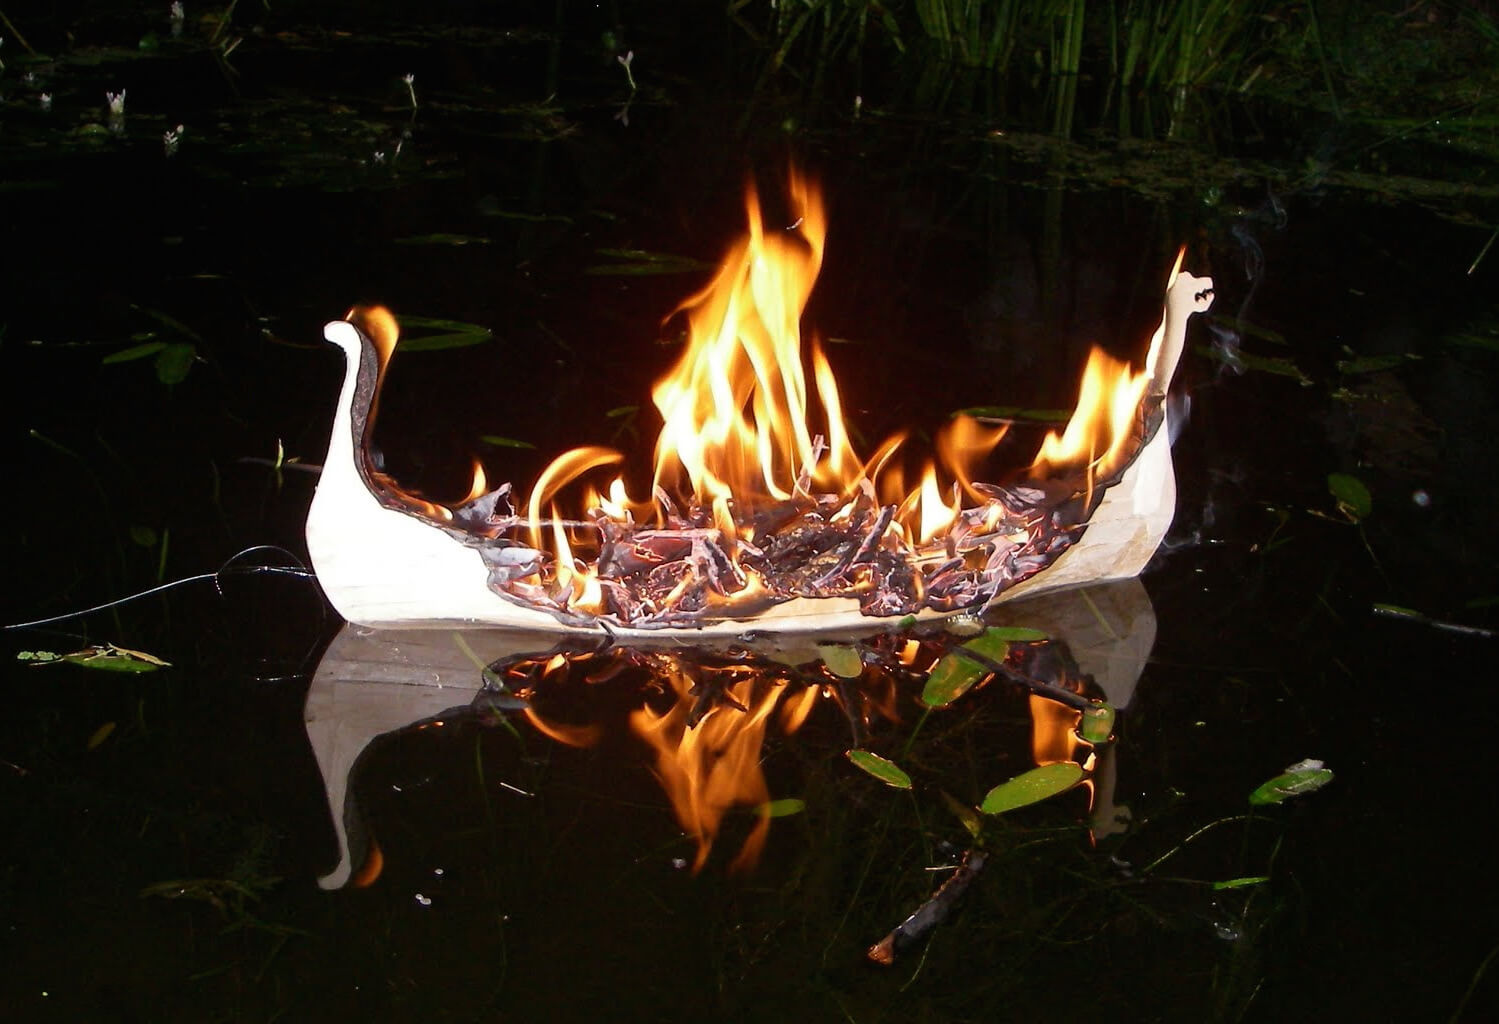
We gathered around the pond, started the music and then lit the boat on fire. It burned quite well and by the second round of Joy to the World, the boat had burned down to the bottom of the hull, turned over, and sank bottom up to bottom of the pond.
Here are the basic steps I took to build the boat. I am happy with how it turned out. It was fun to build something that I knew was going to be destroyed, it was liberating to not get too hung up on making it perfect.
My general approach was to fit the wood as best as I could and sand down the imperfections. This worked pretty well, especially because balsa and bass wood sand easily.
Unfortunately, I didn’t document the pieces of balsa that this required, and since the boat burned up, I can’t really create an exact list now.
Rough list of materials:
Bulkheads: 10 total – 1/16in. thick balsa
Strakes: 8 total – 1/16in. x 1/16in. balsa
Gunnels: 2 total – 3/32in. x 3/32in. balsa
Keel: 2 pieces – 1/8in. wide 3/32in. thick balsa
Planking: I used a mix of 1/4in. and 1/2in. wide bass wood, both 1/32in. thick. Bass wood is a little stronger than balsa and it was easier for me to find thinner bass wood. From the pictures, it looks like I used about 16-20 1/2in. planks.
Bow and Stern towers: 6 total – 1in. wide 1/16 thick balsa.
I used BSI Insta-cure+ Glue, it cures very fast and is really strong. I have found this to be the best glue for bending balsa and getting it to stick.
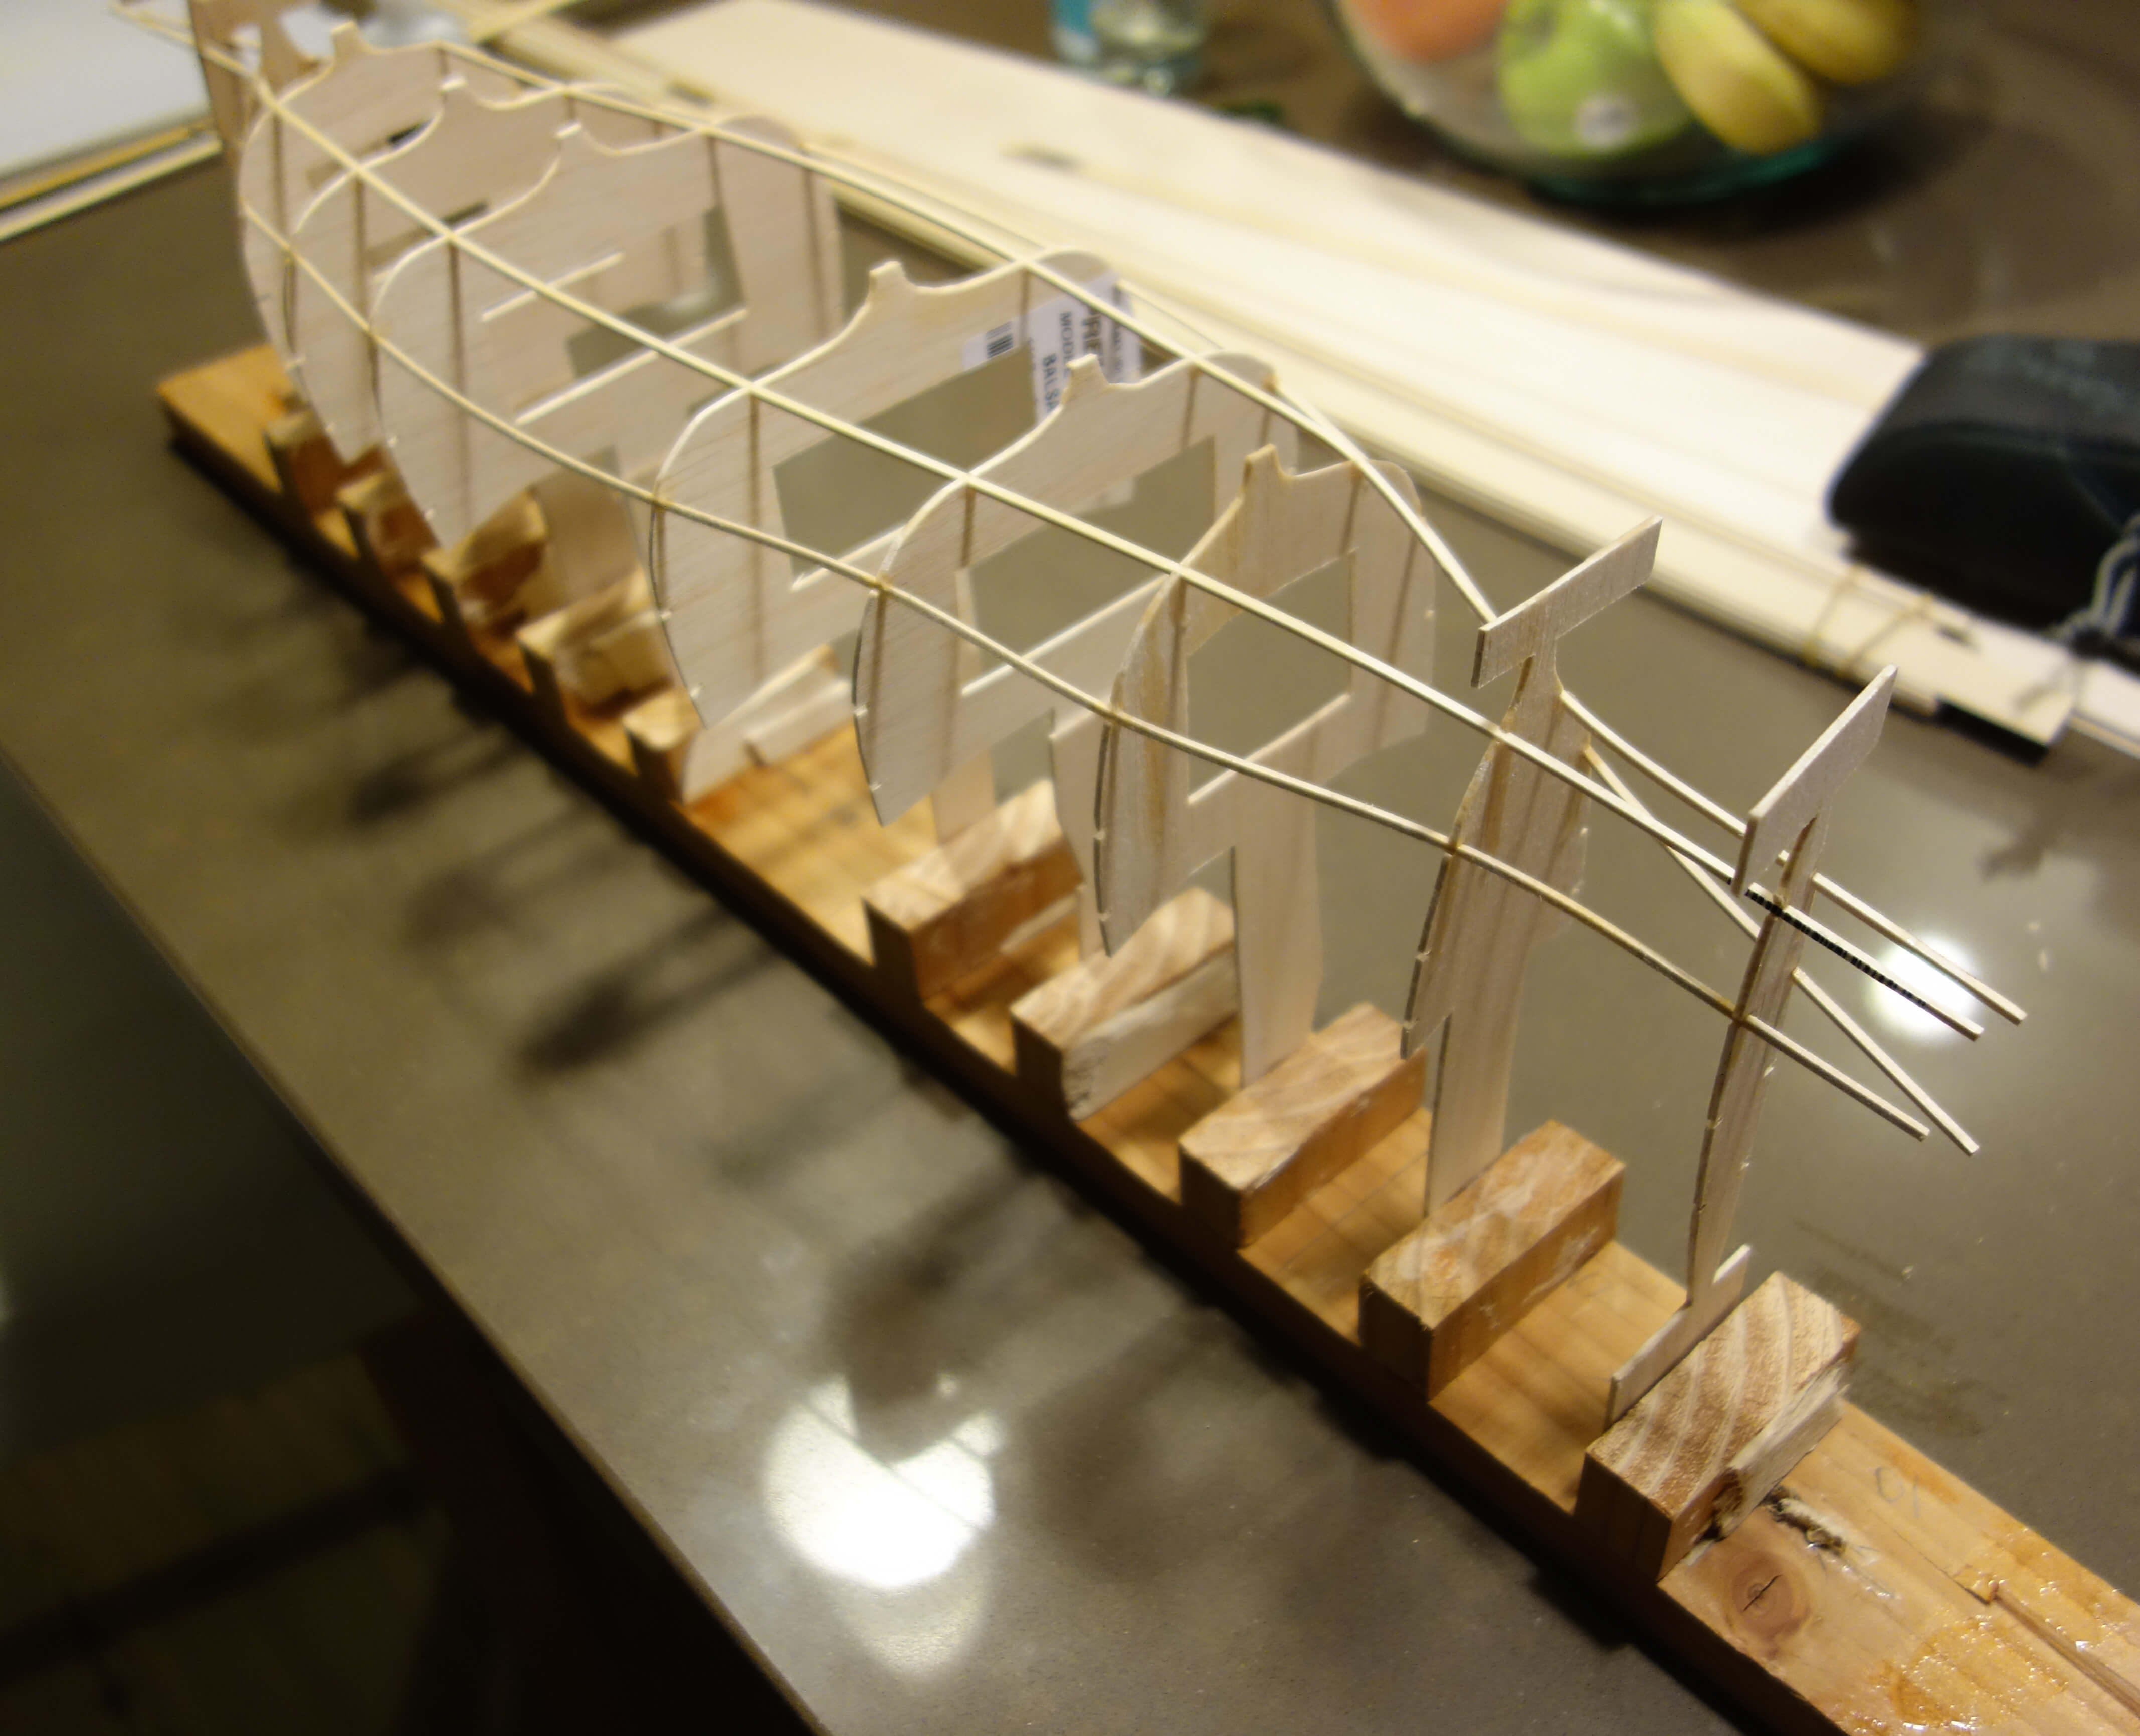
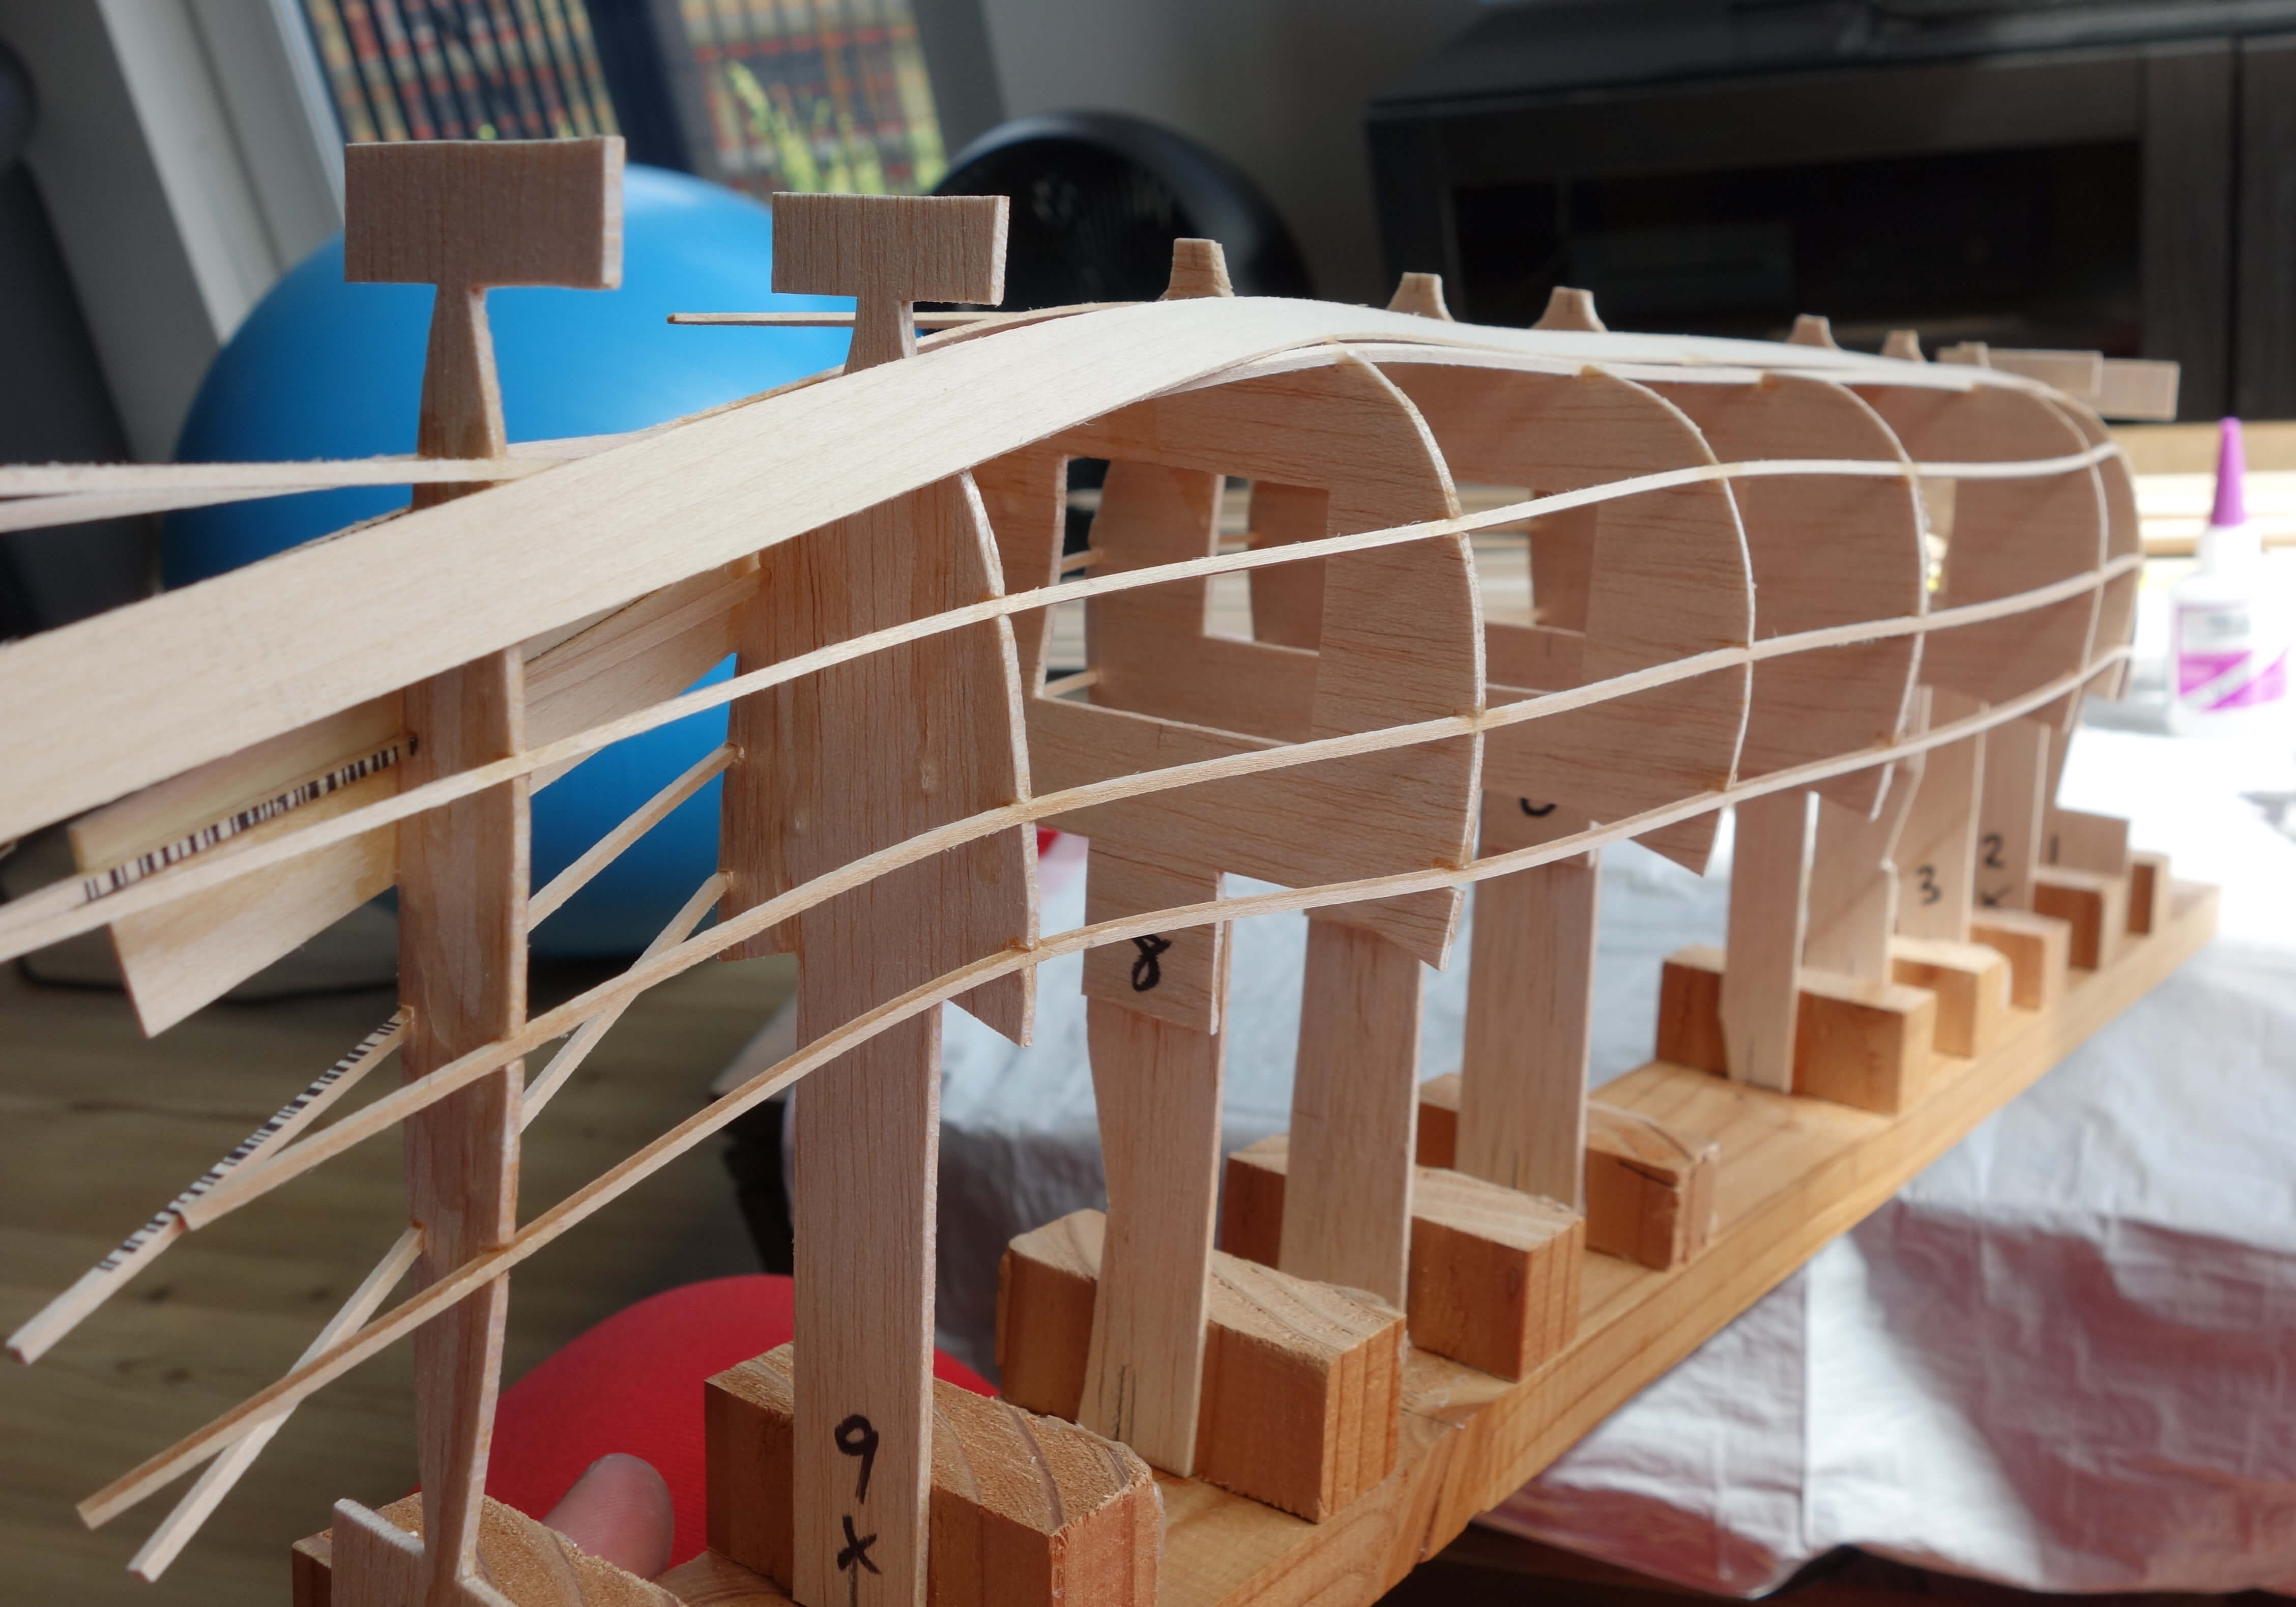
I used a jig to help secure the boat during most of the construction.
The jig had 10 blocks, with 2 inches between the left sides of each block, except for the middle two, which were 4 inches apart. This way when the bulkhead tabs were glued to the jig, they were 2 inches apart.
In order to keep the boat true, it was important that the blocks were square to the base and that the middle of the bulkhead tabs were centered. I wish I had done a better job of sighting down the bulkheads as I glued them to make sure they were aligned.
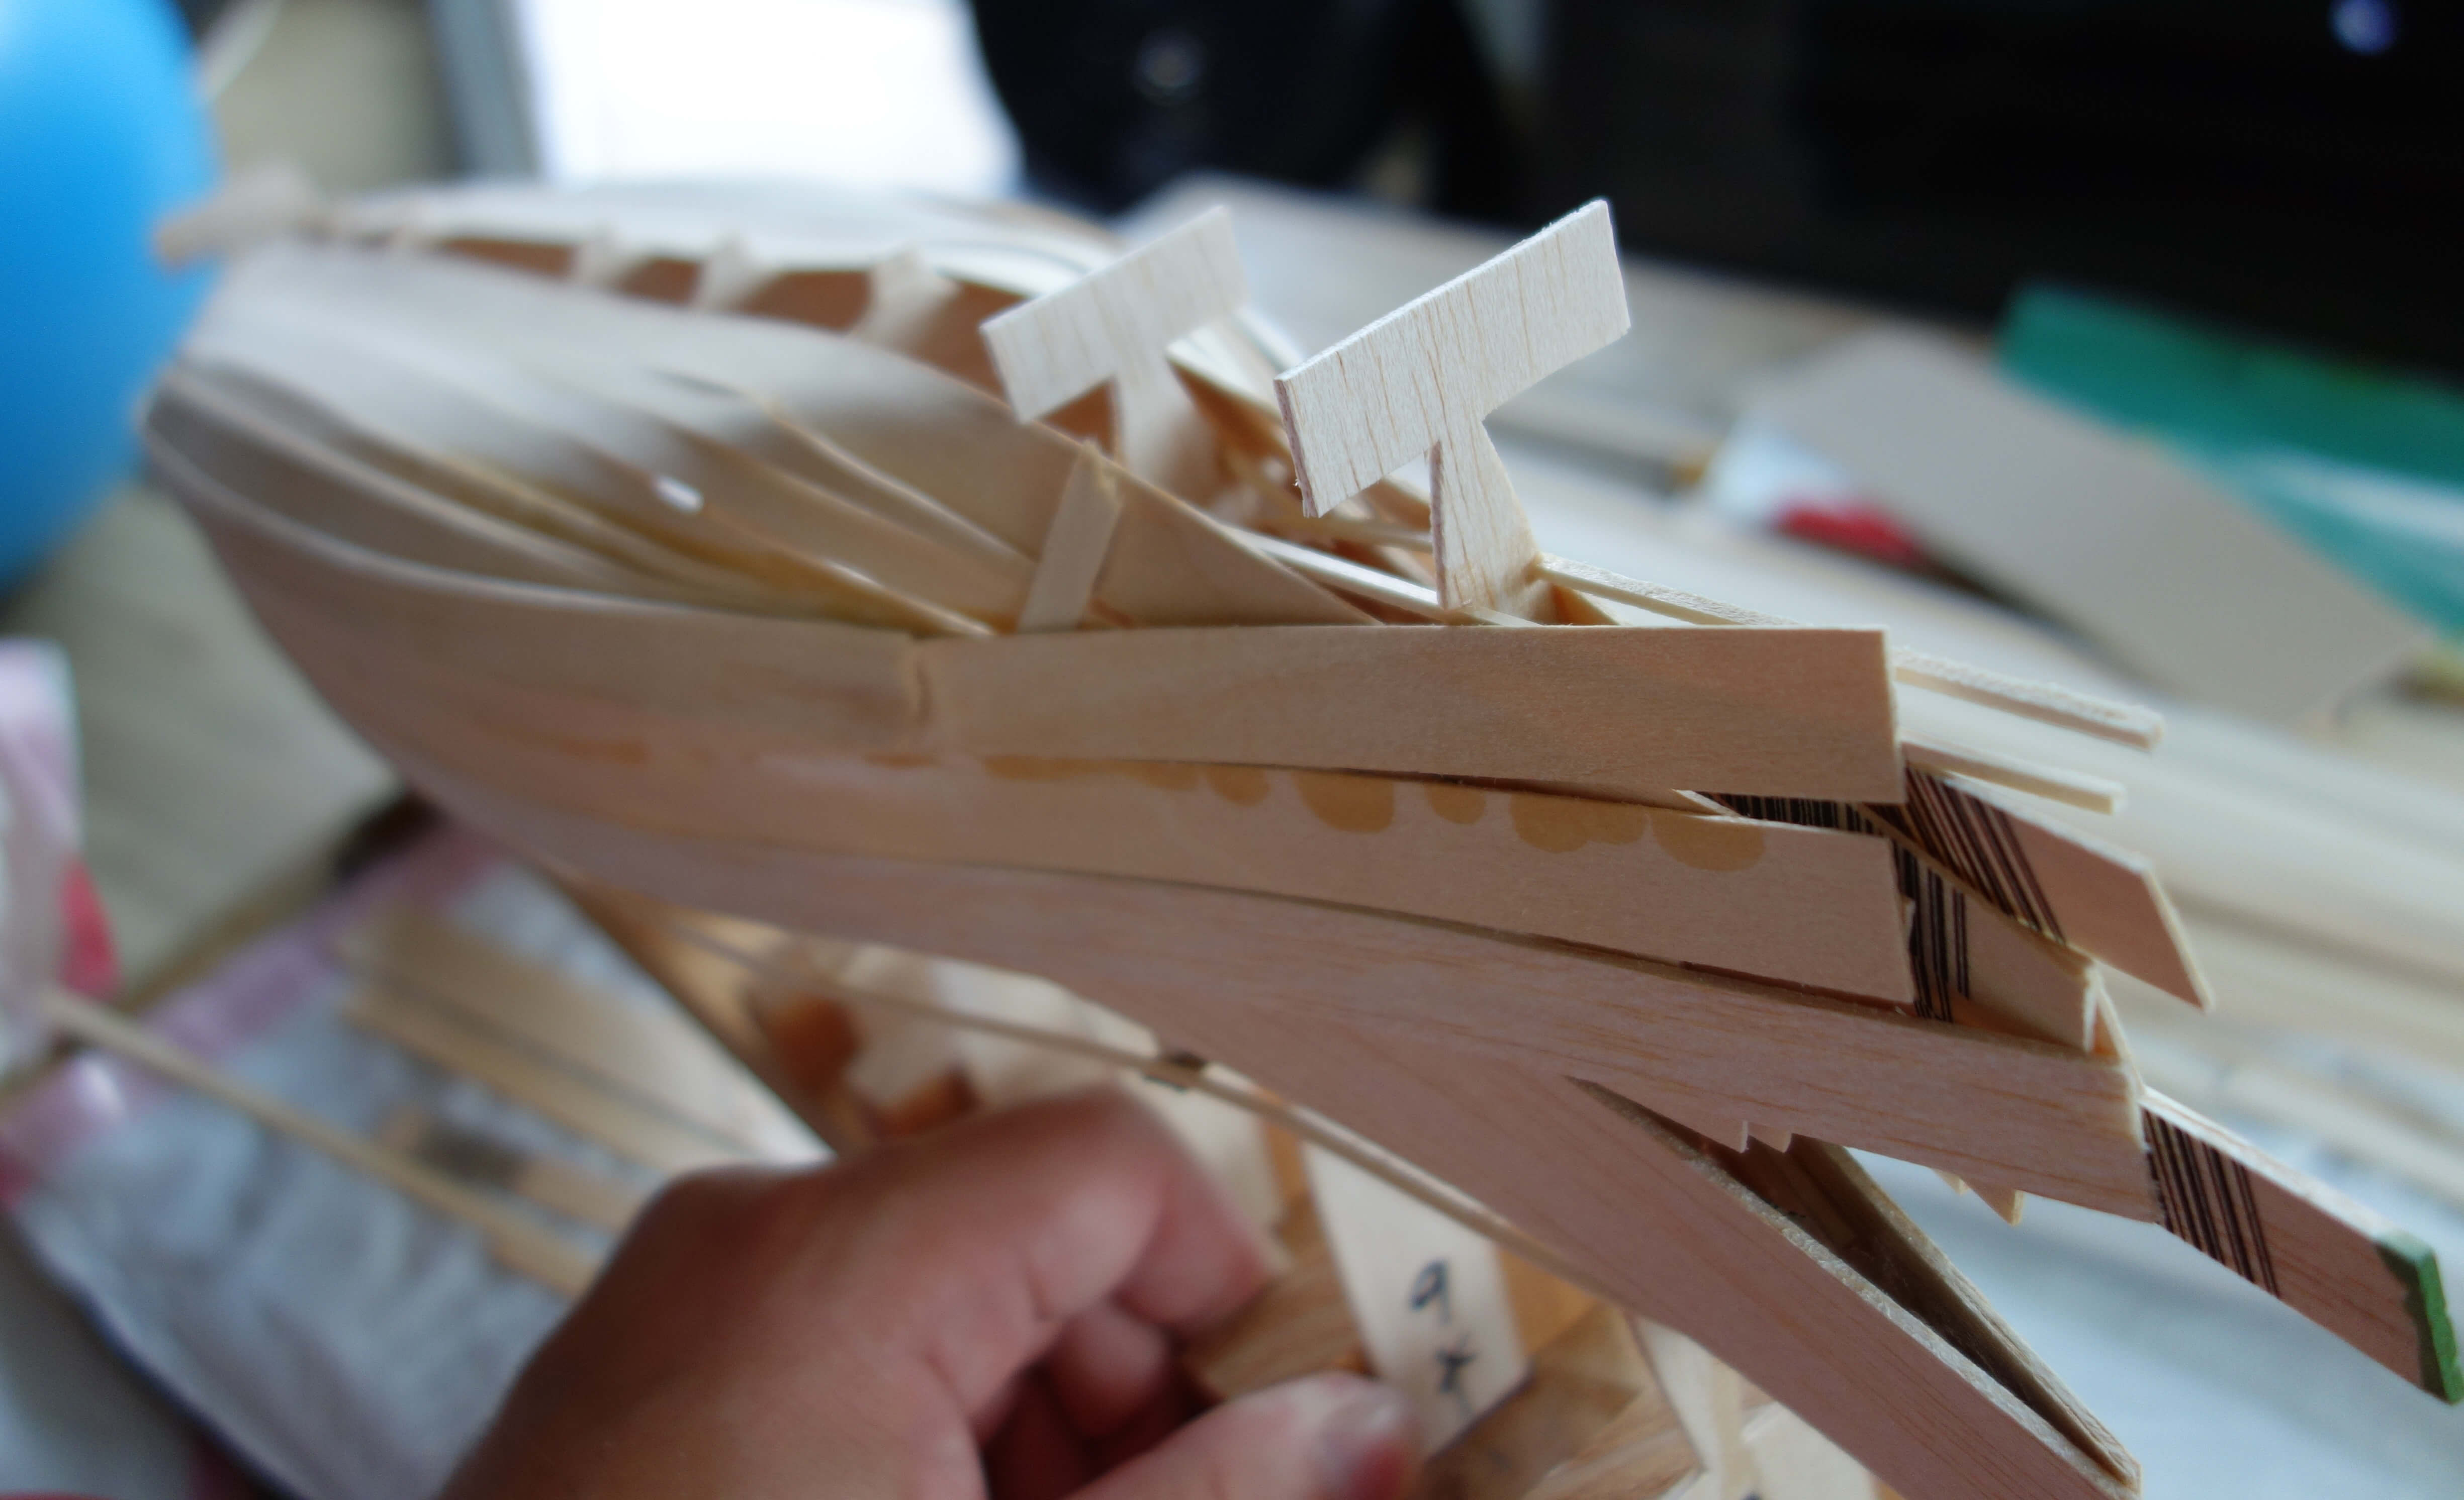
Cutting out the bulkheads
I printed the plans out on paper, cut each piece out roughly, and then taped the paper onto the balsa. I used an exacto knife to trace the printout and cut the wood. My main focus was on getting the outline traced smoothly on the first pass and then going deeper with the subsequent passes.
Cutout bulkheads. The bulkheads have and extra tab on the bottom of 1, 2, 9, and 10. These are not necessary and no longer part of my plans.
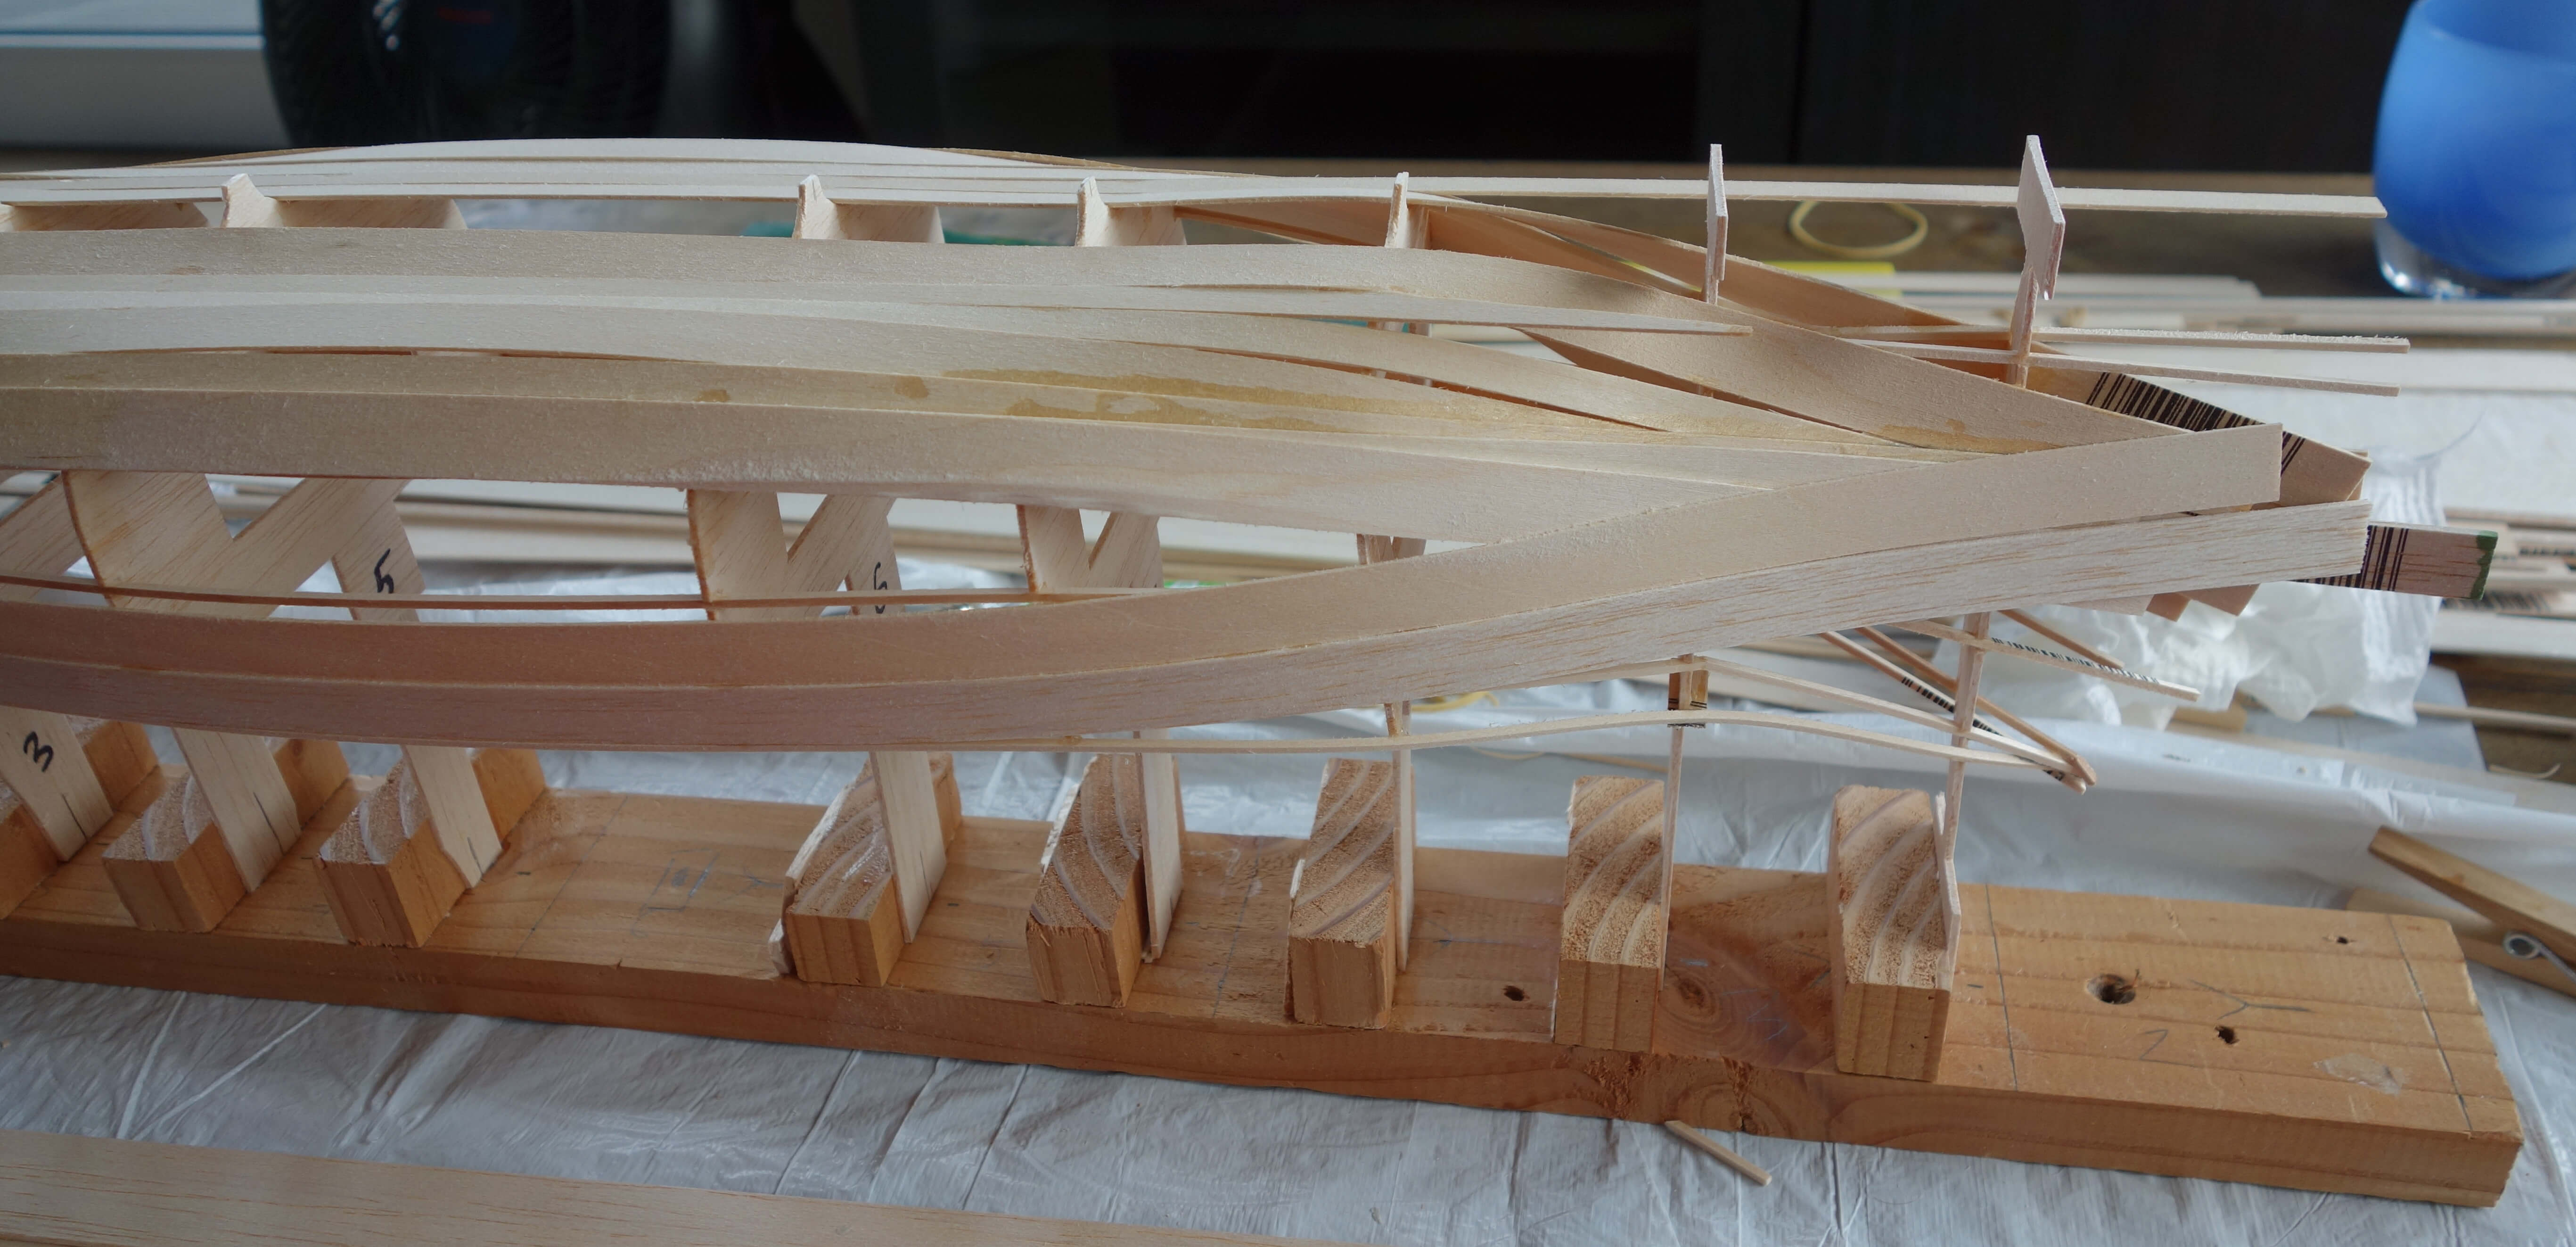
The Strakes
I then added the strakes. I started from the middle of the boat, securing 2 bulkheads at a time. Balsa bends pretty easily, but I ended up breaking a few pieces on the ends. I have since updated the plans to make bulkheads 2 and 9 a little wider, which might help.
First couple of strakes
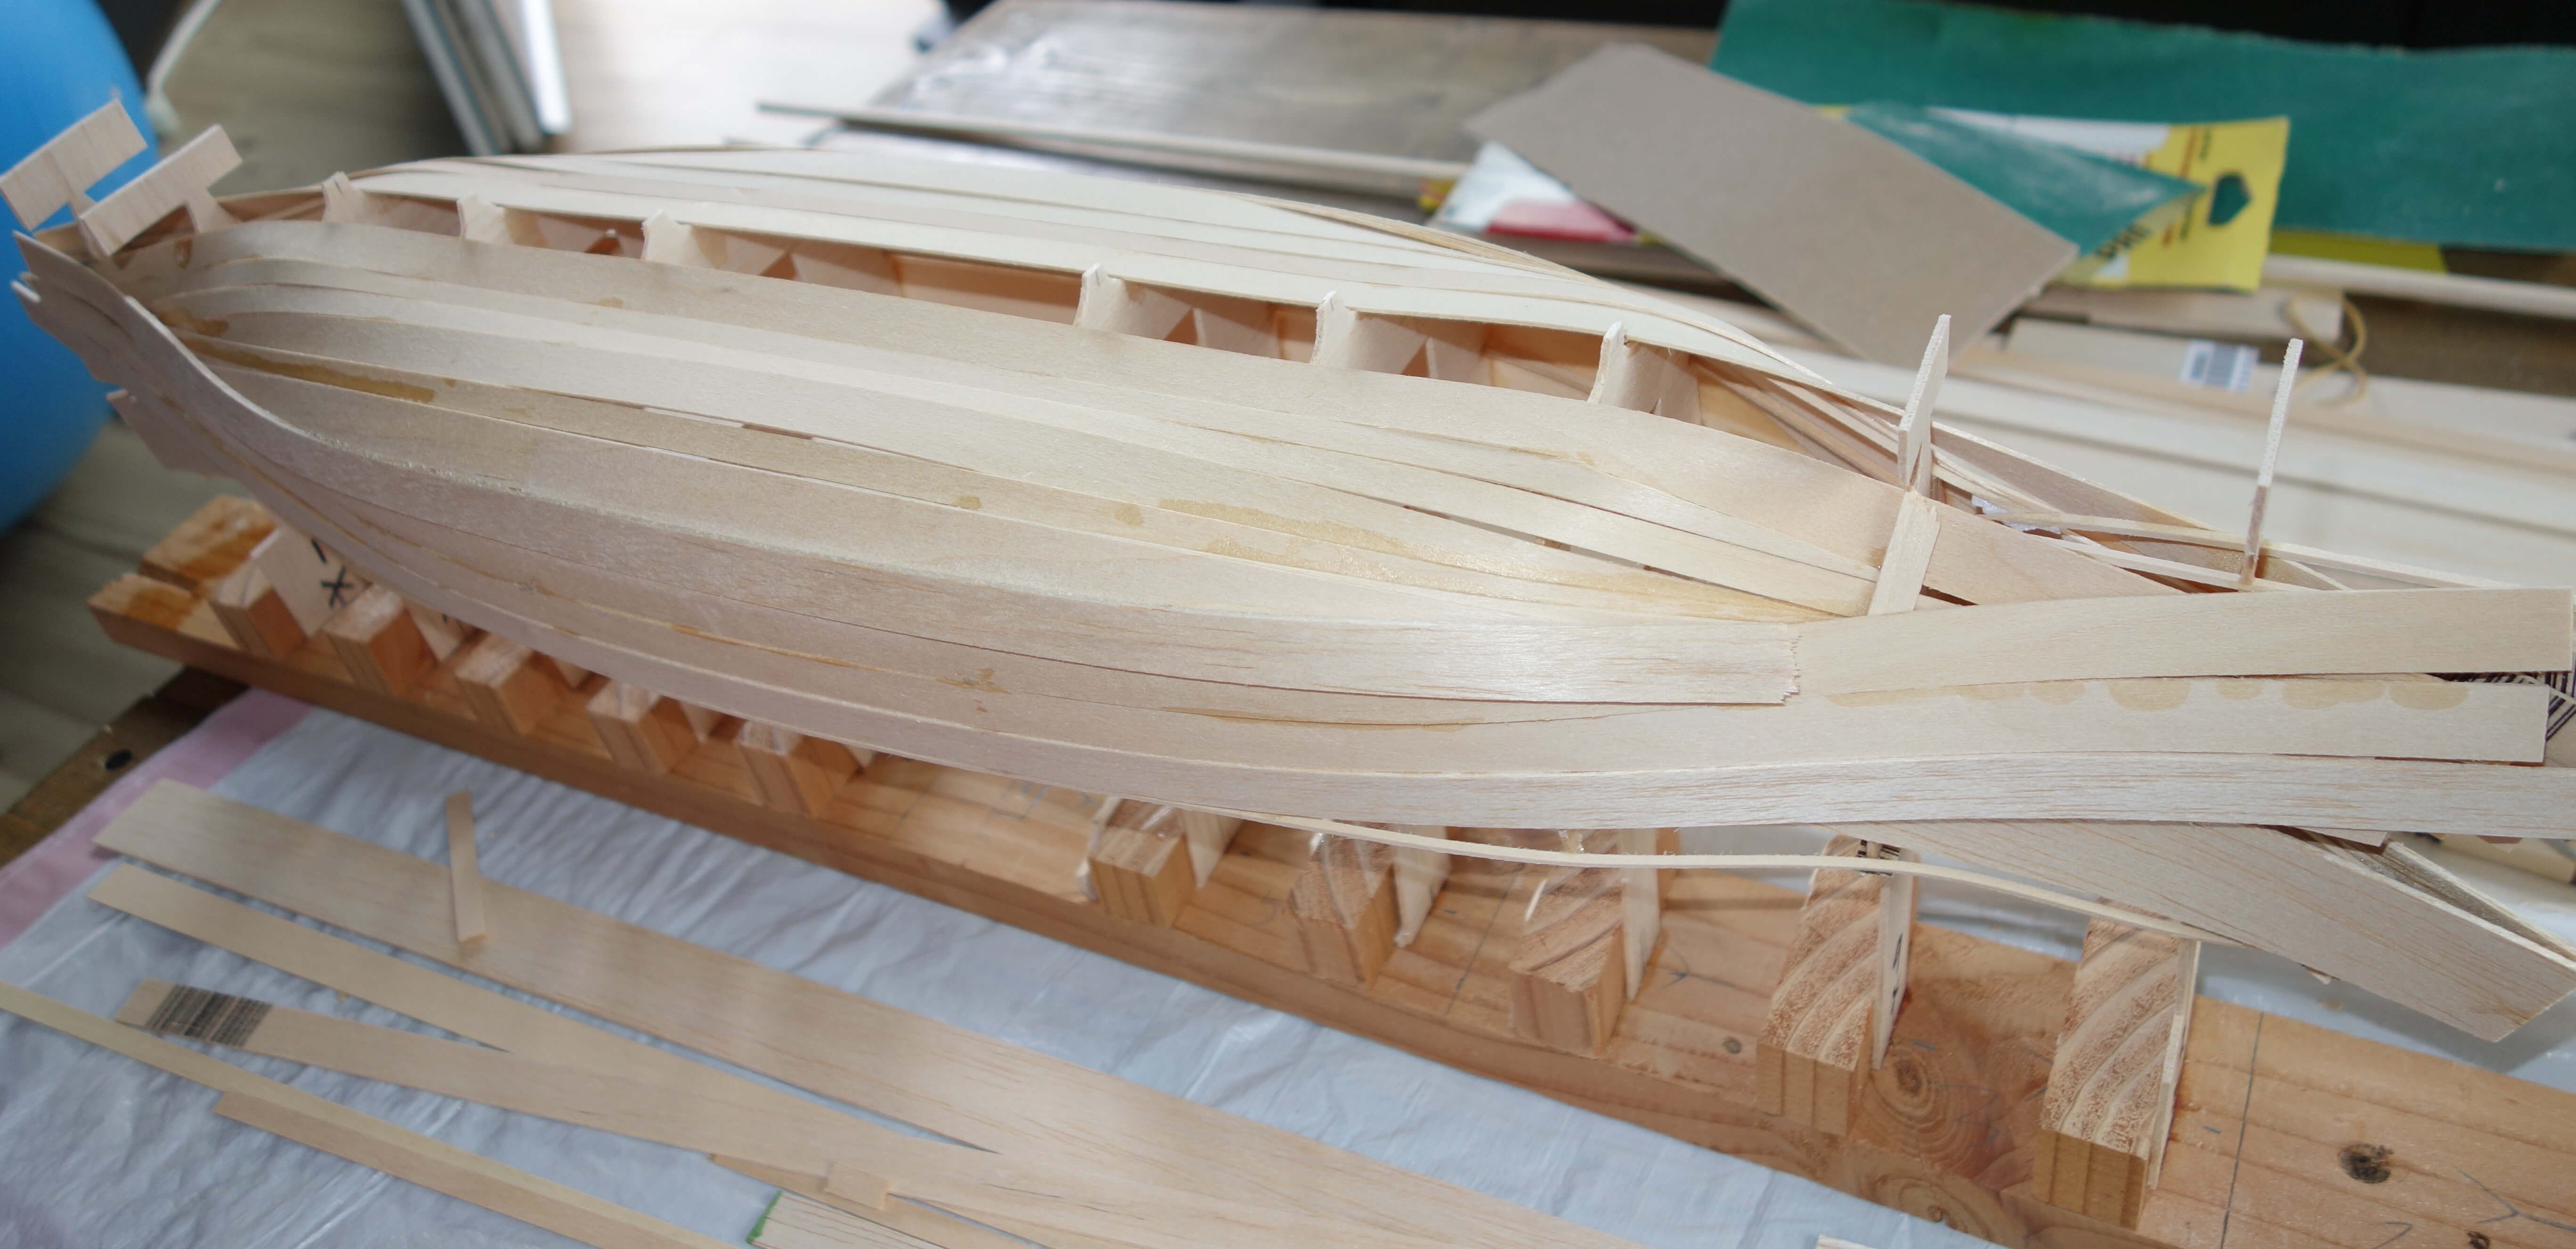
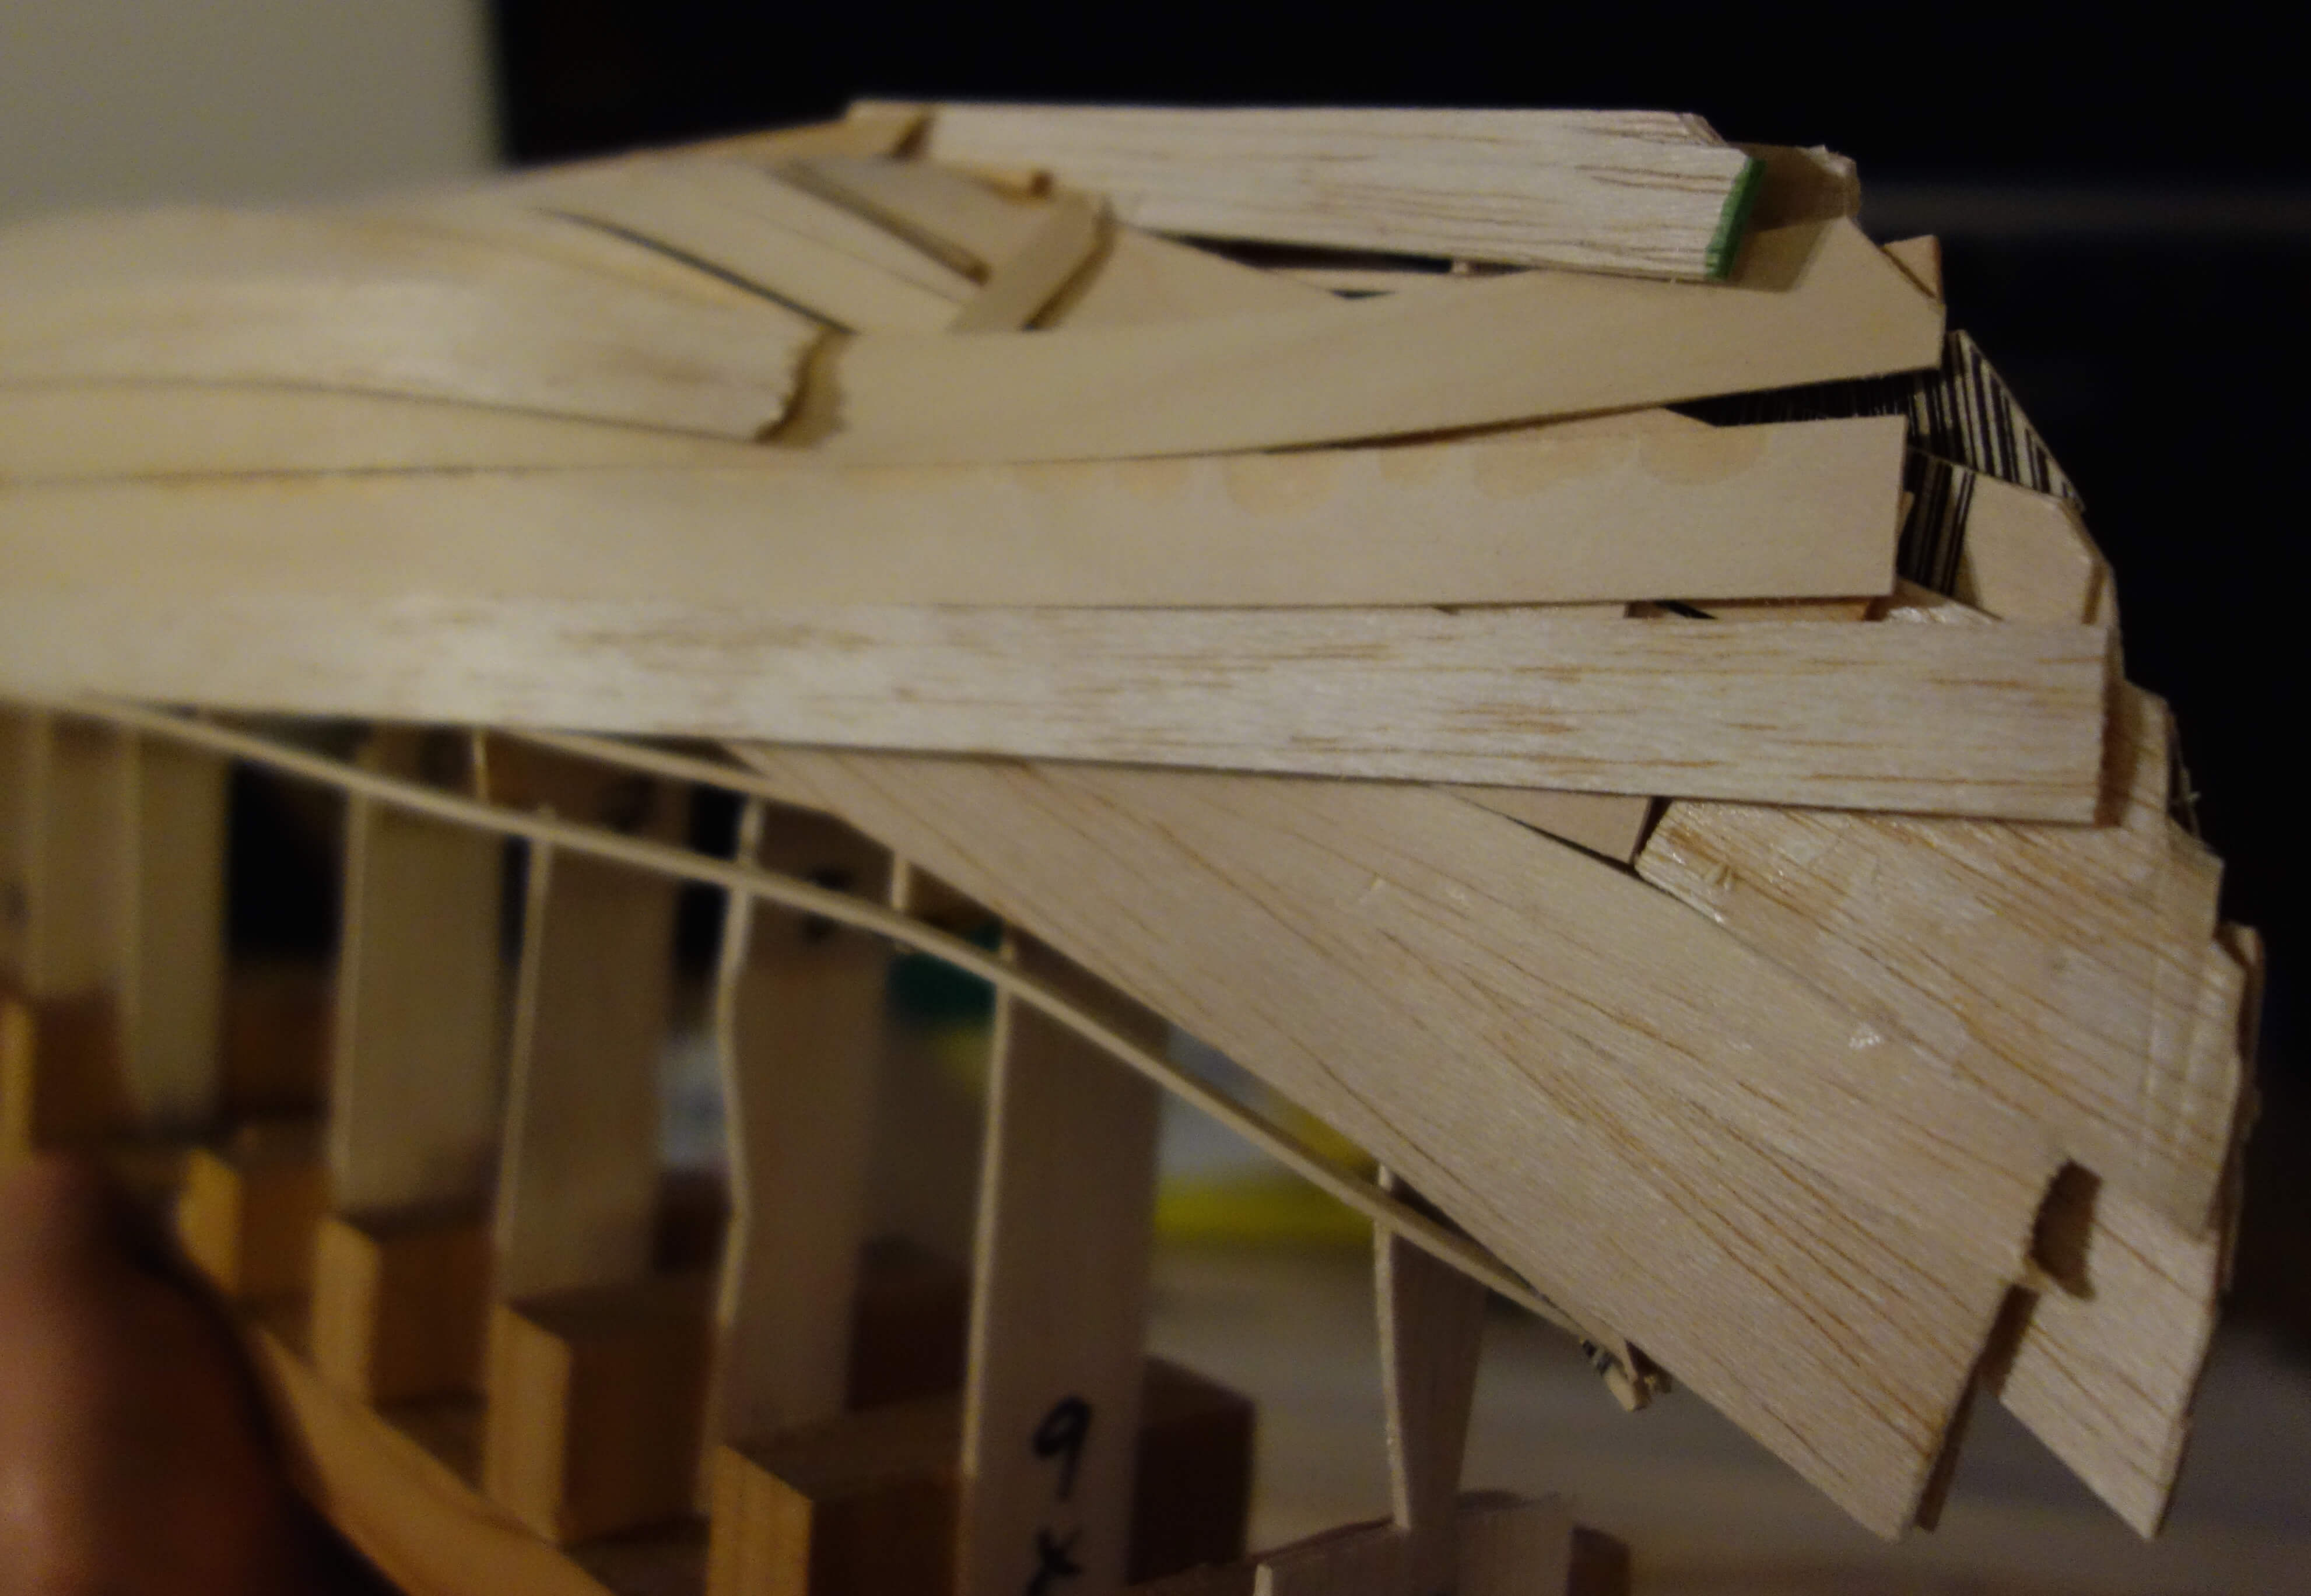
The planks
I added the planks starting from the middle of the hull and working my way up the sides. Again gluing two bulkheads at a time, starting from the middle. It had a hard time bending the bass wood enough to lay each plank along the one before it. I ended up overlapping many of the planks with a less extreme curve. I didn’t worry about planking along the super steep keel part to start.
As you can see, I didn’t align the ends, after the planks were in place, I used a dremel tool to shape the ends.
Rough ends
Ends shaped by the dremel tool
To fill in some gaps, I used smaller planking cut to length. I found the easiest way was to just eyeball the length, score the wood and then break it by hand. You can see this planking in the pictures below.
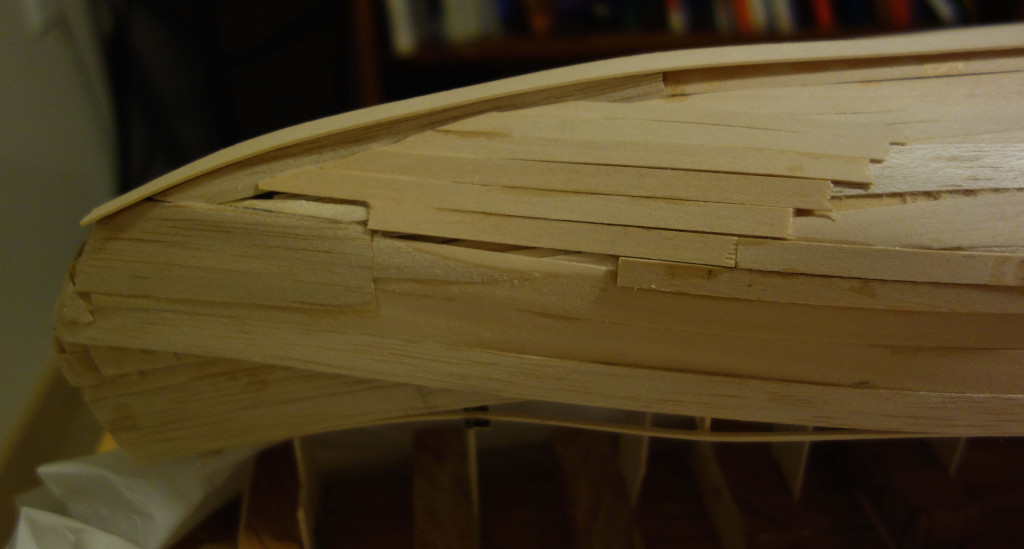
The keel
I used 1/4 in. wide balsa to build up the keel on the steep part of the bulkheads. Then I capped the keel with another 1/4 in. piece. Once this was in place I used an exacto knife to trim the excess and then sanded it to be flush with the planking. I then added thicker pieces on top to make the keel deeper.
I also added some thin pieces to the end of the bow and stern to smooth them out a bit.
At this point I cut the boat away from the jig with scissors.
Before trimming the excess
Keel with extra depth and bow cap in place
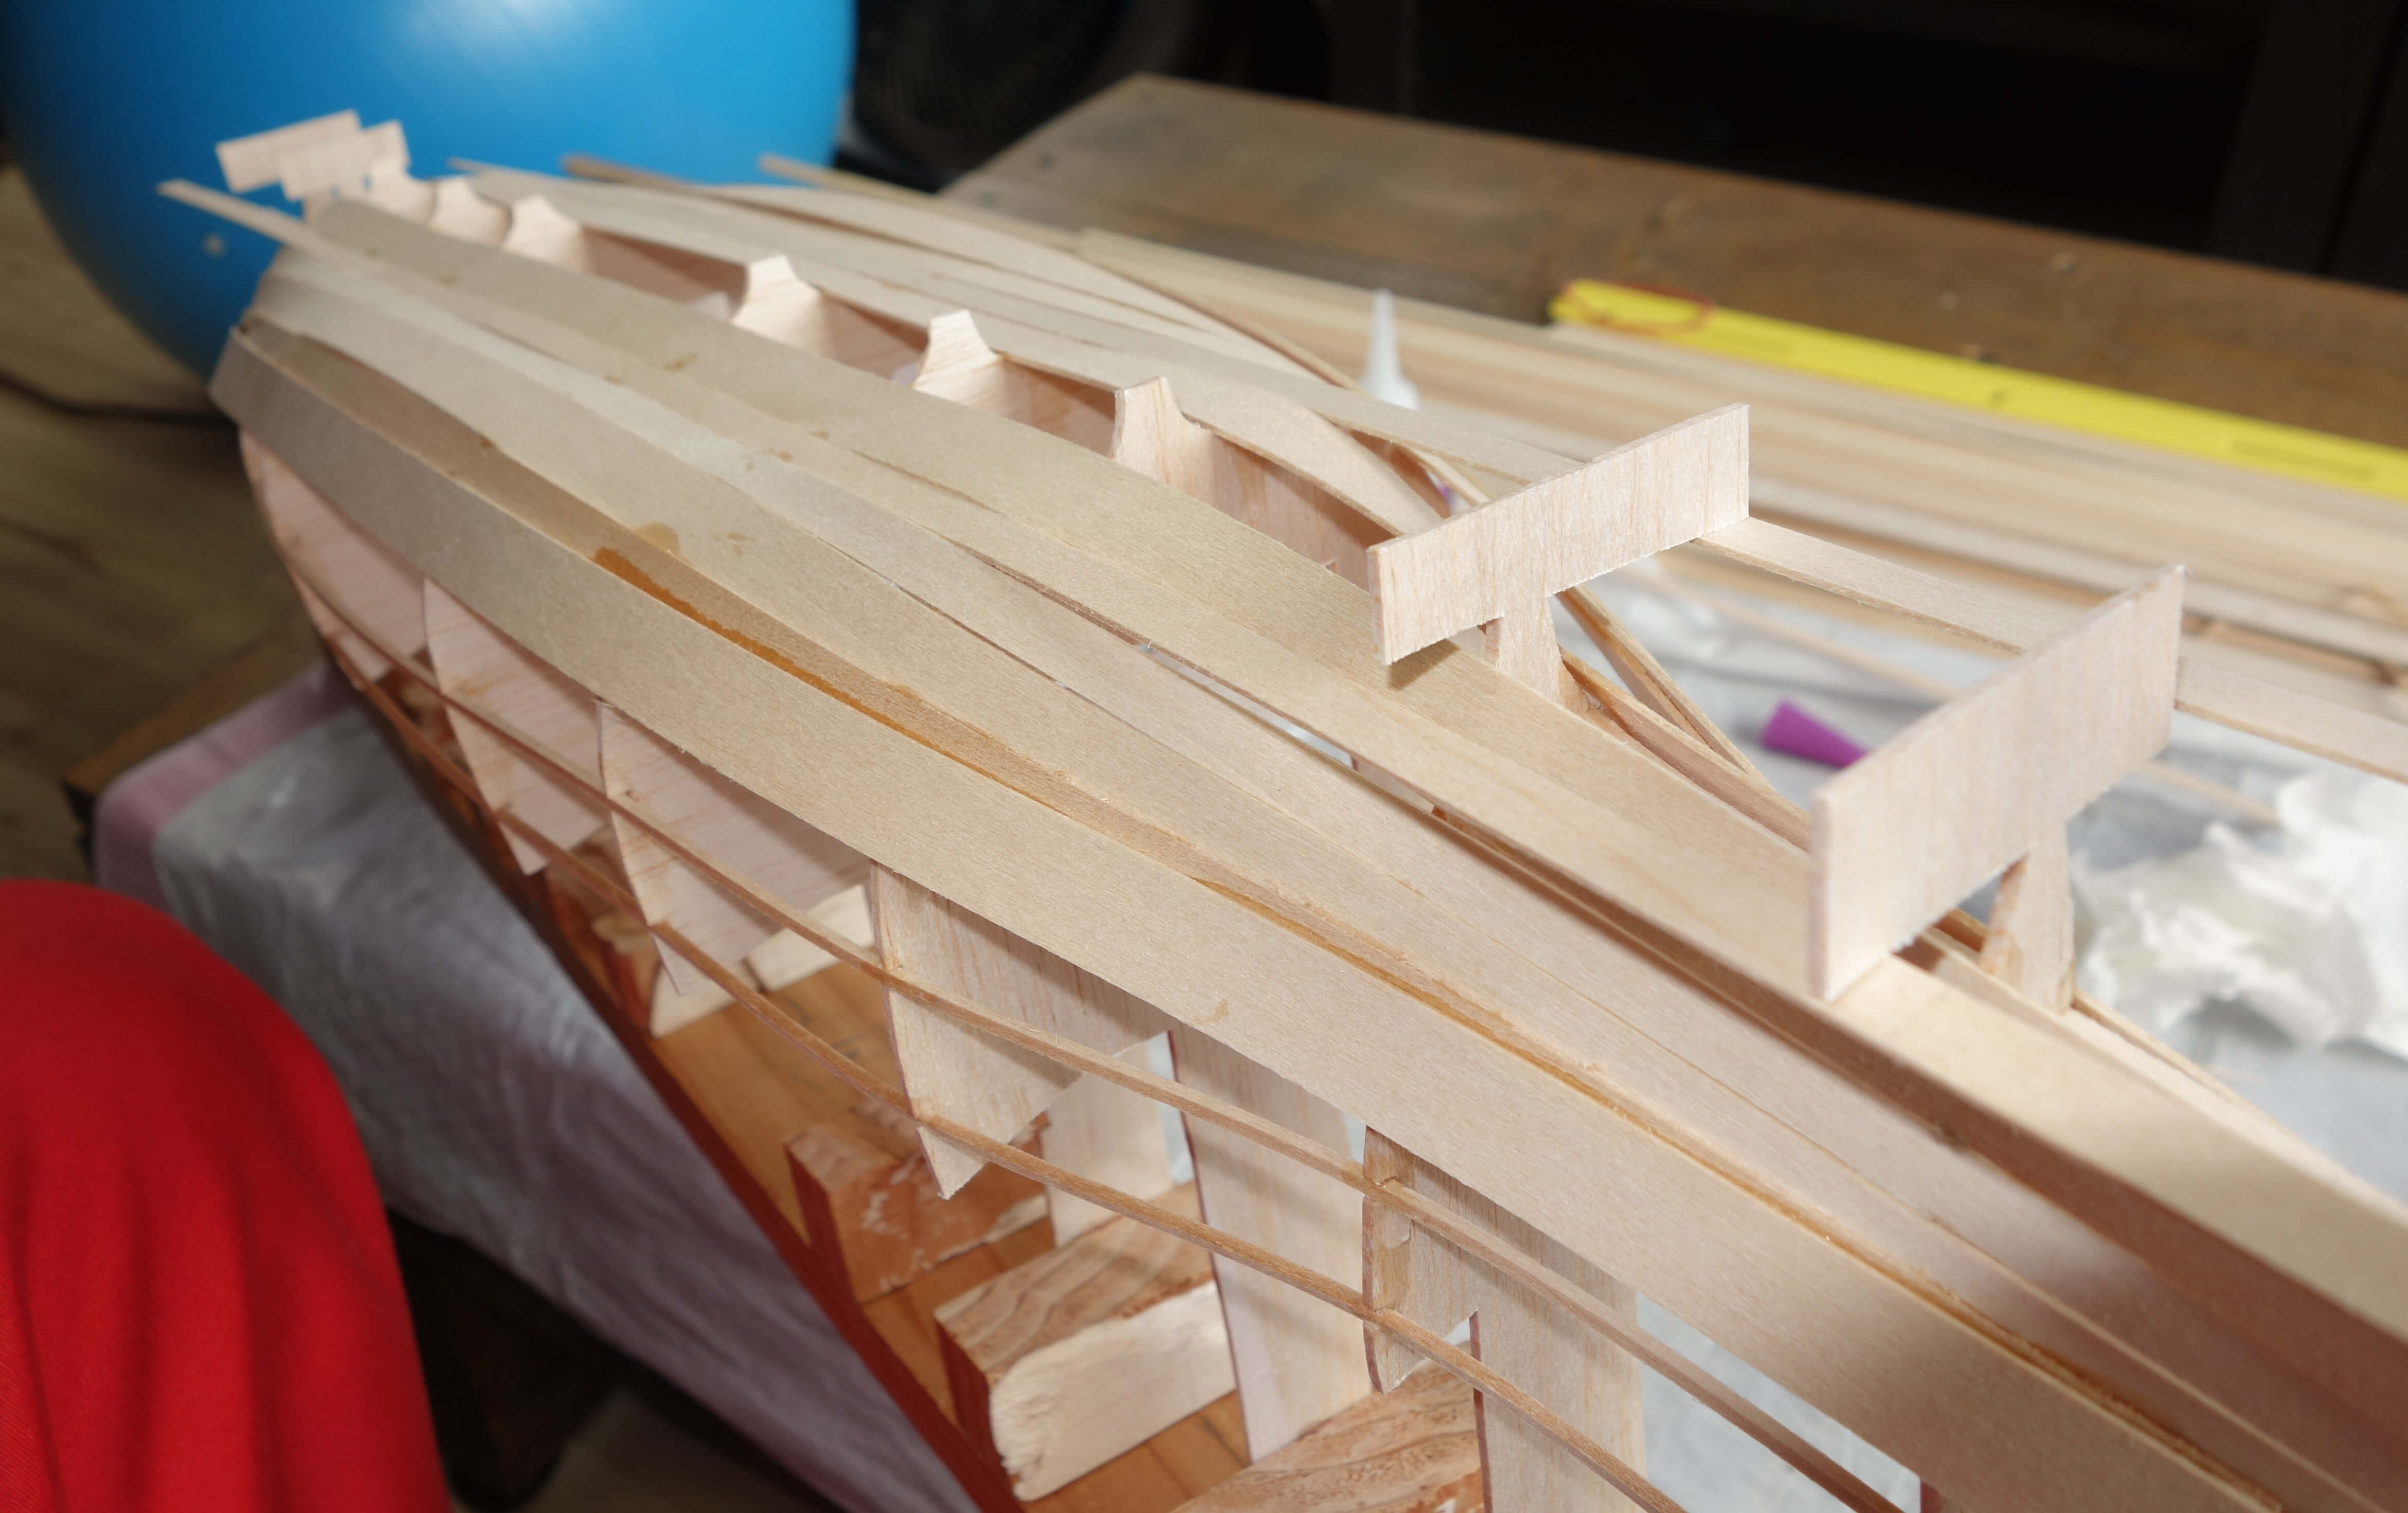
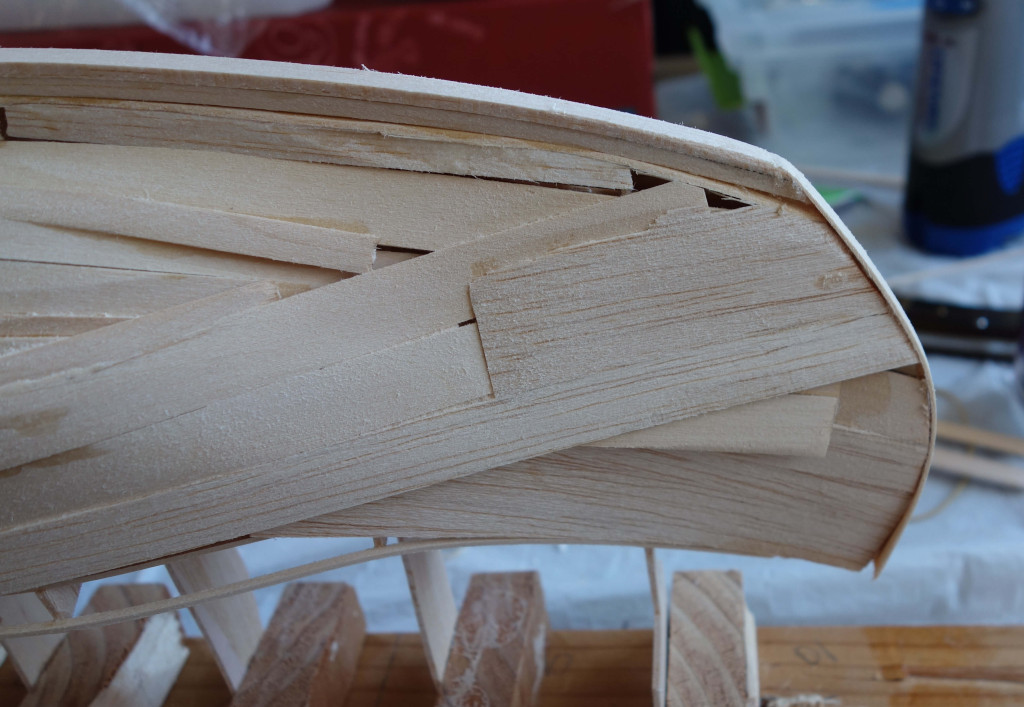
The towers
While adding the planks, I didn’t worry about building up the towers on the bow and stern. I added some pieces after the fact that added probably 6 in. of height. I then used the dremel tool to shape them. I broke the bow dragon while shaping it, so I ended up creating a new one with thicker wood and just glued it to the bow.
Waterproofing
I wanted the boat to float, and use materials that were ok to burn in a pond with fish. I figured that paraffin wax was a good material for waterproofing.
I started by lining the boat with tissue paper and pouring wax over it. I thought that this would create a barrier and that I could then add wax on the outside. I then poured wax over the outside to fill in the bigger gaps.
The wax on the outside of the boat helped prevent the wood from soaking up water. I found the best method was to pour some wax on the boat and then work it into the cracks using a small piece of wood like a squeegee.
The tissue paper didn’t stick well to the hull, and it allowed small leaks, so I removed it and just pouring wax on the inside and moving it around to fill in the holes.
Throughout the waterproofing I floated the boat a couple of times to identify leaks. I used a lot more wax than I would if I wasn’t burning the boat, but I wasn’t too concerned about how the inside looked.
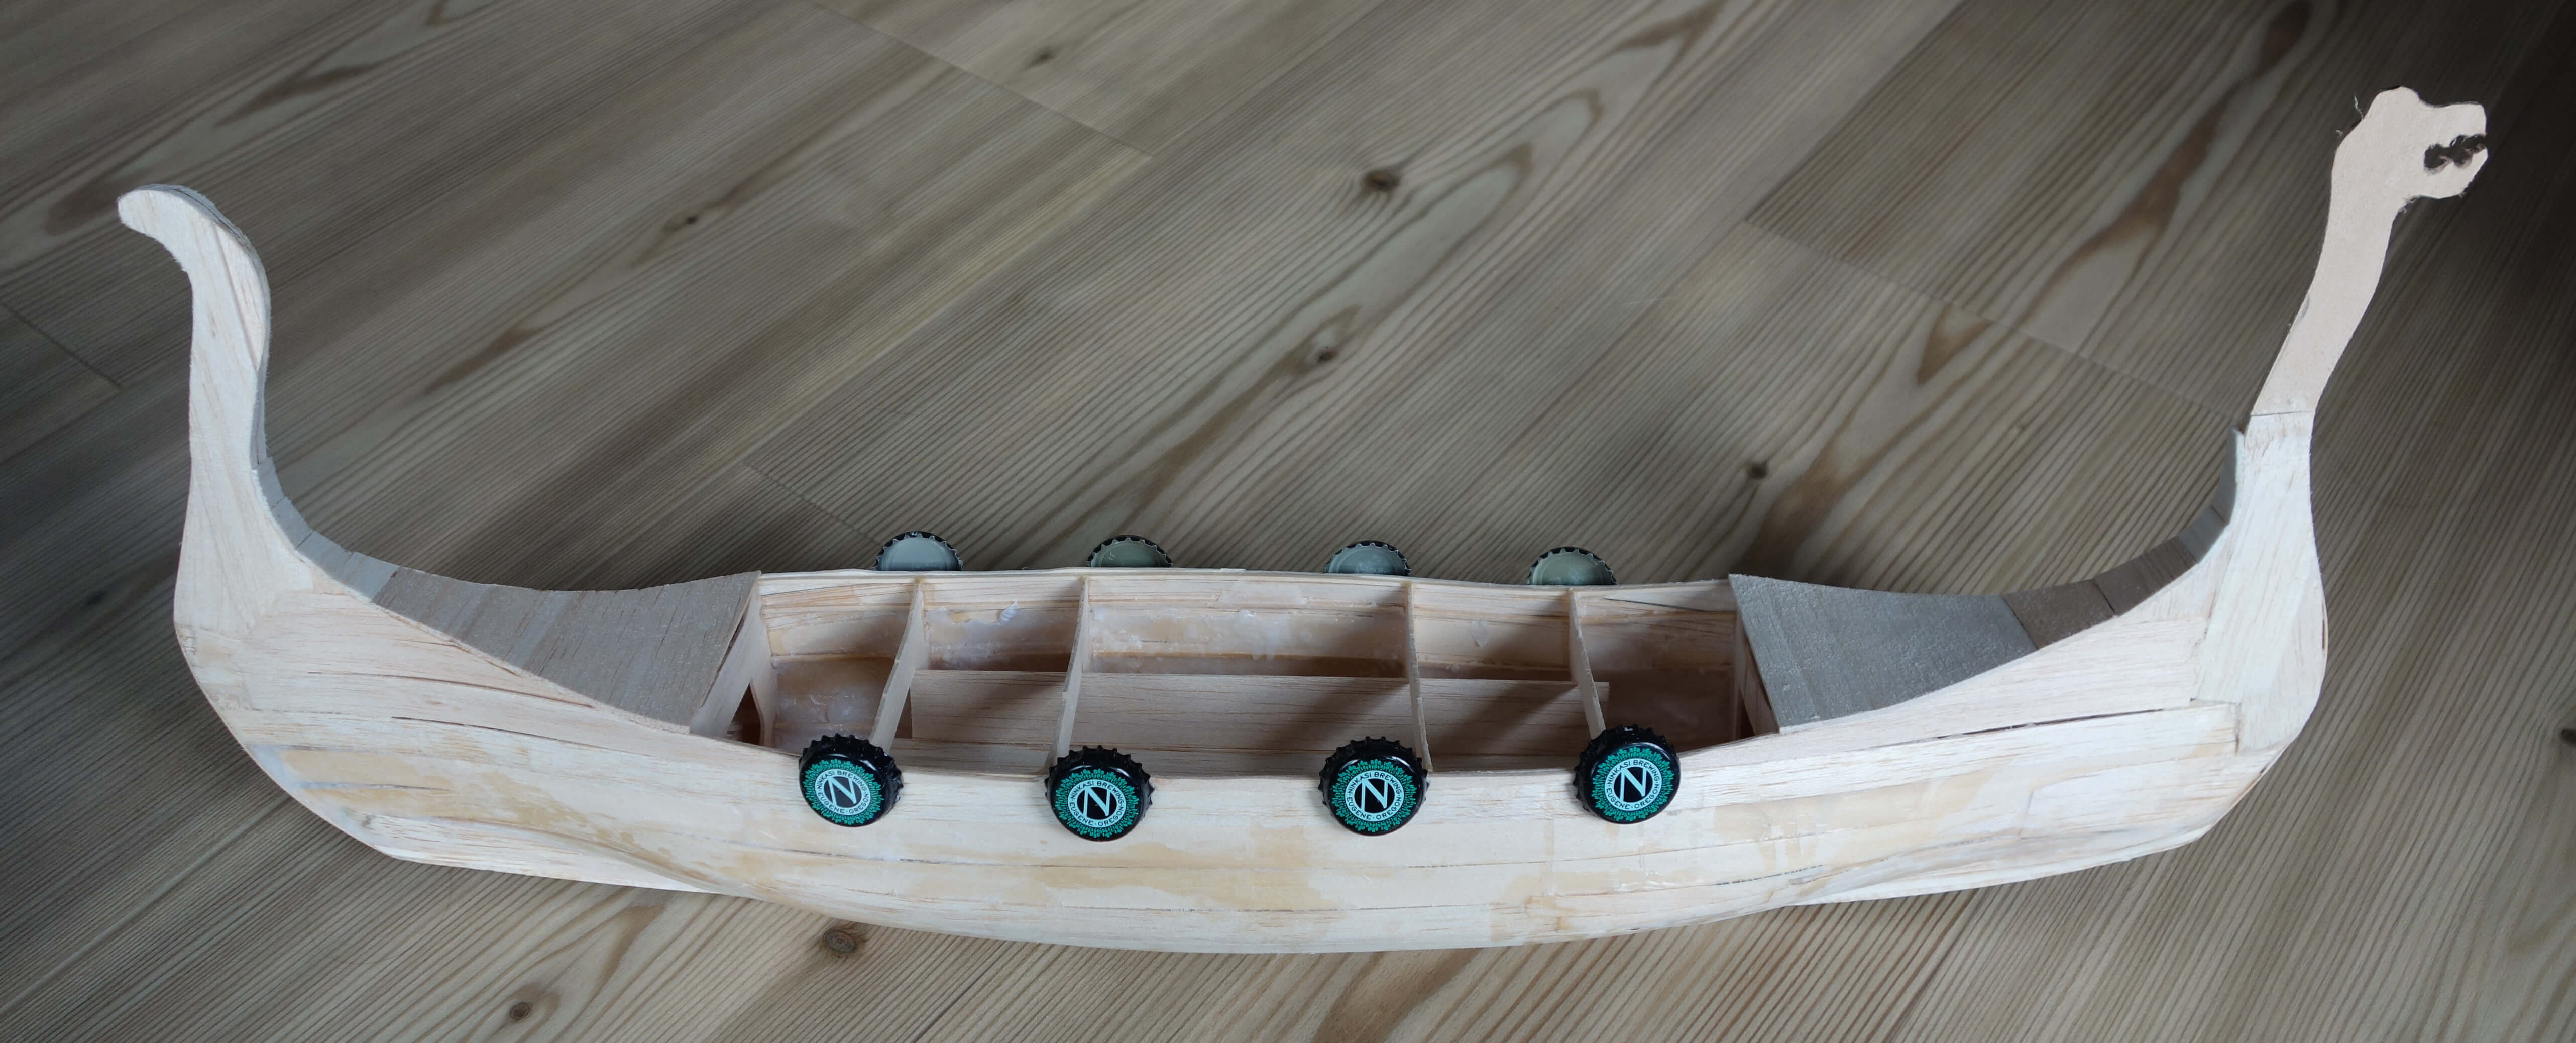
Finishing touches
I added some decking on the bow and stern to give a more finished look, and also built up the deck on the inside to hold Freddie. I added bottlecaps as shields along the side.
Here is the backstory of why I am building a viking boat: Balsa viking boat
I wanted to create my own plans, partially for the challenge, but also because I someday want to build another RC sailboat. I built my first RC sailboat out of balsa using bulkheads, strakes (stringers), and planking. This worked well, so I decided to use a similar approach.
Drew plans by hand
I started by looking at pictures of viking boats online. I got a pretty good sense for the overall shape and sketched out a profile view of what I wanted my boat to look like. I then created a corresponding top view of the boat. I used graph paper so I could easily cross reference dimensions of the different views.
I then sketched out the bulkheads, matching the dimensions that I had established with the top and side view.
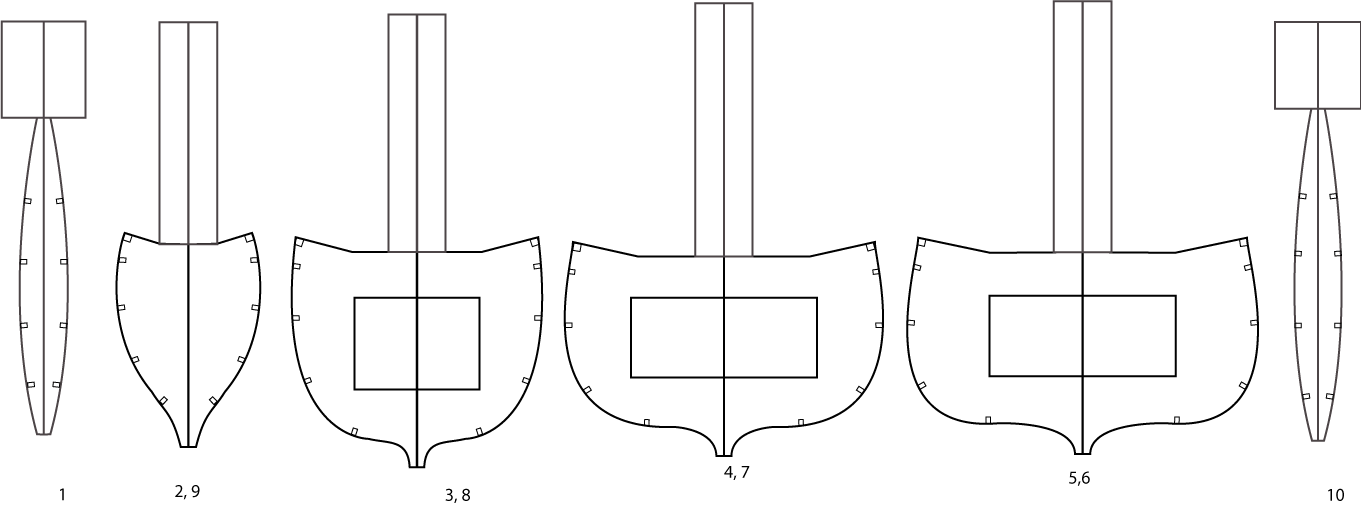
Top and side view of viking boat. Bulkheads are numbered 1-10.
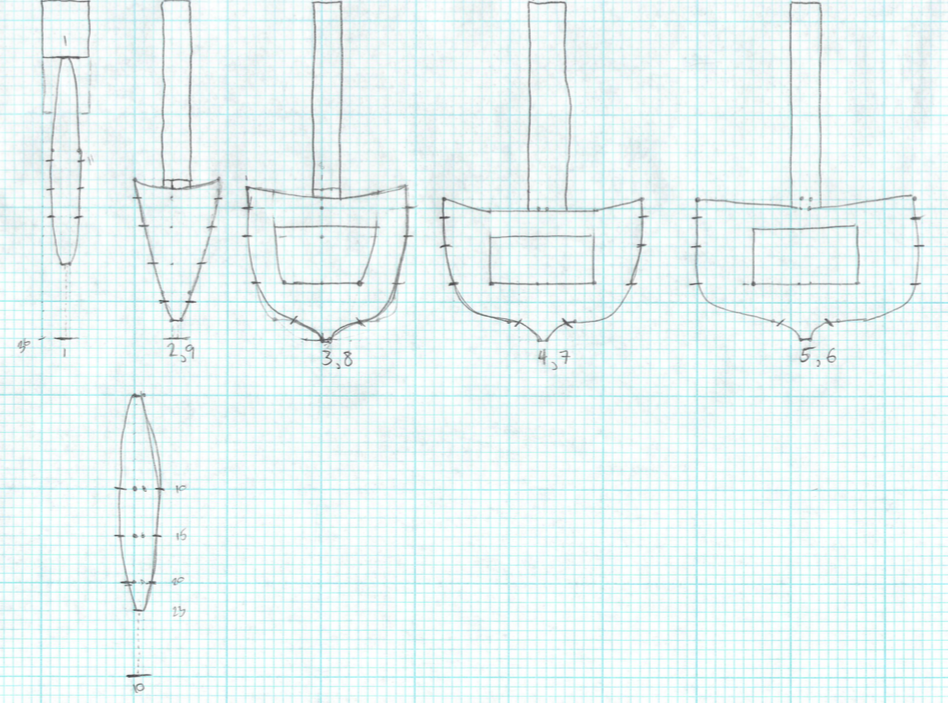
hand sketched bulkheads. The numbers represent the sequence, 1 being the bow, 10 the stern. The rectangles on top are for attaching the bulkheads to a jig during construction.
I wanted plans that were symmetrical, easily printed, and easily modified, so I recreated my sketches in Illustrator.
I started by scanning the sketches as a pdf. Then, using the pen tool, I traced over the left side of each bulkhead. I then copied the left side, reflected it vertically and placed it next to the original, creating a symmetrical drawing.
If you would like the illustrator version, let me know and I will be happy to send them to you.
About the plans
The number under each bulkhead is the sequence of the bulkhead from bow (1) to stern (10). The bulkheads with two numbers are the same for those positions, for example bulkhead 2 and 9 are the same shape.
The rectangle at the top of each bulkhead is used to secure the bulkhead to the jig during construction. These will be cut off after the boat is built.
The small squares along the edge of the bulkheads are notches for the strakes. These allow the planking to sit flush with the edge of the bulkhead.
The rectangles inside of bulkheads 3-8 are cutouts for decking.
When my mom was in highschool she dissected a frog that led her to pursue her career as a veterinarian. She kept the frog, Freddie, in a jar above her desk. She retired recently and as closure on her career, wanted to provide a wake for Freddie. I thought a viking funeral in my parents’ pond would be appropriate, and I offered to build the viking boat.