Using Amazon Web Services to create a serverless web app

Amazon Web Services (AWS) provides resources that can take the place of a traditional webserver. A huge advantage to this approach is removing the need for the developer to maintain servers, and to allow for easy scaling depending upon use.

In my project, I want to set up mobile app that will use AWS as a backend. I plan on using the following services:

  • Lambda – allows you to run arbitrary code without setting up a server
  • Relational Database Service (RDS) – hosted database. I will be using postgresql
  • Step Functions – Connect services together using visual workflows
  • API Gateway – Create API endpoints to allow your backend to be used outside of AWS

Other technology I will be using

  • Node.js – I am new to JavaScript and want to learn more about it
  • PostgreSQL
  • Bookshelf.js/Knex – I want a well supported ORM that supports PostgreSQL. Bookshelf.js seems robust and since it is built on top of Knex, I can always fall back to Knex for unsupported functionality.
  • node-lambda – Make it easier to manage AWS Lambda deployment

Here is an outline of my steps

  • Set up PostgreSQL and Bookshelf.js
  • Set up hosted database using RDS
  • Create simple lambda that reads from RDS
  • Integrate API Gateway with Lambda
  • Connect 2 Lambdas together with Step Functions
  • Integrate API Gateway with Step Functions

Set up Bookshelf.js for Node.js

Intro

I am going to walk through setting up a brand new Node.js project using Bookshelf and PostgreSQL. At the end, we will have a simple Node.js project that can insert and retrieve data from a database.

Here is what this post will cover

  • Set up a new Node.js project
  • Install necessary libraries to interface with PostgreSQL database
  • Set up process to create a database table
  • Use Bookshelf to
    • insert data
    • retrieve data

The code for this post can be found here.

Why Bookshelf.js?

Bookshelf.js is an Object Relational Mapping (ORM) for Node.js that allows developers to more easily interface with a relational database. It allows the dev to focus on higher level functions, rather than low level queries. It takes care of some basic attribute mapping to make data models simpler. It also allows for the same code to be used against different relational databases in case you want to change the underlying database.

I chose Bookshelf.js because it is well maintained, well documented, and it is built on Knex.js, which is a SQL query building framework. I can use Knex for queries that are not easily supported in Bookshelf.

Install necessary software

Node.js

I am using Node.js 4.3.2 because 4.3 is what is supported in AWS Lambda. If you don’t have node installed, follow these instructions.

[~]$ node -v
v4.3.2

PostgreSQL

Instructions on how to install PostgreSQL. I use Postico to easily interface with the PostgreSQL.

Before we go on, start the database.

[~]$ postgres -D /usr/local/var/postgres

Set up a new Node.js project

Set up the project directory and initialize the project. When you run npm init, it will prompt you to answer some questions, you can use the default values or set your own, at this point they don’t matter too much.

[~]$ mkdir aws_walkthrough
[~]$ cd aws_walkthrough
[~/aws_walkthrough]$ npm init

Install the node modules that we will need, the -save option will add the modules to the package.json file.

[~/aws_walkthrough]$ npm install knex bookshelf pg dotenv -save

Here is what each module does

  • bookshelf – the ORM we will be using
  • knex – required by bookshelf, but in the future it may not be included automatically
  • pg – the postgresql module
  • dotenv – a utility that makes dealing with environment variables easy

Here is our current package.json

{
 "name": "aws_walkthrough",
 "version": "0.1.0",
 "description": "A sample project using AWS",
 "main": "index.js",
 "scripts": {
   "test": "echo \"Error: no test specified\" && exit 1"
 },
 "author": "Jake Sparling",
 "repository" : {
   "type" : "git",
   "url" : "https://github.com/jsparling/aws_walkthrough"
 },
 "license": "ISC",
 "dependencies": {
   "bookshelf": "^0.10.3",
   "dotenv": "^4.0.0",
   "knex": "^0.12.7",
   "pg": "^6.1.2"
 }
}

The dotenv module reads from a .env file in the project directory. This will set the environment variables. Right now we only need to set which environment we are in.

NODE_ENV=development

Hello (node) world

Let’s create a simple javascript file named index.js that will show that we have node working.

'use strict'

console.log("node is working")

Now, make sure that it works

[~/aws_walkthrough]$ node index.js
node is working
[~/aws_walkthrough]$

Create a database

Let’s create our database, and verify that it exists.

[~/aws_walkthrough] $ createdb aws_walkthrough

#verify that the db exists, use '\q' to exit psql
[~/aws_walkthrough]$ psql aws_walkthrough
psql (9.4.0)
Type "help" for help.

aws_walkthrough=#


Create table in database

Set up a knexfile.js config file for Knex. This tells Knex how to connect to the database, notice there are entries for development and production. Right now we care most about development.

// Update with your config settings.
require('dotenv').config()

module.exports = {
  development: {
    client: 'pg',
    connection: {
      database: 'aws_walkthrough'
    },
    pool: {
      min: 2,
      max: 10
    },
    migrations: {
      tableName: 'knex_migrations'
    }
  },

  production: {
    client: 'pg',
    connection: {
      host: process.env.DB_HOST,
      database: 'aws_walkthrough',
      user:     process.env.DB_USER,
      password: process.env.DB_PASS
    },
    pool: {
      min: 2,
      max: 10
    },
    migrations: {
      tableName: 'knex_migrations'
    }
  },
};


Now create a migration that will define our table. The resulting XXXXX_create_table.js file is just a blank template that we will fill out. Yours will have a different date and time in the name.

[~/aws_walkthrough] $ knex migrate:make create_table
Using environment: development
Created Migration: /Users/jake/aws_walkthrough/migrations/20170219092242_create_table.js
[~/aws_walkthrough] $

Later, we will be using the test jsonAPI here. To keep it simple, let’s just create a table that replicates the post resource, which has data like this:

{
  "userId": 1,
  "id": 1,
  "title": "sunt aut facere repellat providen",
  "body": "quia et suscipit suscipit recusandae"
}

Edit the XXXXX_create_table.js file to include the columns we want our table to have. Mine looks like this

exports.up = function(knex, Promise) {
  return Promise.all([
    knex.schema.createTable('articles', function(table) {
      table.increments('id').primary();
      table.integer('remote_id').unique();
      table.text('title');
      table.text('body');
      table.timestamps();
    })
  ])
};

exports.down = function(knex, Promise) {
  return Promise.all([
    knex.schema.dropTable('articles')
  ])
};


This will create a table called ‘articles’.  We have an id field that will automatically increment when we insert new records. The remote_id is the id from the test service, we want to be sure that we don’t have duplicates, so we use the .unique() method. The table.timestamps(); command will add a created_at and updated_at column that are automatically populated when a record is added or updated. I have excluded the user_id that appears in the test API to keep the table simple.

The exports.down function defines what should happen if we rollback the migration, in general this should do the reverse of what the exports.up function does.

Now, run the migration with knex migrate:latest, and make sure the table exists.

~/aws_walkthrough] $ knex migrate:latest
Using environment: development
Batch 1 run: 1 migrations
/Users/jake/aws_walkthrough/migrations/20170219092242_create_table.js
[~/aws_walkthrough] $


[~/aws_walkthrough] $ psql aws_walkthrough
psql (9.4.0)
Type "help" for help.

aws_walkthrough=# \d articles
                                    Table "public.articles"
   Column   |           Type           |                       Modifiers
------------+--------------------------+-------------------------------------------------------
 id         | integer                  | not null default nextval('articles_id_seq'::regclass)
 remote_id  | integer                  |
 title      | text                     |
 body       | text                     |
 created_at | timestamp with time zone |
 updated_at | timestamp with time zone |
Indexes:
    "articles_pkey" PRIMARY KEY, btree (id)
    "articles_remote_id_unique" UNIQUE CONSTRAINT, btree (remote_id)

aws_walkthrough=#

Set up Bookshelf

Start with a bookshelf.js file that will allow us to use bookshelf in other files.

'use strict'

// Set up knex using the config file for the environment
var knex = require('knex')(require('./knexfile')[process.env.NODE_ENV])

// set up bookshelf using the knex setup we created above
var bookshelf = require('bookshelf')(knex)

// make sure bookshelf is available when importing this file
module.exports = bookshelf

Create a model class for the articles table that we can use to interface with the table. By extending the bookshelf.Model, we get functionality that allows us to access the attributes of the table as methods on the Article variable.

'use strict'

var bookshelf = require('./../bookshelf')

// create the Article model, it will include all of the attributes of the table.
// the hasTimestamps: true command will automatically populate the created_at and updated_at columns
var Article = bookshelf.Model.extend({
  tableName: 'articles',
  hasTimestamps: true
})

module.exports = Article


Insert data into the table

Edit index.js to create a new entry in the articles table

'use strict'

var bookshelf = require('./bookshelf')
var Article = require("./models/article")

var insertArticle = (callback) =>{
 // create a new entry in articles database
 new Article({
   title: "Sample title",
   body: "Sample body"
 }).save()
 .then(function(saved) {
   console.log(saved)
   const insertedId = saved.attributes.id

   callback(insertedId)
 })
}

// insert the article, and when we are done, destroy connection and get the inserted article
insertArticle(function(id){
  bookshelf.knex.destroy()
  console.log("inserted article with id: " + id)
})

Run index.js and make sure that it adds data to the table.

[~/aws_walkthrough] $ node index.js
ModelBase {
  attributes:
   { title: 'Sample title',
     body: 'Sample body',
     updated_at: Sun Feb 19 2017 10:34:22 GMT-0800 (PST),
     created_at: Sun Feb 19 2017 10:34:22 GMT-0800 (PST),
     id: 6 },
  _previousAttributes:
   { title: 'Sample title',
     body: 'Sample body',
     updated_at: Sun Feb 19 2017 10:34:22 GMT-0800 (PST),
     created_at: Sun Feb 19 2017 10:34:22 GMT-0800 (PST),
     id: 1 },
  changed: {},
  relations: {},
  cid: 'c1',
  _knex: null,
  id: 1 }
inserted article with id: 1


[~/aws_walkthrough] $ psql aws_walkthrough
psql (9.4.0)
Type "help" for help.

aws_walkthrough=# select * from articles;
 id | remote_id |    title     |    body     |         created_at         |         updated_at
----+-----------+--------------+-------------+----------------------------+----------------------------
  1 |           | Sample title | Sample body | 2017-02-19 10:34:22.967-08 | 2017-02-19 10:34:22.967-08
(1 row)

aws_walkthrough=#

Retrieve data from the database

Now, modify index.js to also query the database for the article we just inserted. Below we have added the getInsertedArticle function, commented out the code that just did the insert, and added some new code to insert and then retrieve the record.

'use strict'

var bookshelf = require('./bookshelf')
var Article = require("./models/article")

var getInsertedArticle = (id, callback) =>{
  console.log("\nNow get the article from the db\n")
  Article.where('id', id).fetch().then(function(article) {
    callback(article)
  })
}

var insertArticle = (callback) =>{
  // create a new entry in articles database
  new Article({
    title: "Sample title",
    body: "Sample body"
  }).save()
  .then(function(saved) {
    console.log(saved)
    const insertedId = saved.attributes.id

    callback(insertedId)
  })
}

// insert the article, and when we are done, destroy connection and get the inserted article
// insertArticle(function(id){
//   bookshelf.knex.destroy()
//   console.log("inserted article with id: " + id)
// })

insertArticle(function(id) {
  getInsertedArticle(id, function(article) {
    bookshelf.knex.destroy()
    console.log(article)
  })
})


Done

That is it. There are many more things we can do with a database, like create relationships, do complex joins, etc., but this is a good starting point.

Here is a link to the code from this post.
Working with servos and an Arduino Nano clone

Over the past few weeks I have been working on building the software to allow my RC Sailboat to sail autonomously. To keep the form factor as small and light as possible, I bought a cheap Arduino Nano clone to use in place of an Arduino Uno.

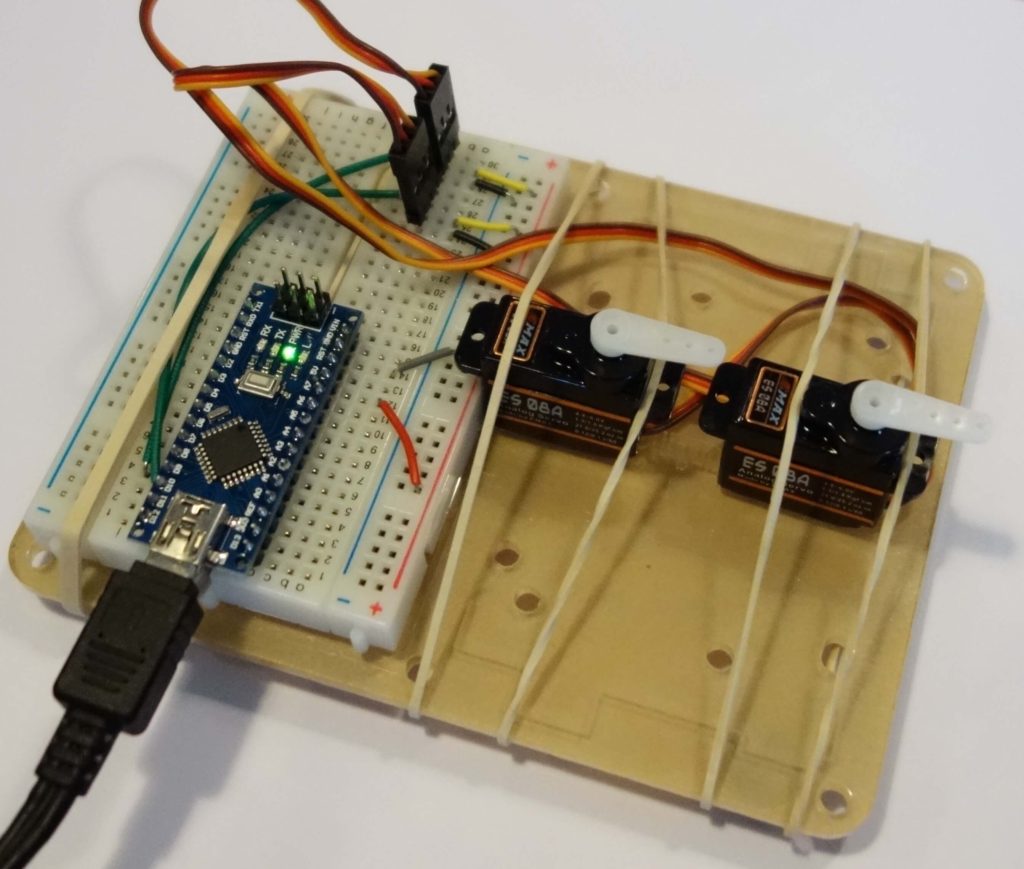
Nano with rudder and Sail
Nano microcontroller with servos for sail and rudder control

Obstacle 1: drivers

My first obstacle was getting my mac to communicate with the board. The basic issue is that the WCH340G USB interface chip on the clone is different than the FTDI FT232RL used on the authentic Arduino Nano. There are many sites with instructions and links to drivers, but this one had the most up to date driver that was signed. The older drivers were not signed and required me to bypass OSX’s security to allow unsigned drivers. direct link to driver download

Obstacle 2: consistent power

I had some semi-working software running on the Uno that would adjust a sail and rudder servo. When I swapped in the Nano the servos generally worked, but would sometimes move wildly or jitter. Since the Nano and Uno are very similar (chip, ram, clock speed, etc.) I figured the issue was going to be with the power or maybe the WCH340G USB chip.

To troubleshoot, I used my voltmeter to see how the Nano voltage changed while adjusting the servos. When not moving the servos, it put out 4.8V on the 5V pin and while moving the servos simultaneously it would drop to ~4.2V. The servos expect 4.8-6V so this could contribute to the issue. As reference, the Uno put out 5V, I didn’t test it while moving servos.

In the past I have had issues with macs not putting out enough voltage through USB, and I have a cord that includes 2 plugs, one for power and one for power+data. The cord is similar to this one.

I swapped out the cords and the servos started behaving as expected. My guess is that a combination of data transfers (to signal the servo change) and keeping a consistent power supply were too much for the single cord.

Since I want to run the system without my computer, I think the USB cord is not the best solution. A couple of alternative options are a separate power supply for the servos, or using a capacitor to smooth out the power.

To keep down weight and complexity, I took the capacitor approach. I found many sources that said a minimum of 470uF was the correct capacity and that the voltage rating should be 3x what you have in the system. I added a single 1000uF/25V capacitor with the old cord and the servos behaved well. The servos also worked well with three 100uF/16V capacitors in parallel, but I prefer the single capacitor solution.

Building nightstands

Introduction

I designed matching nightstands, this page shows how I built them.

Lumber

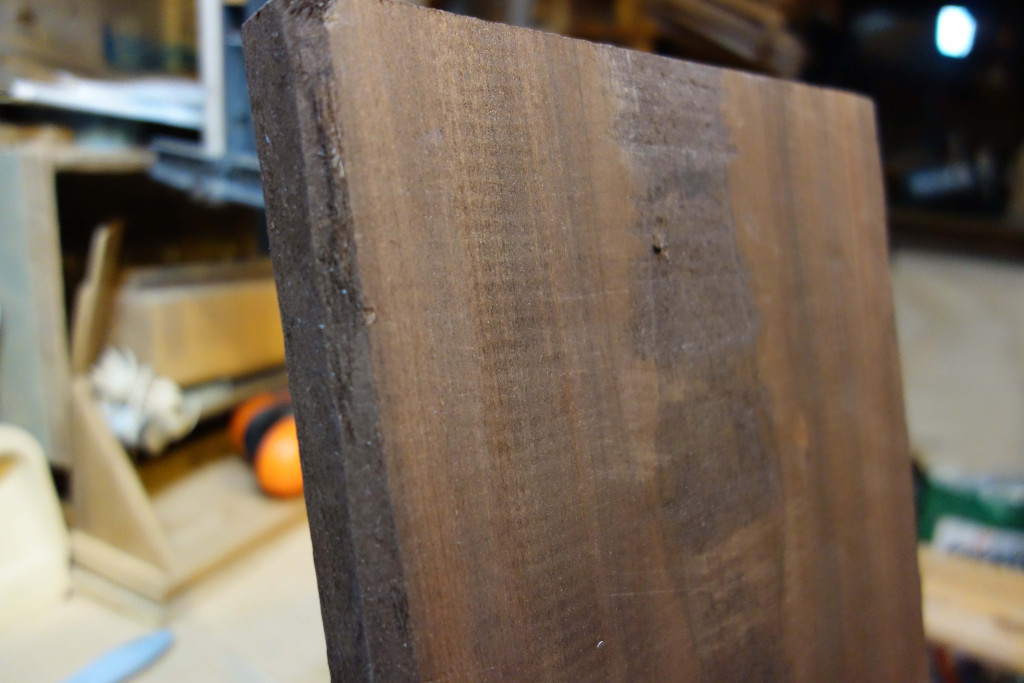
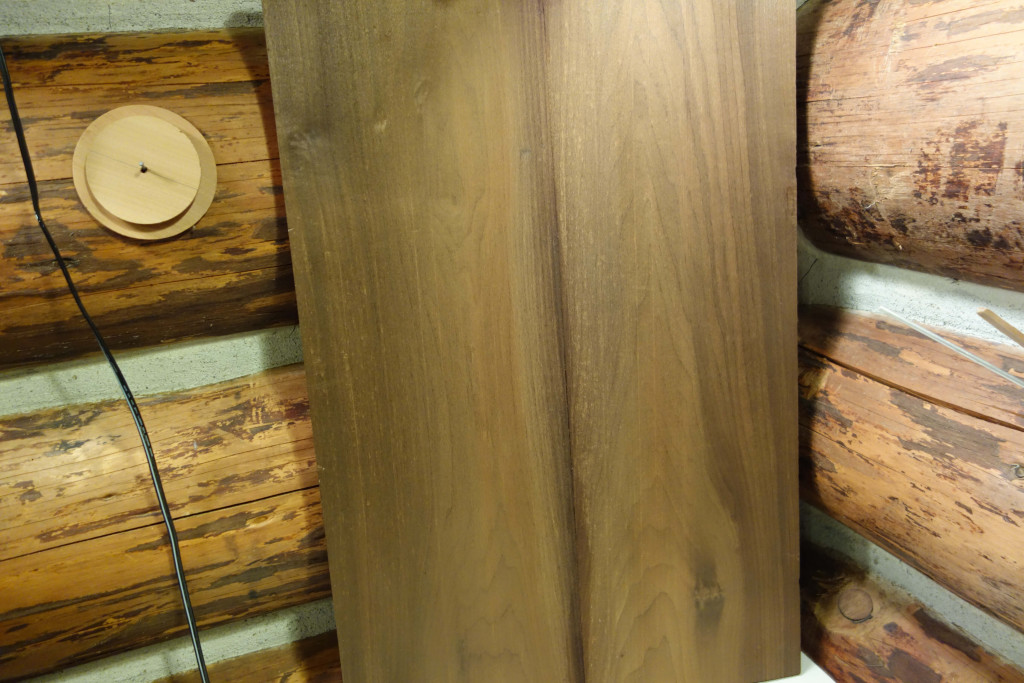
I wanted dark wood that was inexpensive and easy to work with. I went to Crosscut Hardwoods in Seattle and it was amazing. The staff was super helpful and directed me to roasted poplar. Poplar is normally a blonde color, but they put it into a kiln and it turns a dark brown throughout. Nearly all of the water was removed in the roasting process and then the lumber was cut, so there is very little warping. Also, it has a nice campfire smell.

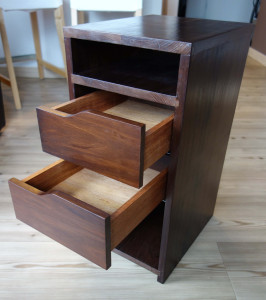
The lumber was 8-10 inches wide and a full inch thick, which is thicker than I was looking for, but something remedied with a planer.

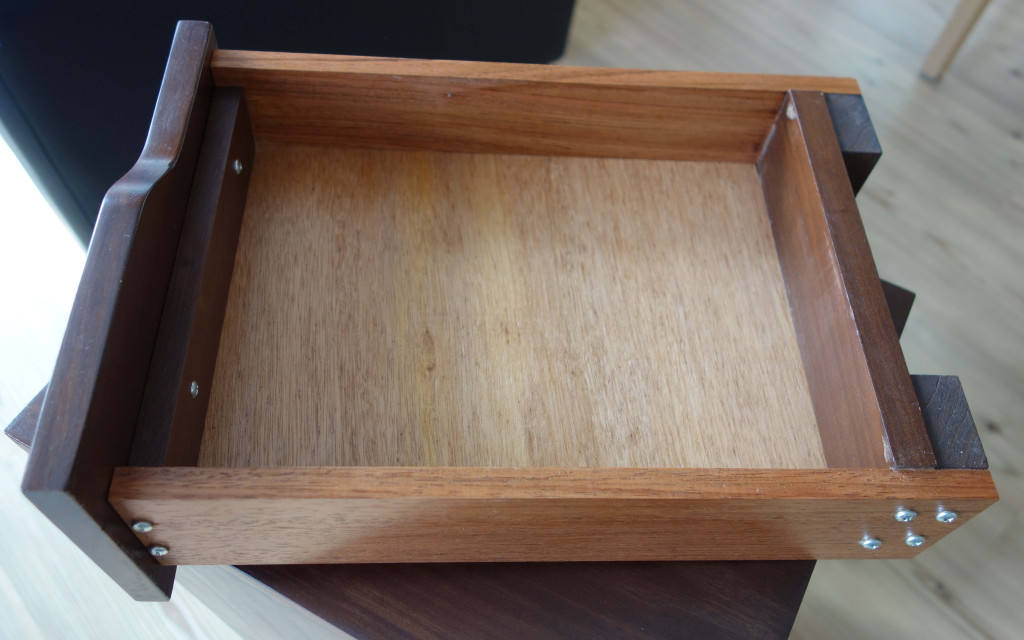
I bought jatoba (Brazilian Cherry) for the sides of the drawers, mainly because it was already a 1/2 inch thick and I liked the color contrast with the roasted poplar.

I bought 1/8 in. mahagony veneer plywood for the bottoms of the drawers.

Roasted poplar
Roasted poplar

Construction

I spent a full weekend with my dad in his shop creating the nightstands.

Edge Joining

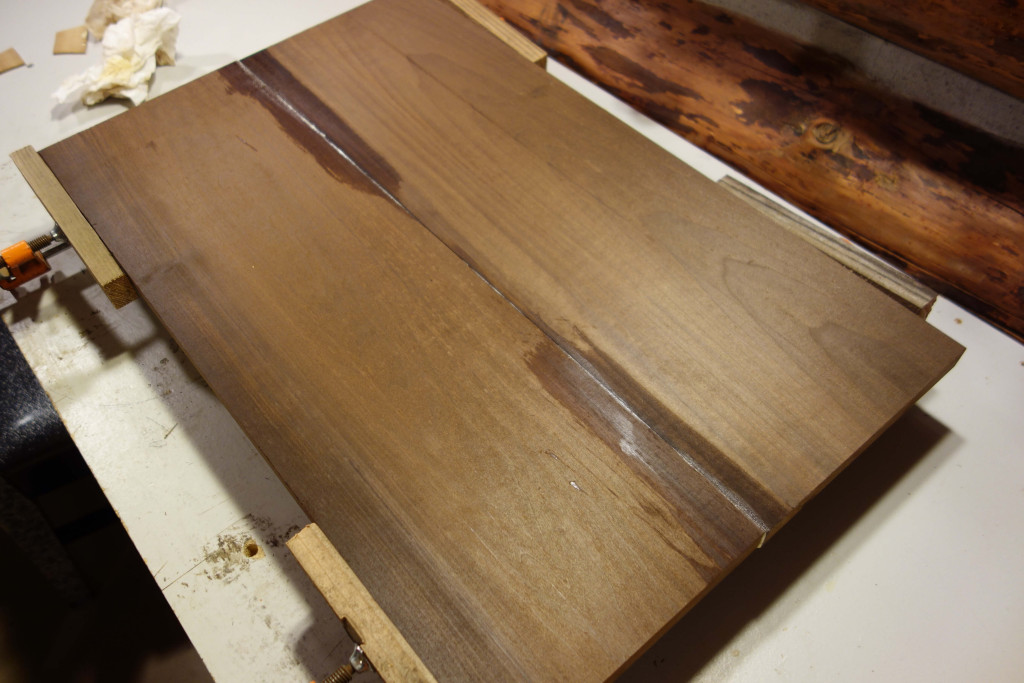
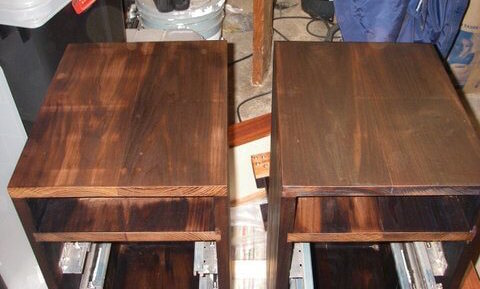
We had to edge join many pieces, but we wanted to get them to the basic length and thickness first. We used a 12 in. planer to bring the thickness from 1 in. to 3/4 in. This was a lot of work.
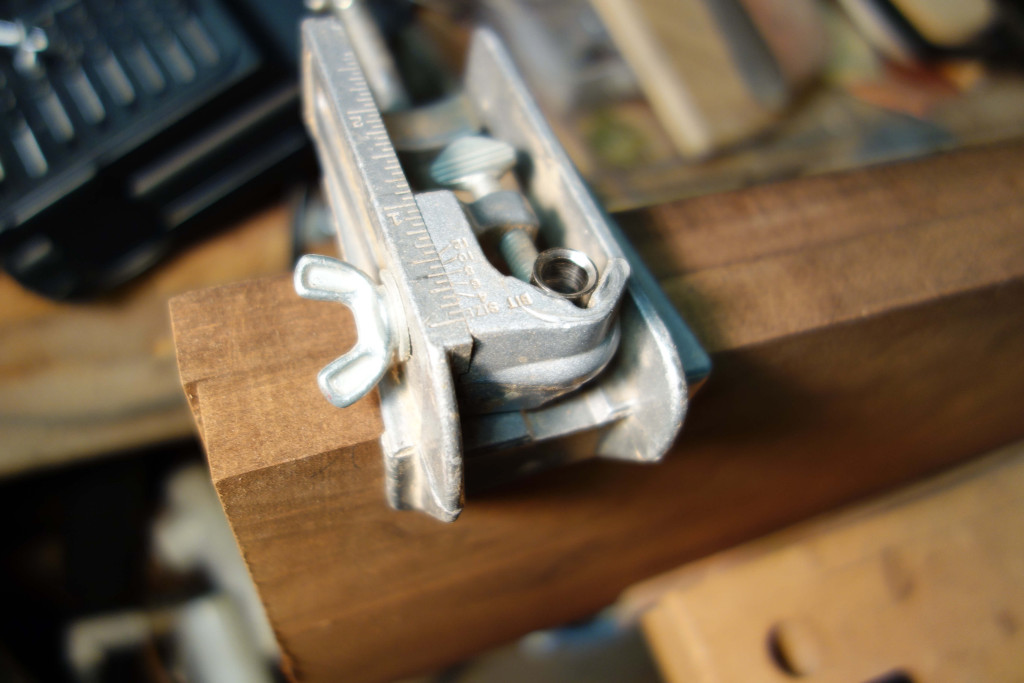
We drilled holes in the edges to receive dowels, then glued the pieces together and let sit over night.
After the glue was set, we cut the pieces to the exact dimensions. We used a thickness sander to smooth out imperfections of the joint, remove glue residue and get the pieces to the desired thickness.
Drawers

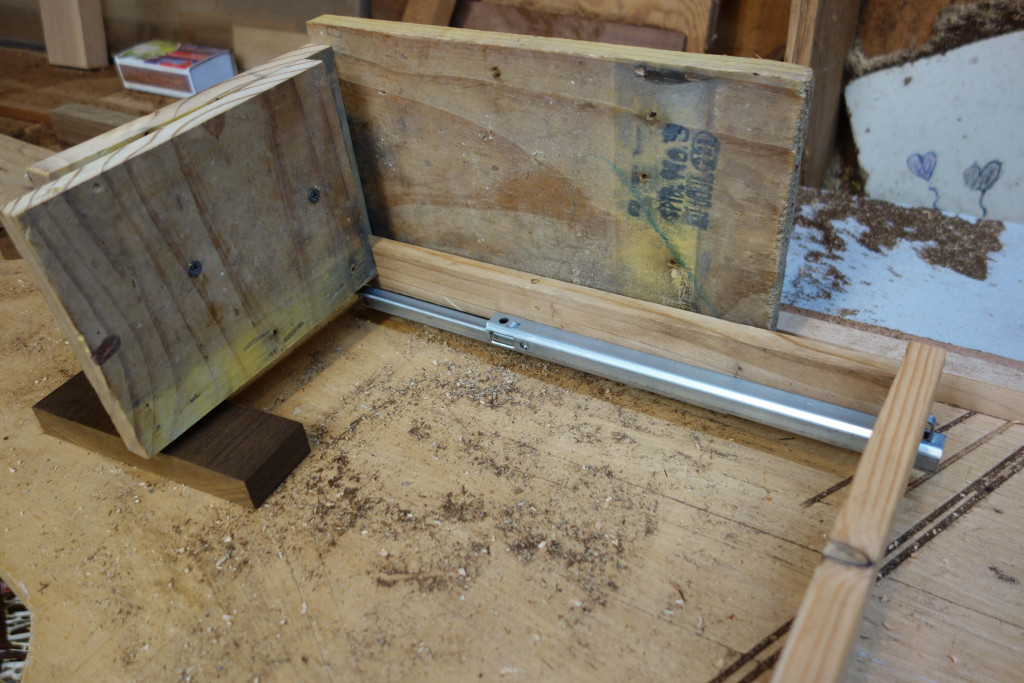
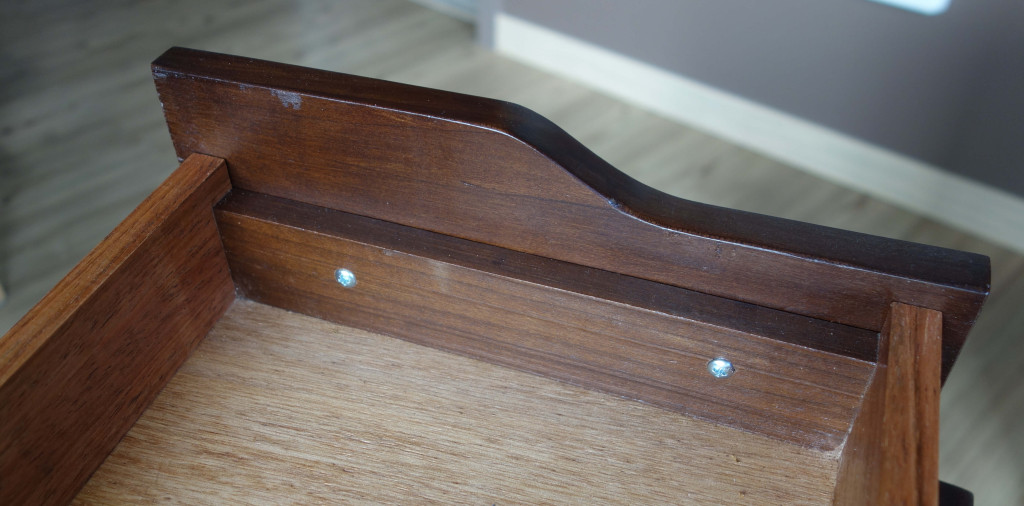
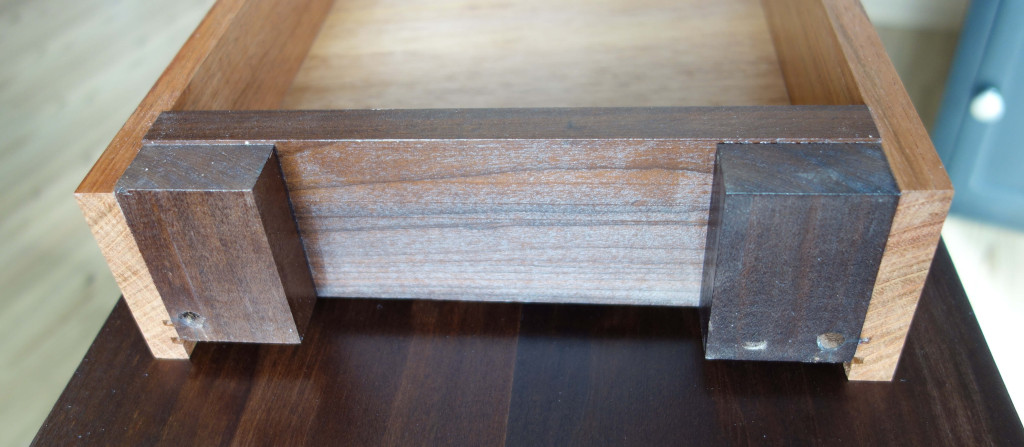
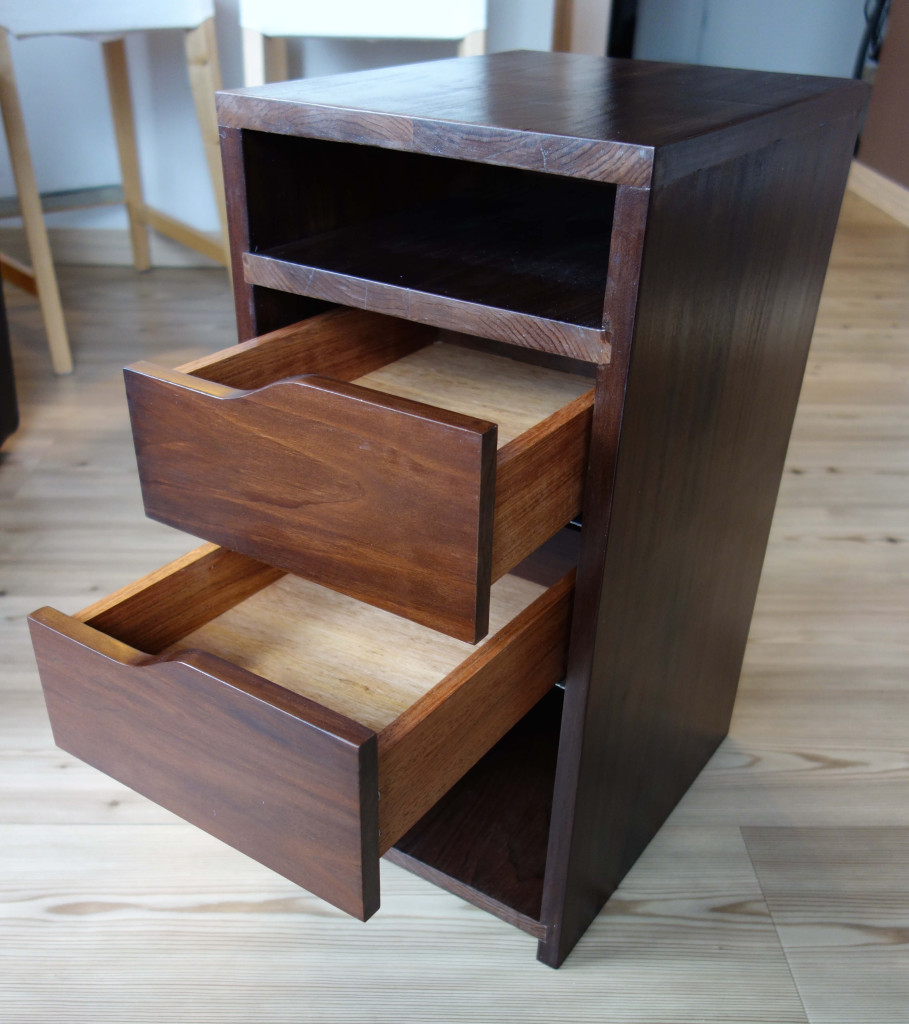
Although I had designed the drawers on paper, I wanted to be sure we had a design that would work with the runner, so I created a wood prototype.

Figuring out how the runners and drawers will work together.
Figuring out how the runners and drawers would work together.

Once I had a good idea of how the runners would work, we attached them to the sides of the stands. There was a lot of trial and error to get them even.

We used self drilling screws to assemble the drawers, predrilling the jatoba because it is such a hard wood.

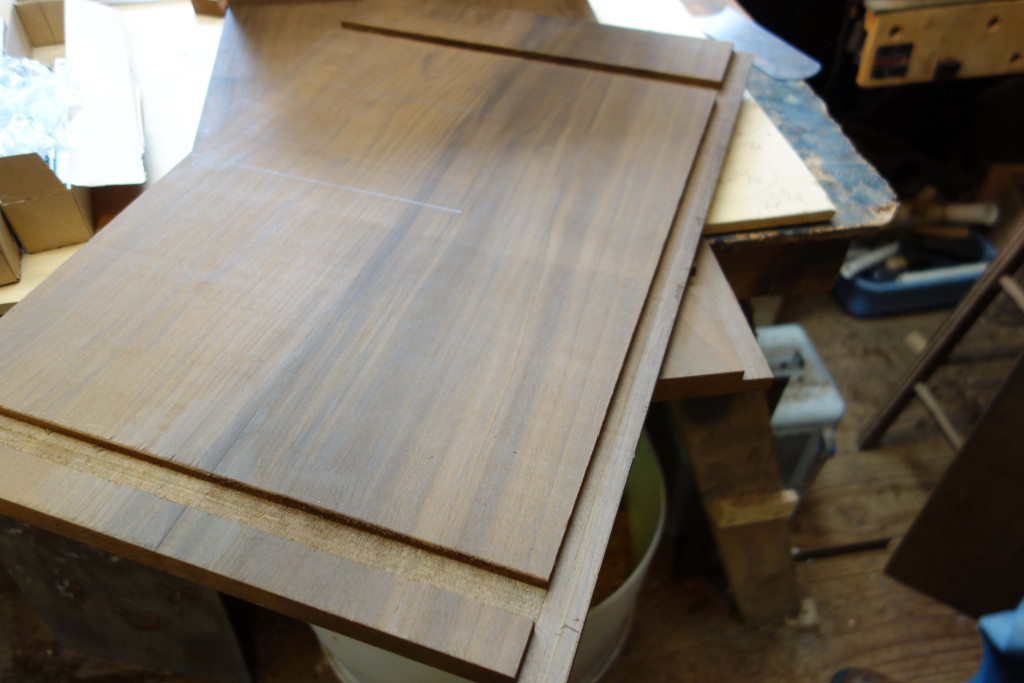
Dados

We cut dados for the shelves and the backs of the nightstands.

Finishing

Prepping for sanding

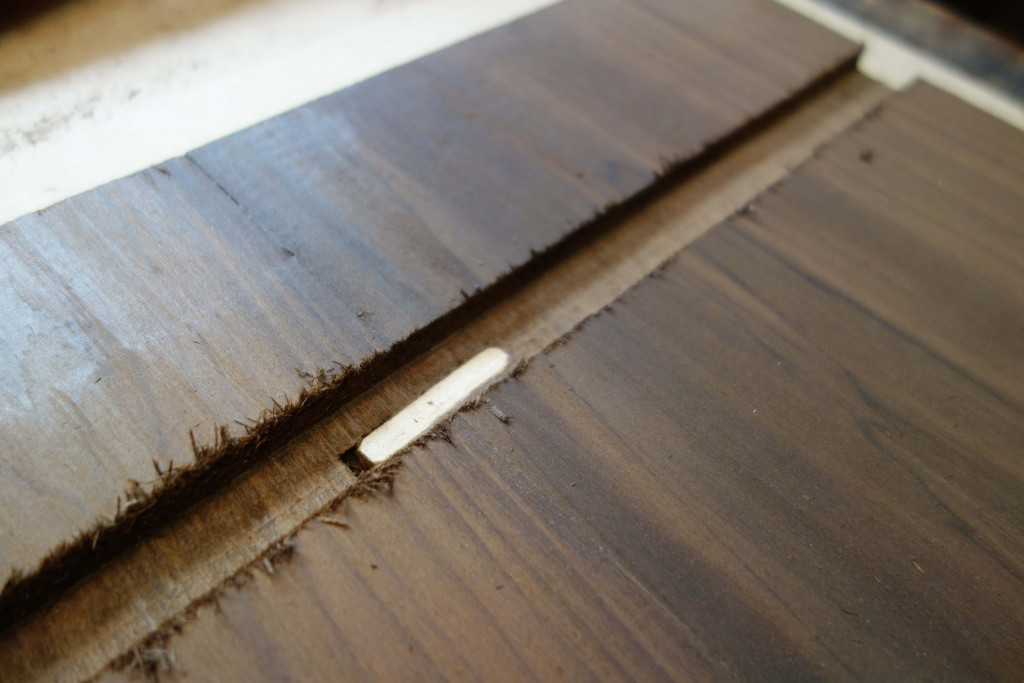
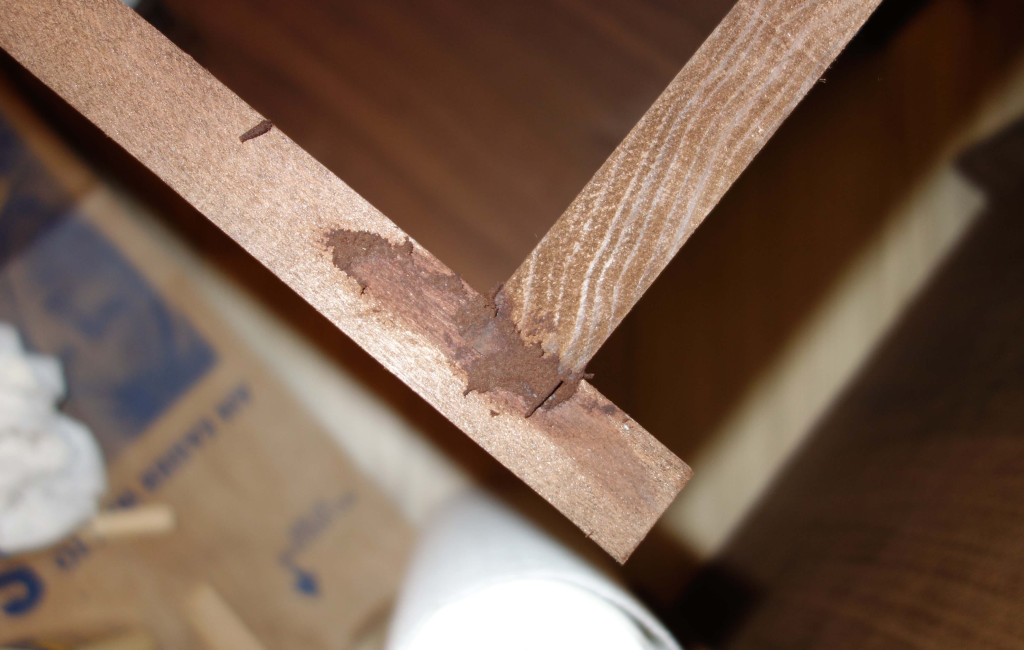
There were several gaps and imperfections that needed to be filled in, most were small enough that a mixture of sawdust and glue worked well. There were a few gaps that I filled first with slivers of wood and then finished with the sawdust and glue mixture. When mixing, I went for as little glue as possible, while still getting a tacky feel.

I used too much putty in a few places that required a lot more sanding.

Smoothing and Sanding

I used a card scraper to get the surfaces flush with each other, this worked great and was much faster than sanding. I then used an orbital sander with 150 grit sandpaper. I didn’t spend a lot of time sanding the inside faces.

Polycrylic

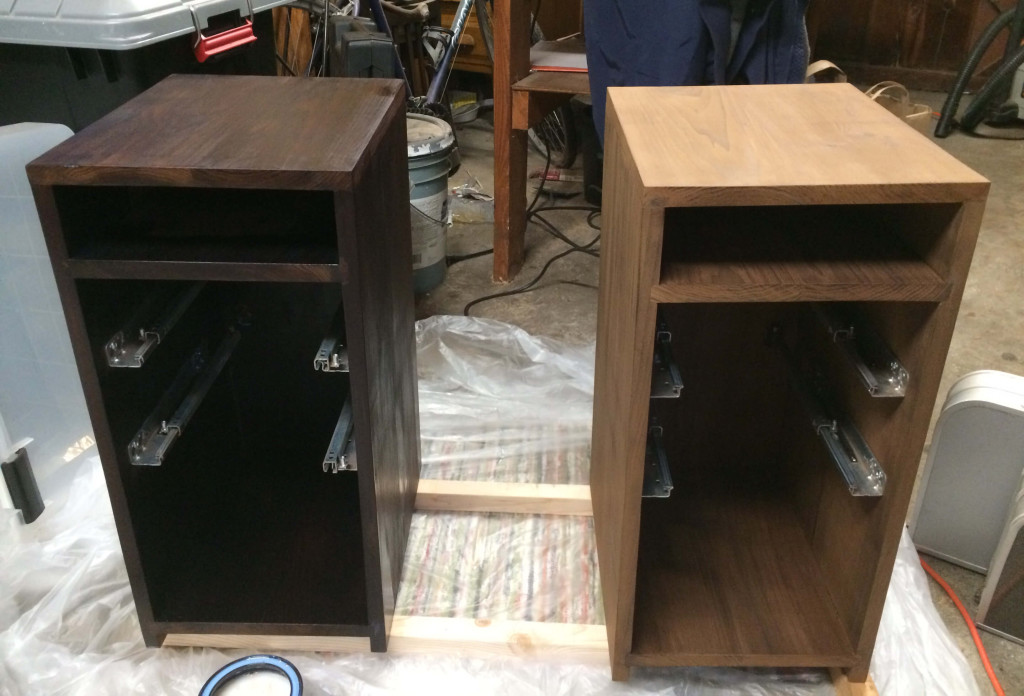
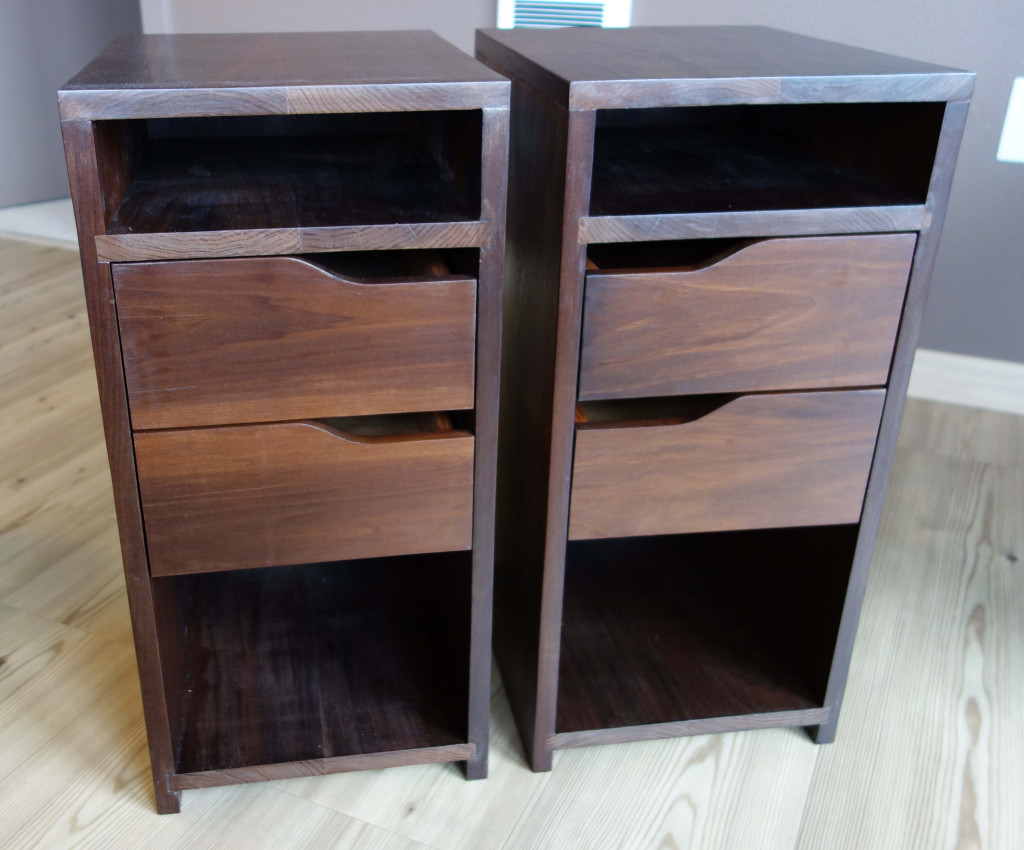
I used Minwax Polycrylic waterbased clear matte finish. This was really low odor and dried fast. I did 3 coats, sanding with 220 by hand between coats. Since the drawer faces and top were going to be the most visible, I did an extra couple of coats and sanded with 320 between the final coats.

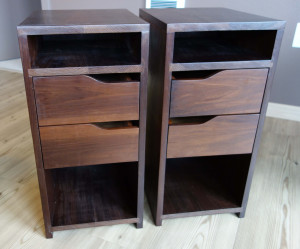
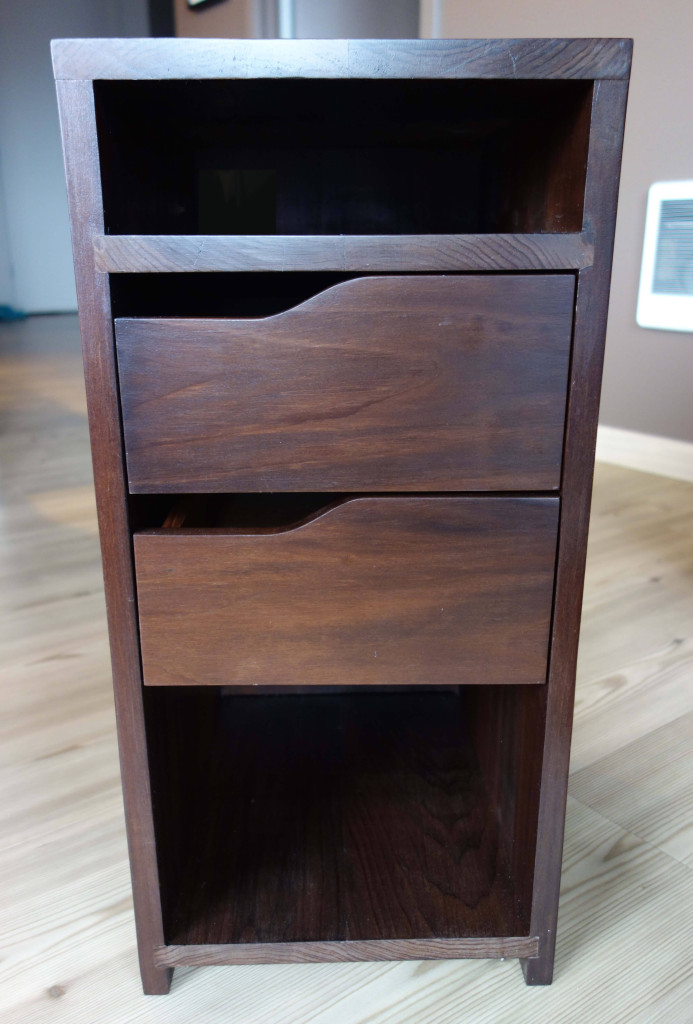
Finished nightstands

Designing nightstands

We were looking for nightstands that wouldn’t take up too much room and would still be functional. We found that many of the options were either ugly, too big, too expensive, or a combination of all three. I decided that I could design and build nightstands that would meet our needs and it would be a fun project.

Requirements

  • Dark wood
  • 12 inches wide
  • A drawer or two to reduce clutter
  • A shelf for cell phones

Planning

Inspiration

I found a few designs that were similar to what we were looking for, here is my pinterest board with some inspiration.

Sketching

I started with some simple sketches to figure out how the proportions would work and to see if two drawers were too many.

From the inspiration night stands and through my sketches, I realized that I would prefer to have drawers without pulls, to give a sleek look.

Designing

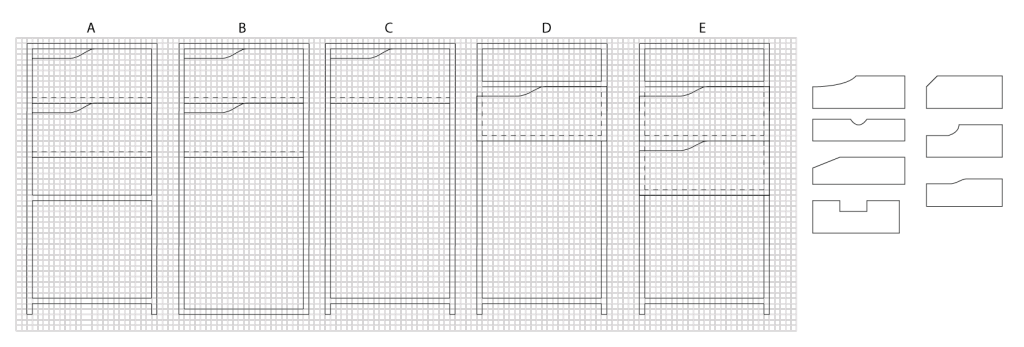
I spent some time in Illustrator laying out several options. Since neither of us have many large books and we have a separate bookshelf, we decided that a shorter bottom shelf was a good compromise for 2 drawers.

Possible designs for nightstand
Possible designs for nightstand, including pull cutouts. (I went with E)

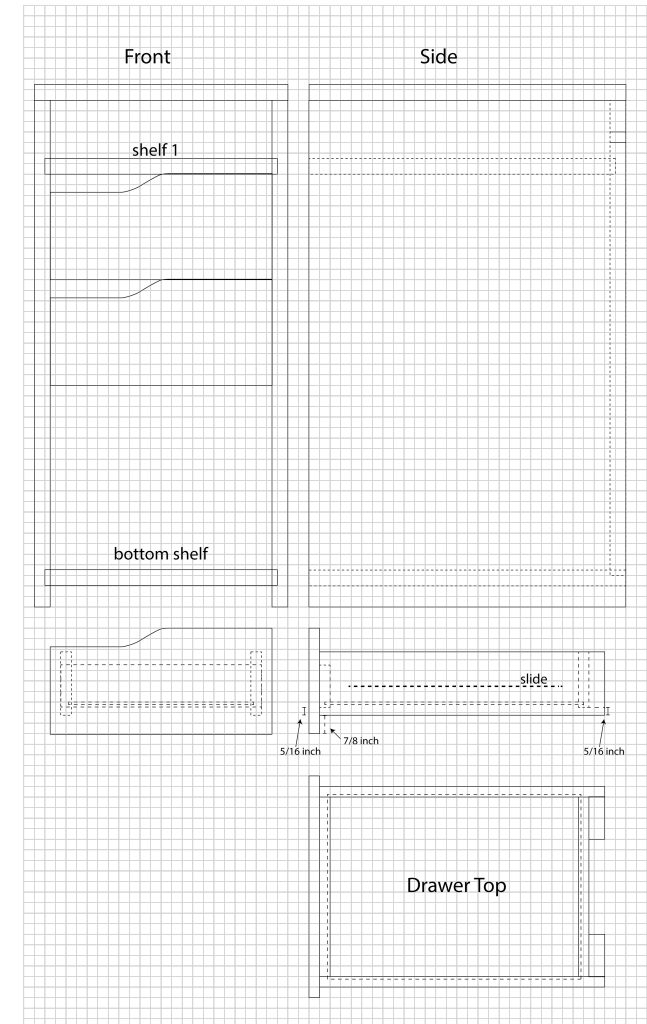
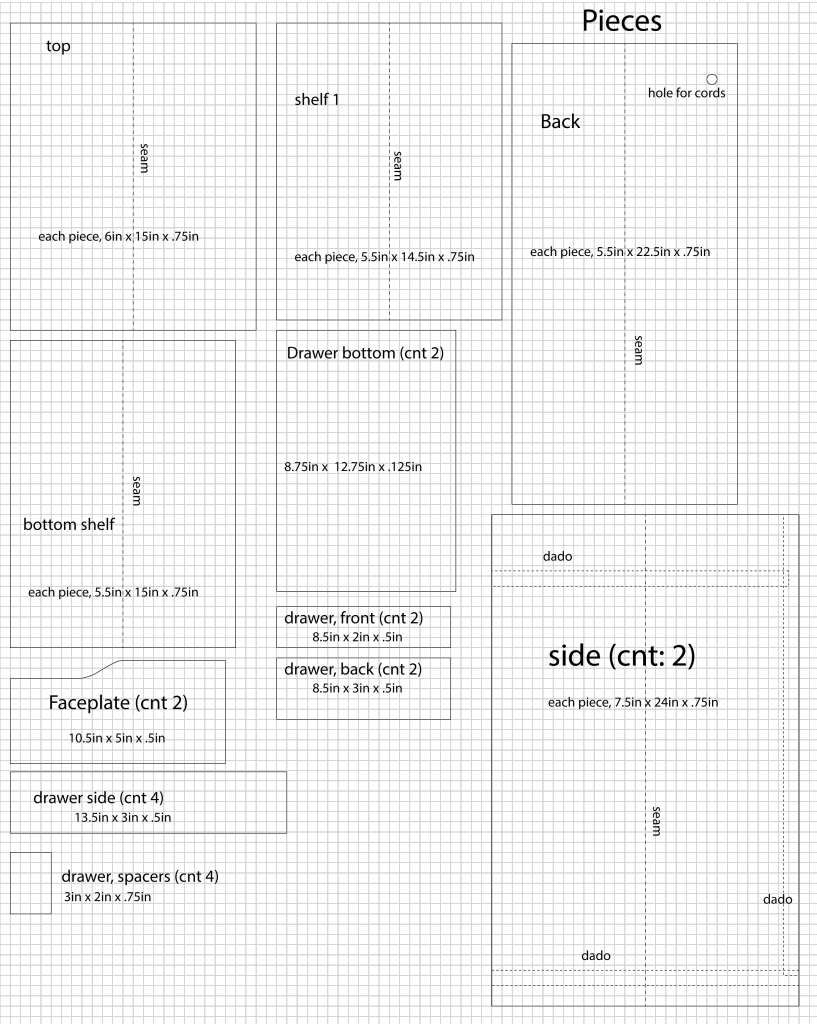
(Almost) final plans

The grid squares are 1/2 inch. I assumed 3/4 in. thick boards, except for on the drawers. Most of the faces are wider than regular lumber, so I assumed we would have to edge join pieces to make boards that were wide enough.

The drawer front pieces, which are just behind the faceplate are a bit shorter to make sure your hand doesn’t hit them when you pull the drawer open.

The gap behind the drawer was originally created to allow a cord to go behind the drawers, but I instead opted for drilling a hole in the back of the nightstand.

The drawer bottoms are 1/8 in. plywood.

I used Ikea Besta drawer runner slides. The plans are missing the details on where the slides are positioned. This was something we figured out at build time.

Prototyping

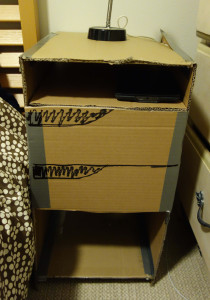
To make sure the nightstand would be an appropriate size, I created a very rough prototype out of cardboard. I was happy with the size and dimensions and was ready to start the build process.

Cardboard prototype

The build process: Building nightstands

How to display Google Earth maps on website

Updated: April 17, 2020

This post shows how to export a Google Earth route, and import it in Google Maps, to then be embedded in a webpage.

When I hike, I track my routes with a GPS and import them into Google Earth. This works great on my personal computer, but it doesn’t allow me to easily embed the maps on a webpage. To allow others to view my maps, I import them into Google Maps and then embed these custom maps on my webpage.

Steps to embed Google Earth routes on webpage using Google Maps

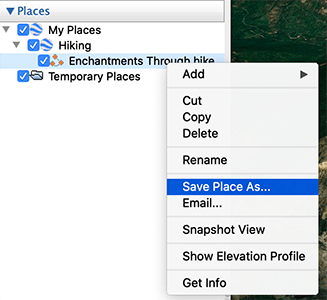
  1. In Google Earth, right click on the route you want to save and select “save place as”

2. Save the file as a .kml

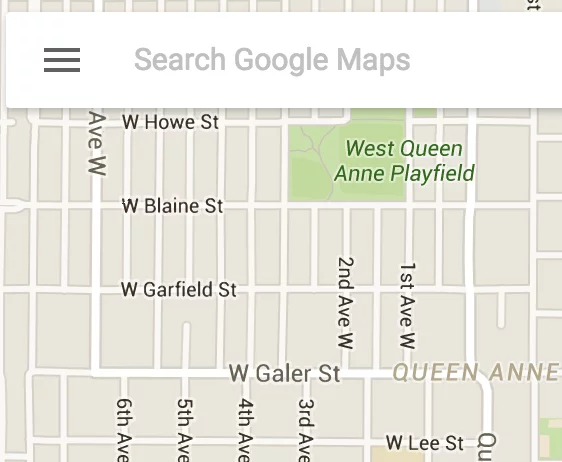
3. Sign in to Google Maps and open the menu on the left side of the search bar by clicking the three line icon

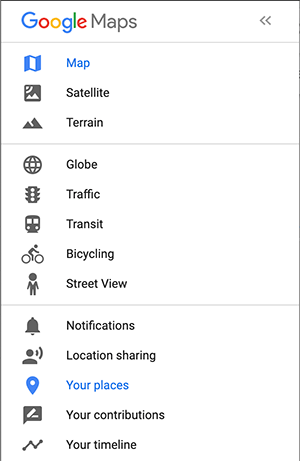
4. Within the menu, select “Your Places”, then the “Maps” tab.

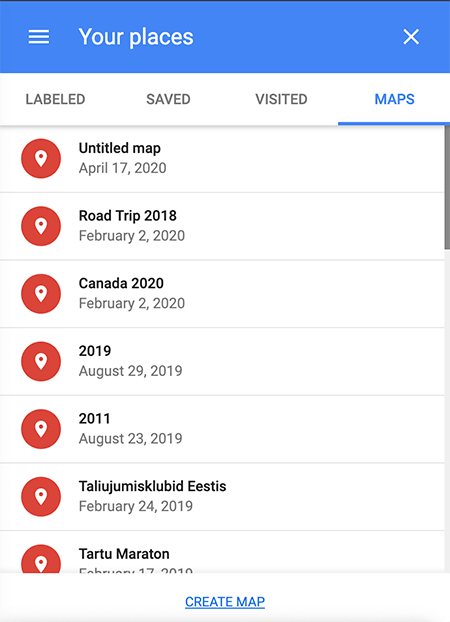
5. This page will show all of your custom maps, click the “Create Map” link at the bottom of the page

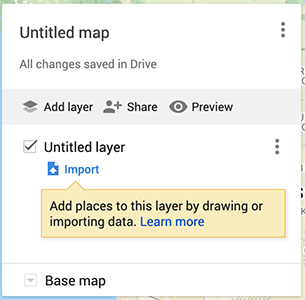
6. The map edit screen will open with one map layer created for you. Click “import” under the layer. This will let you select the .kml file that you created earlier.

7. If you want to add multiple routes to the same map (for instance a multi-day hike), add a new layer with the “Add layer” link, and import a separate .kml file.

8. You can change the look of the map. These changes will be reflected on the embedded map if you change them in the future.

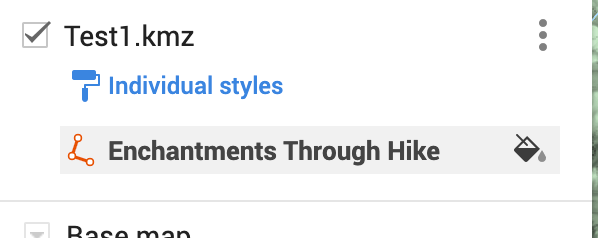
  • To change the color of the route, mouse over the name at the bottom of the layer section (“Enchantments Through hike” in the images below) and click the paint bucket icon.
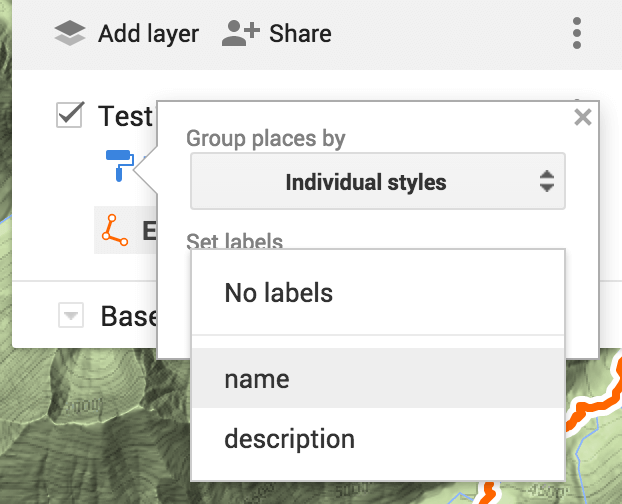
  • To add a label to the route, click on the “Individual styles” link and select the label you want to show.
  • You can change the type of map (terrain, satellite, etc.) from the “Base Map” link under the layers section.

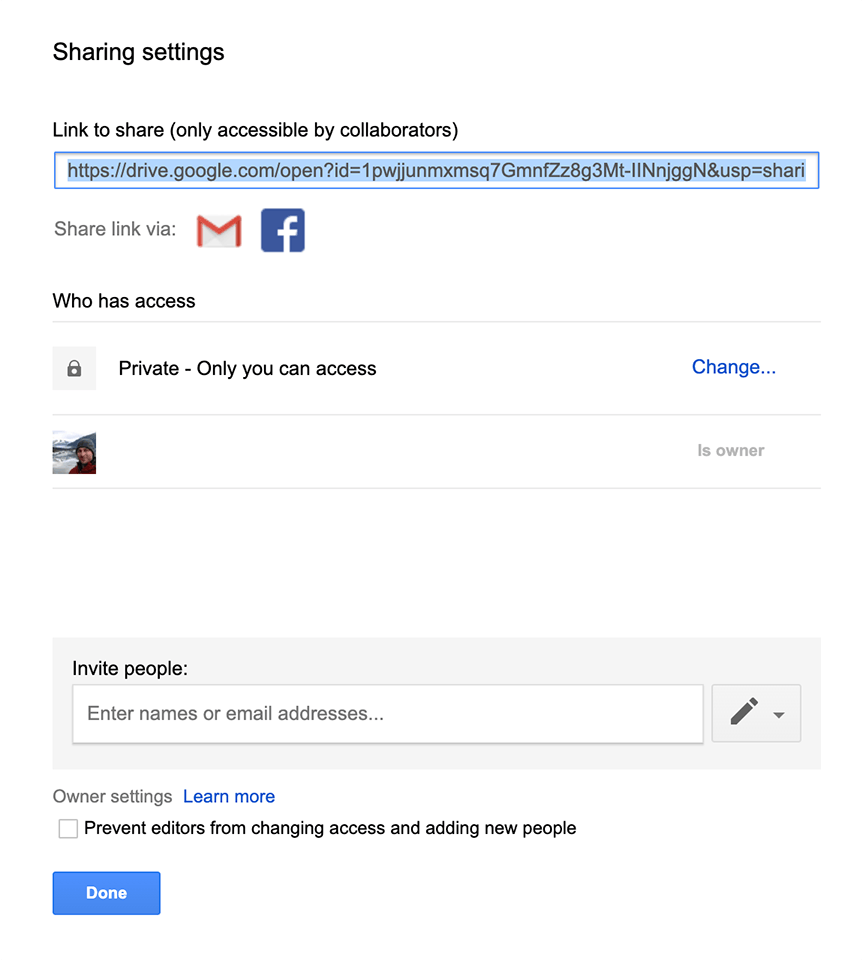
9. In order to embed the map, click the “share” link above the layers section. On the “Sharing settings” screen, select “Change…” on the “Private – Only you can access”.

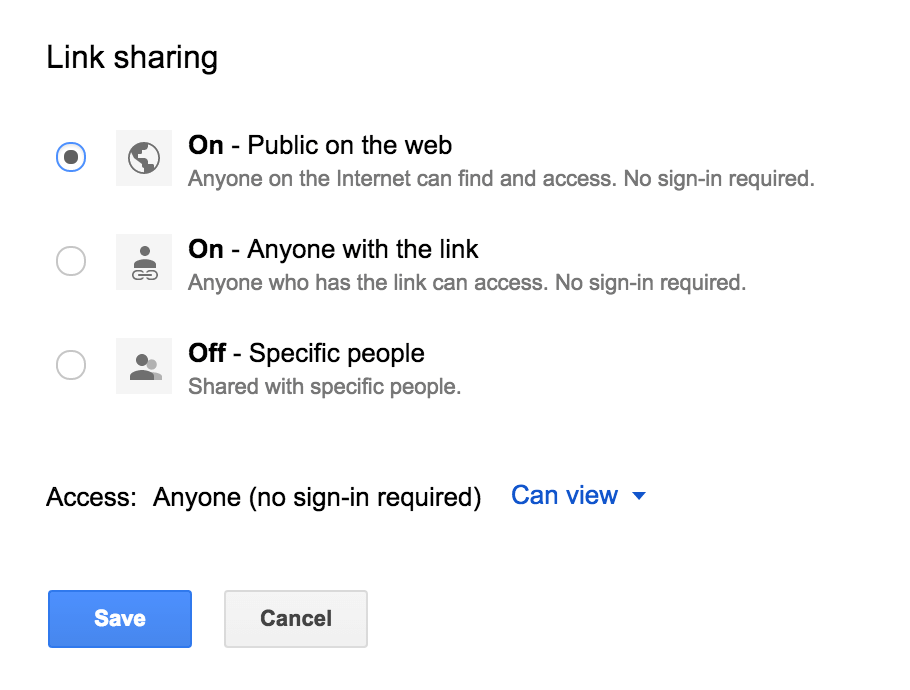
10. On the “Link sharing” page, select “On” to make the map public.

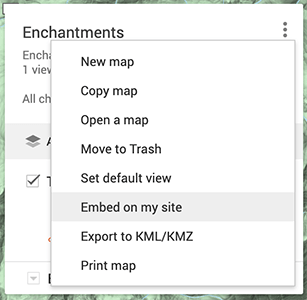
11. Once the map is public, you can select the “Embed on my site” item from the main map menu.

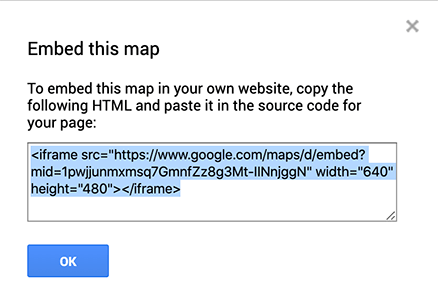
12. Insert the provided code on your site, and you are done.

Here is an example of an embedded map

Viking burial

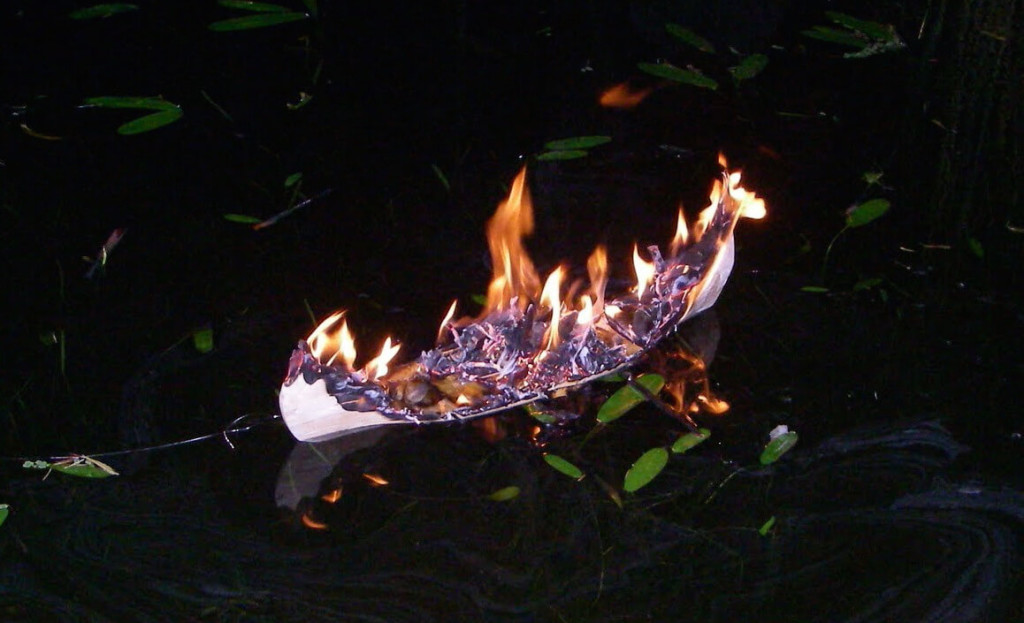
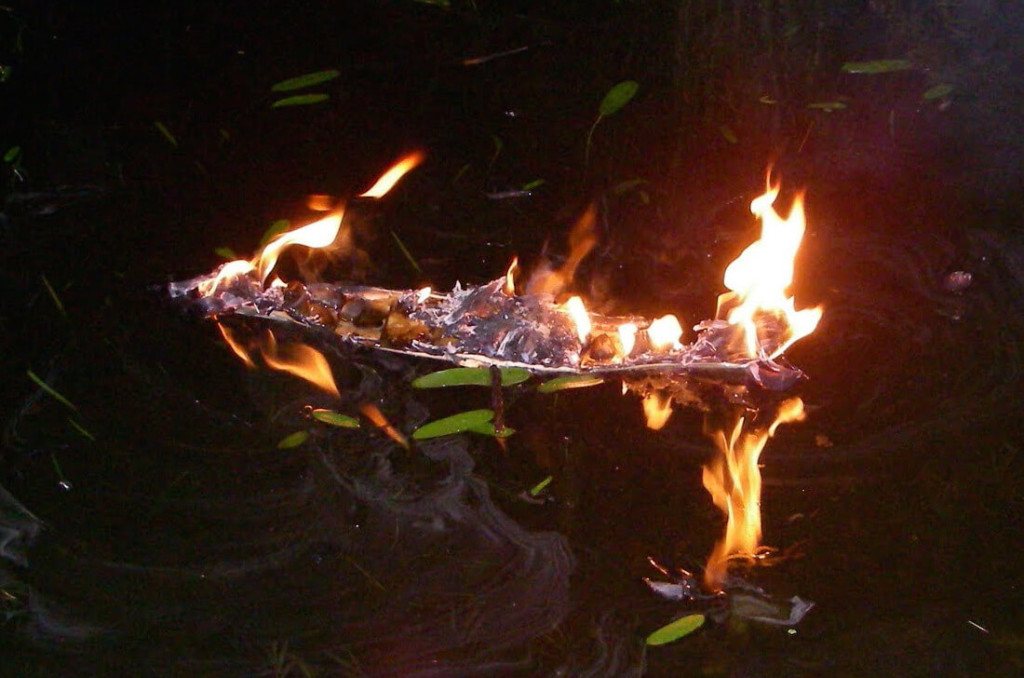
A viking burial for a frog

Why I am building the boat: Balsa viking boat

How I made the plans: Viking boat plans

Boat construction: Viking boat construction

Preparation

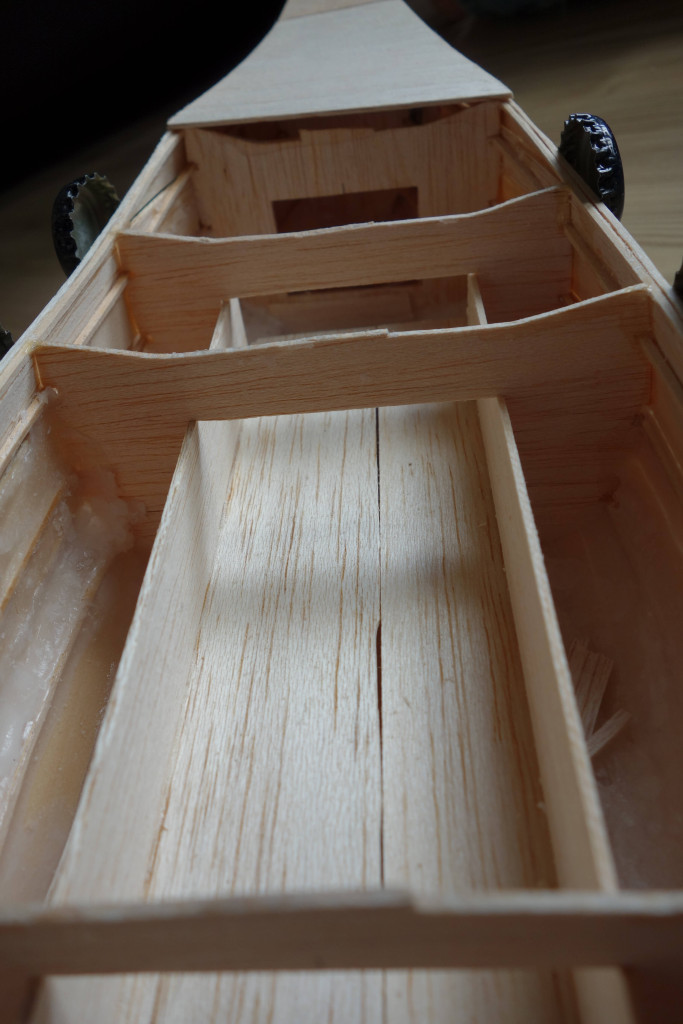
We wanted the boat to sink when it was done burning, so we added some rocks in the compartments at the bow and stern.

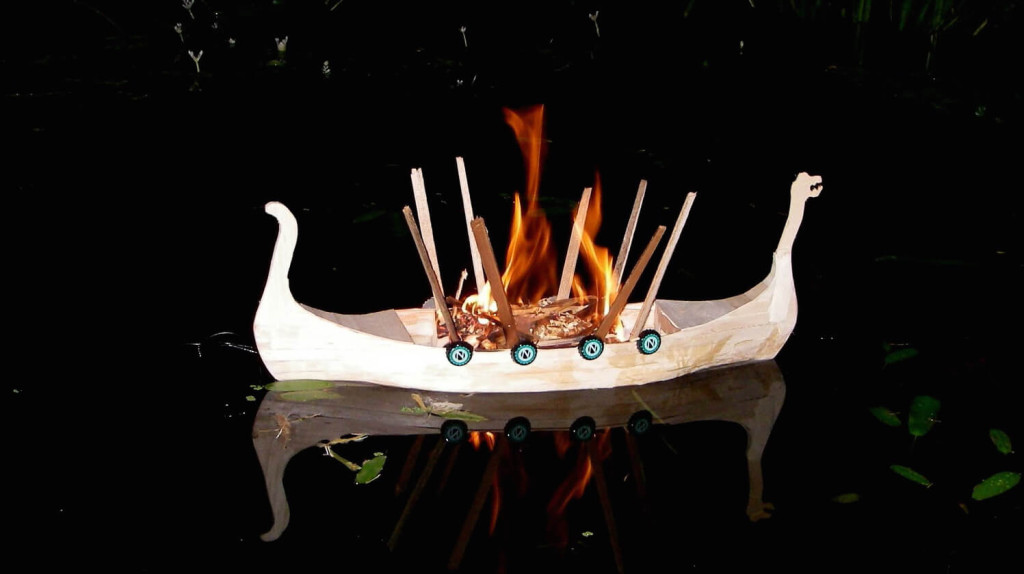
We also wanted to be sure Freddie burned before the boat sank, so we added a bed of wood shavings and kindling around the internal deck. We also used long pieces of cedar to look like oars raised in the sky.

We attached a wire loop to each end of the boat and then tied fishing line to the loops. This way we could easily keep the boat centered in the pond.

Adding Freddie

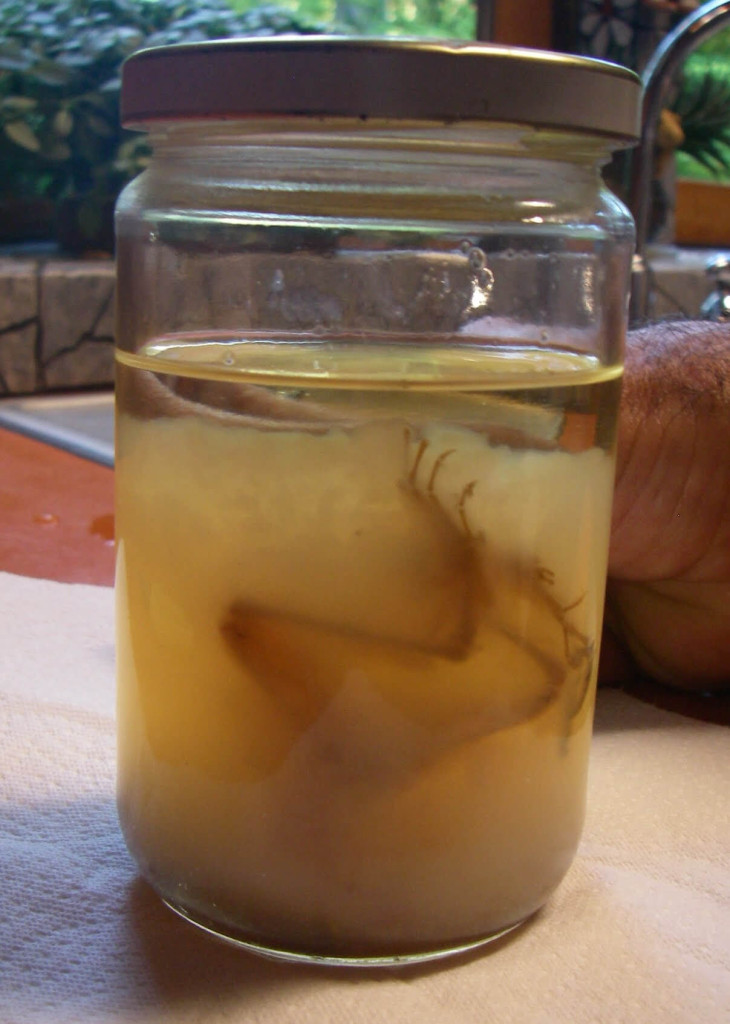
Freddie had spent the last several decades in a jar of formaldehyde and had pretty much decomposed into a cloudy solution. There were still some solid parts, so we created a net of cheesecloth with a wire hanger and poured him into it. We rinsed him off with alcohol to make him more flammable, wrapped him in the cheesecloth to create a shroud, and placed him in the boat.

Too long in a jar
Too long in a jar

The sending off

My mom created a sound track for the funeral which included “Turn! Turn! Turn!” by The Byrds and “Joy to the World” by Three Dog Night.

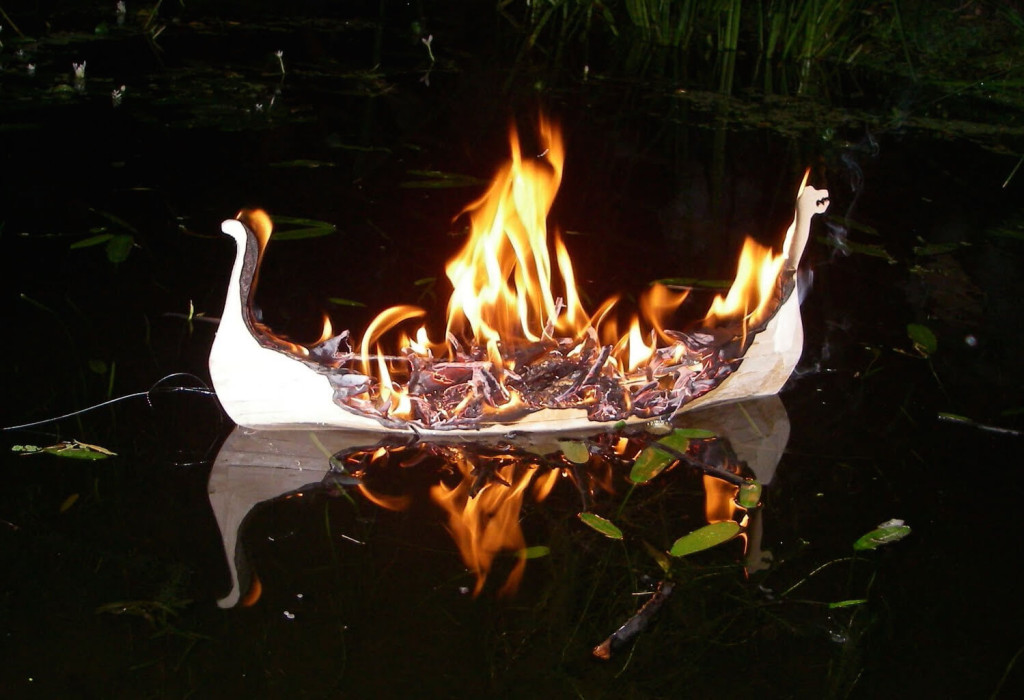
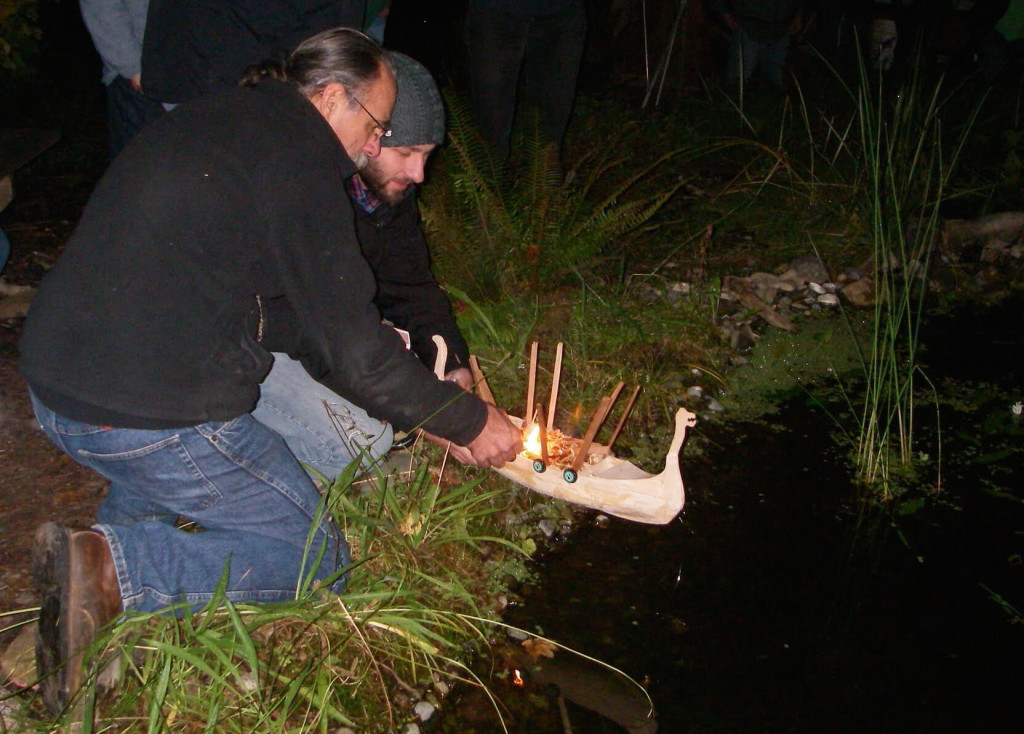
We gathered around the pond, started the music and then lit the boat on fire. It burned quite well and by the second round of Joy to the World, the boat had burned down to the bottom of the hull, turned over, and sank bottom up to bottom of the pond.

Viking boat construction

Intro

Here are the basic steps I took to build the boat. I am happy with how it turned out. It was fun to build something that I knew was going to be destroyed, it was liberating to not get too hung up on making it perfect.

My general approach was to fit the wood as best as I could and sand down the imperfections. This worked pretty well, especially because balsa and bass wood sand easily.

Why I am building the boat: Balsa viking boat

How I made the plans: Viking boat plans

How I destroyed the boat: Viking burial

Materials

Unfortunately, I didn’t document the pieces of balsa that this required, and since the boat burned up, I can’t really create an exact list now.

Rough list of materials:

  • Bulkheads: 10 total – 1/16in. thick balsa
  • Strakes: 8 total – 1/16in. x 1/16in. balsa
  • Gunnels: 2 total – 3/32in. x 3/32in. balsa
  • Keel: 2 pieces – 1/8in. wide 3/32in. thick balsa
  • Planking: I used a mix of 1/4in. and 1/2in. wide bass wood, both 1/32in. thick. Bass wood is a little stronger than balsa and it was easier for me to find thinner bass wood. From the pictures, it looks like I used about 16-20 1/2in. planks.
  • Bow and Stern towers: 6 total – 1in. wide 1/16 thick balsa.
  • I used BSI Insta-cure+ Glue, it cures very fast and is really strong. I have found this to be the best glue for bending balsa and getting it to stick.
  • paraffin wax for waterproofing – 1/2 pound
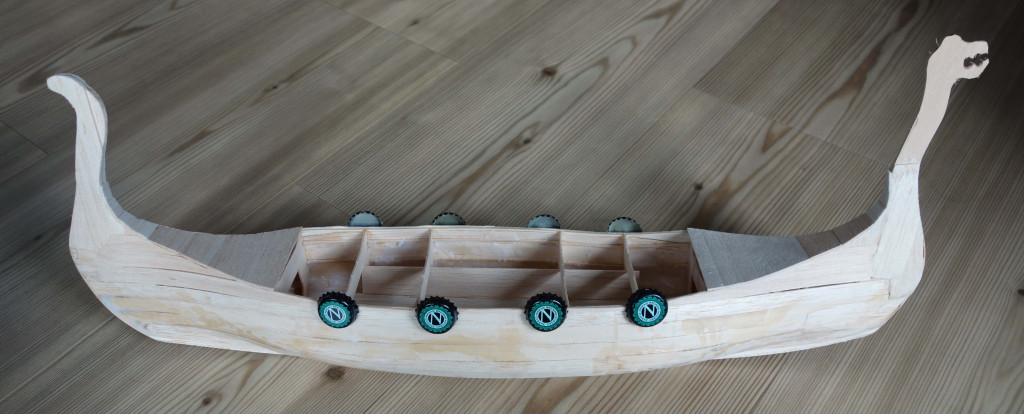
  • Bottlecaps for shields – 8 total

Creating the jig

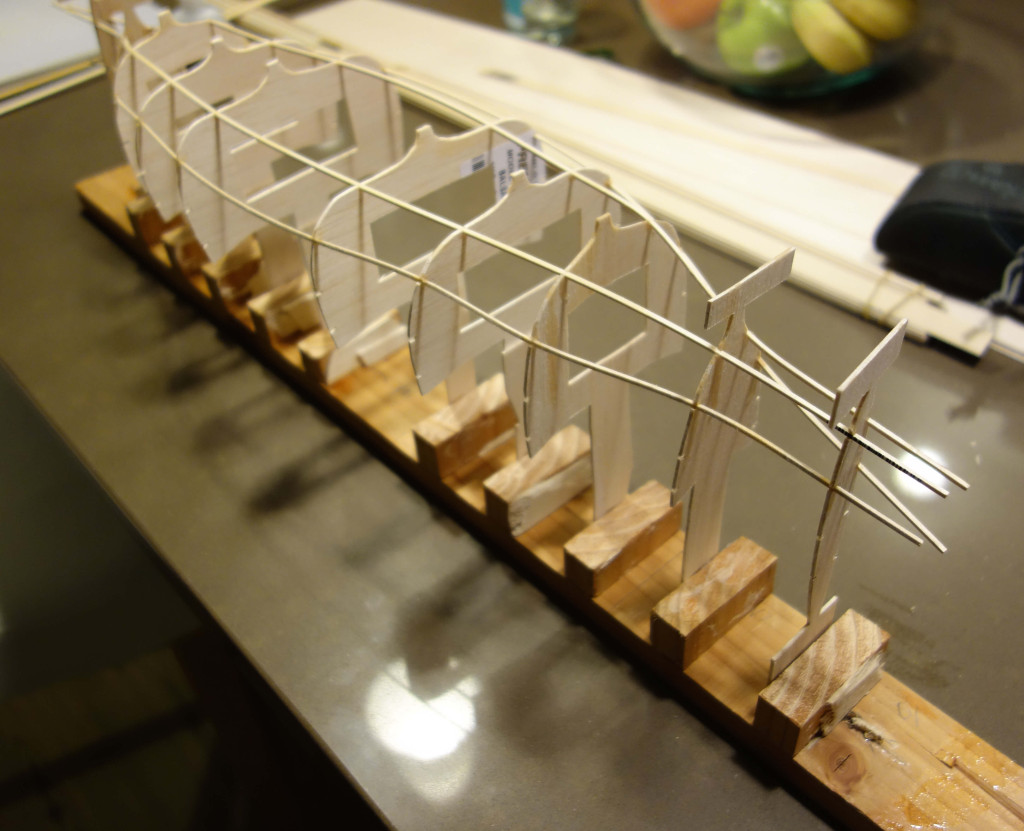
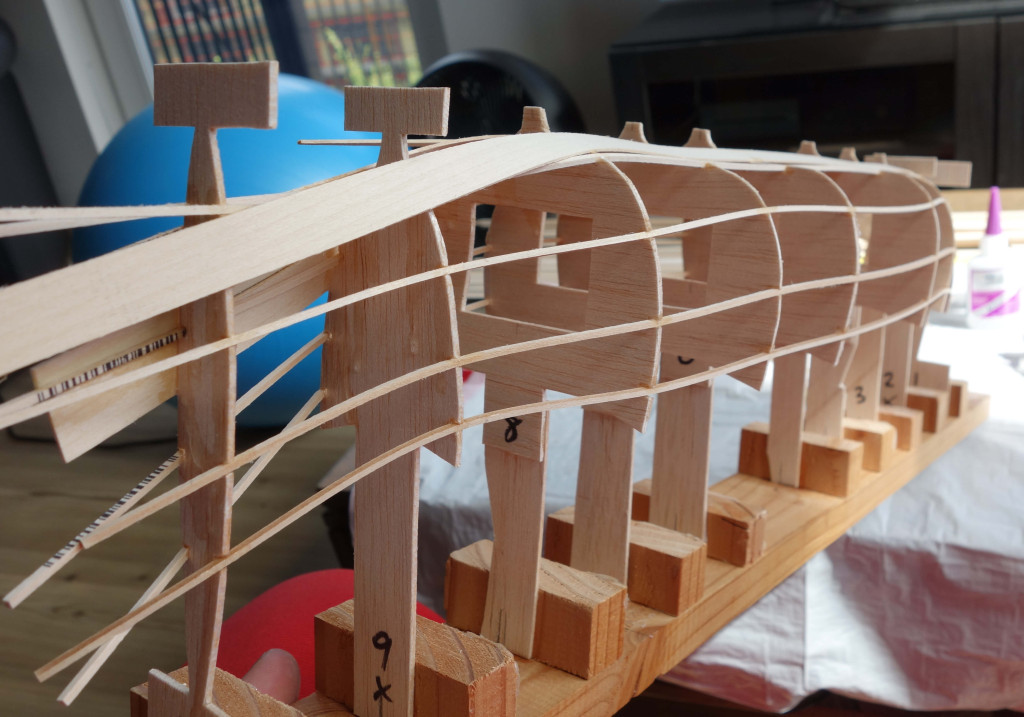
I used a jig to help secure the boat during most of the construction.

The jig had 10 blocks, with 2 inches between the left sides of each block, except for the middle two, which were 4 inches apart. This way when the bulkhead tabs were glued to the jig, they were 2 inches apart.

In order to keep the boat true, it was important that the blocks were square to the base and that the middle of the bulkhead tabs were centered. I wish I had done a better job of sighting down the bulkheads as I glued them to make sure they were aligned.

Cutting out the bulkheads

I printed the plans out on paper, cut each piece out roughly, and then taped the paper onto the balsa. I used an exacto knife to trace the printout and cut the wood. My main focus was on getting the outline traced smoothly on the first pass and then going deeper with the subsequent passes.

Cutout bulkheads. The bulkheads have and extra tab on the bottom of 1, 2, 9, and 10. These are not necessary and no longer part of my plans.

The Strakes

I then added the strakes. I started from the middle of the boat, securing 2 bulkheads at a time. Balsa bends pretty easily, but I ended up breaking a few pieces on the ends. I have since updated the plans to make bulkheads 2 and 9 a little wider, which might help.

First couple of strakes

The planks

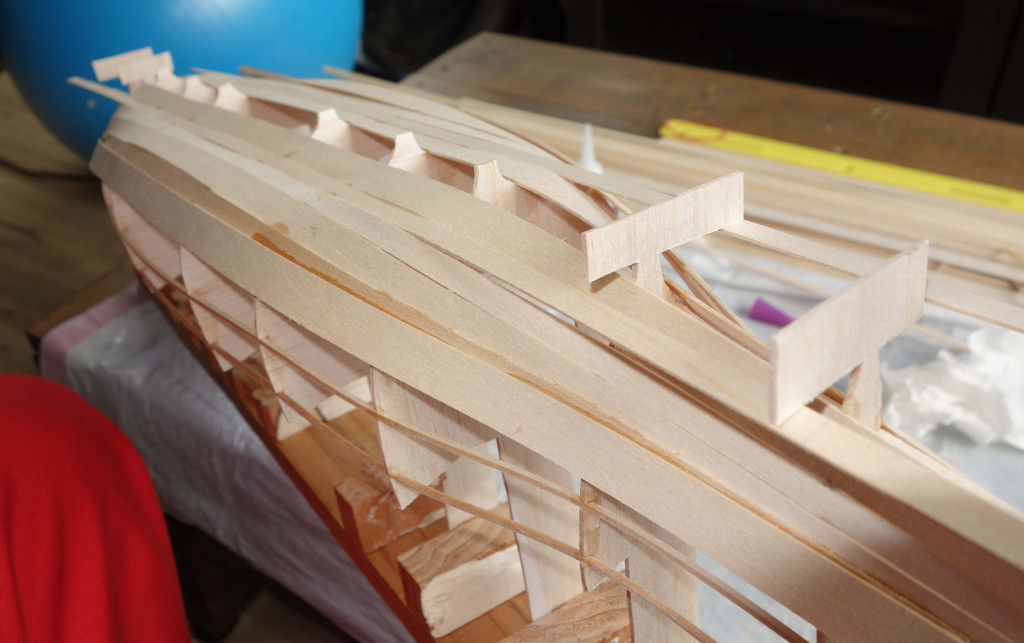
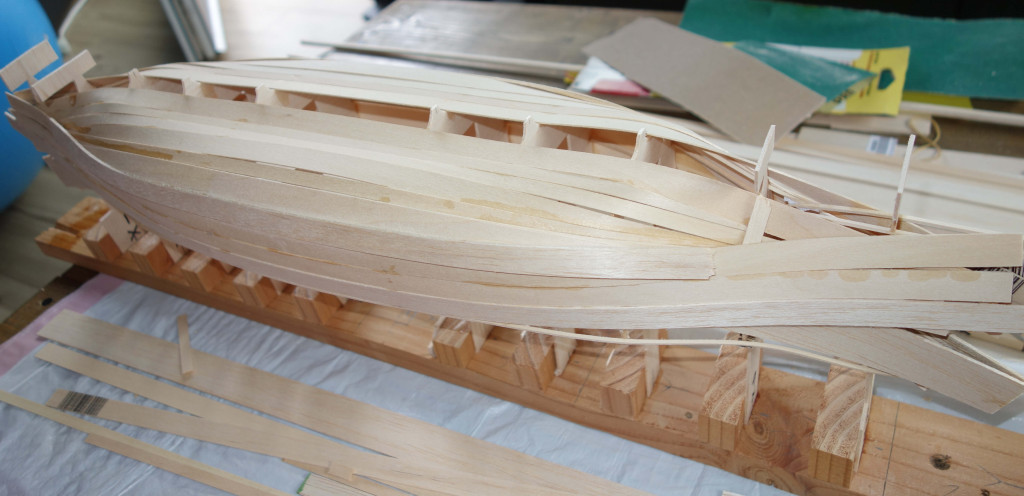
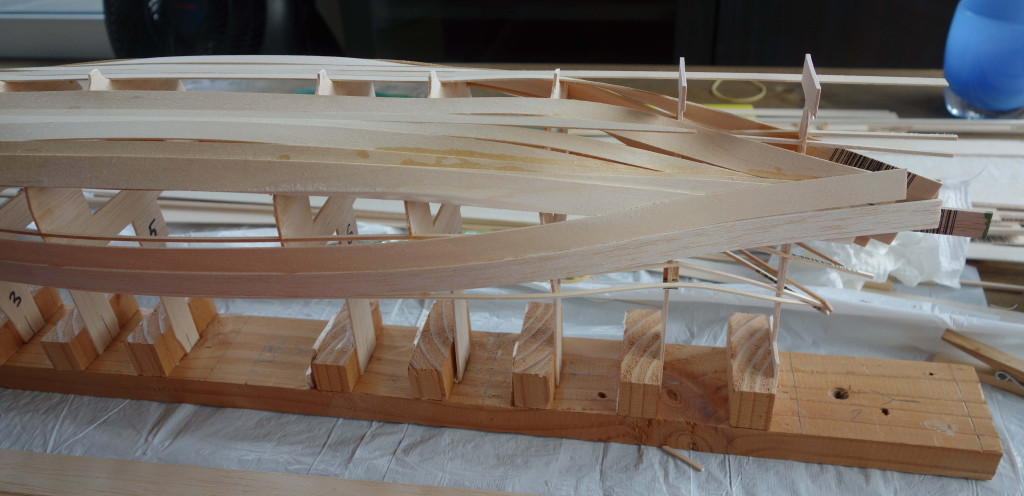
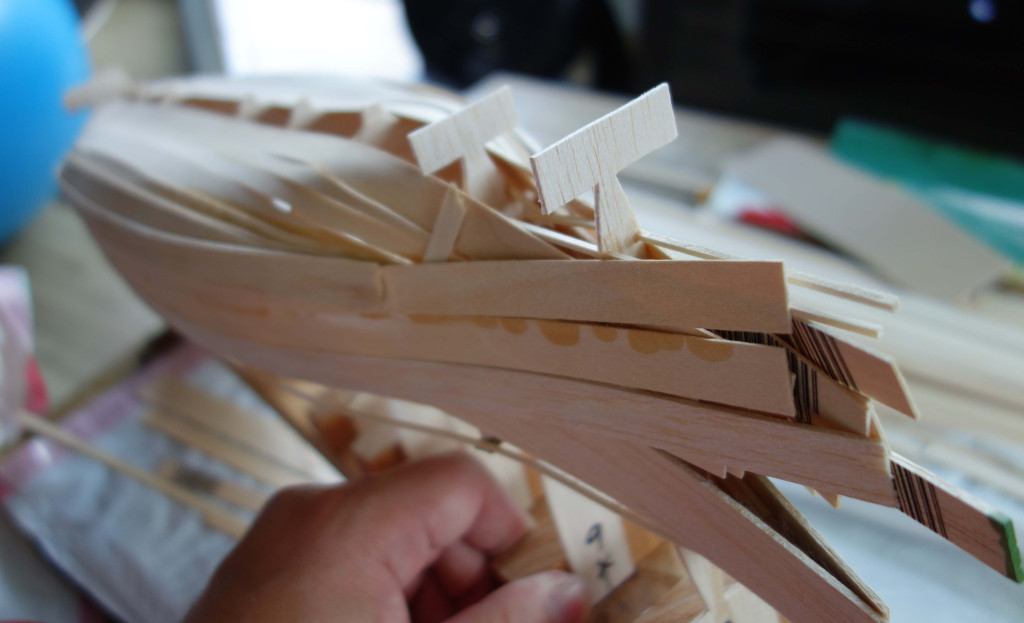
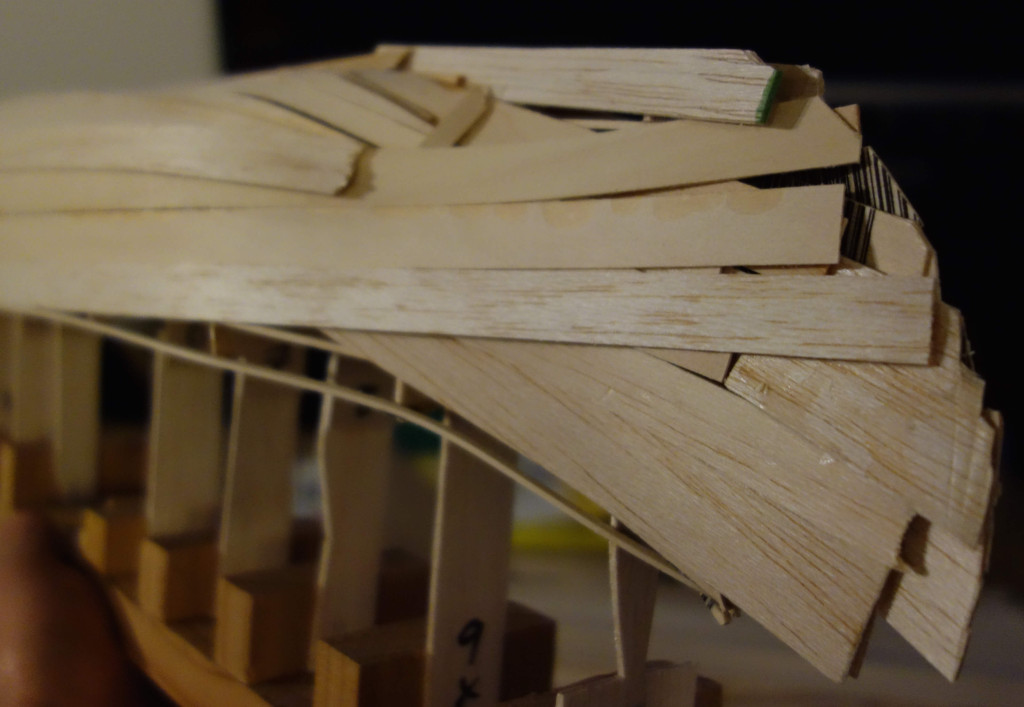
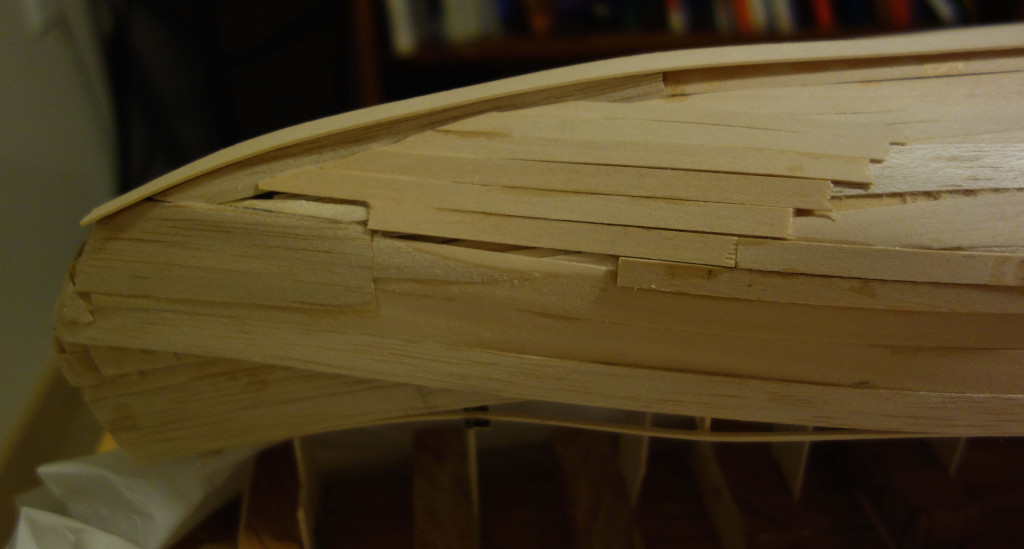
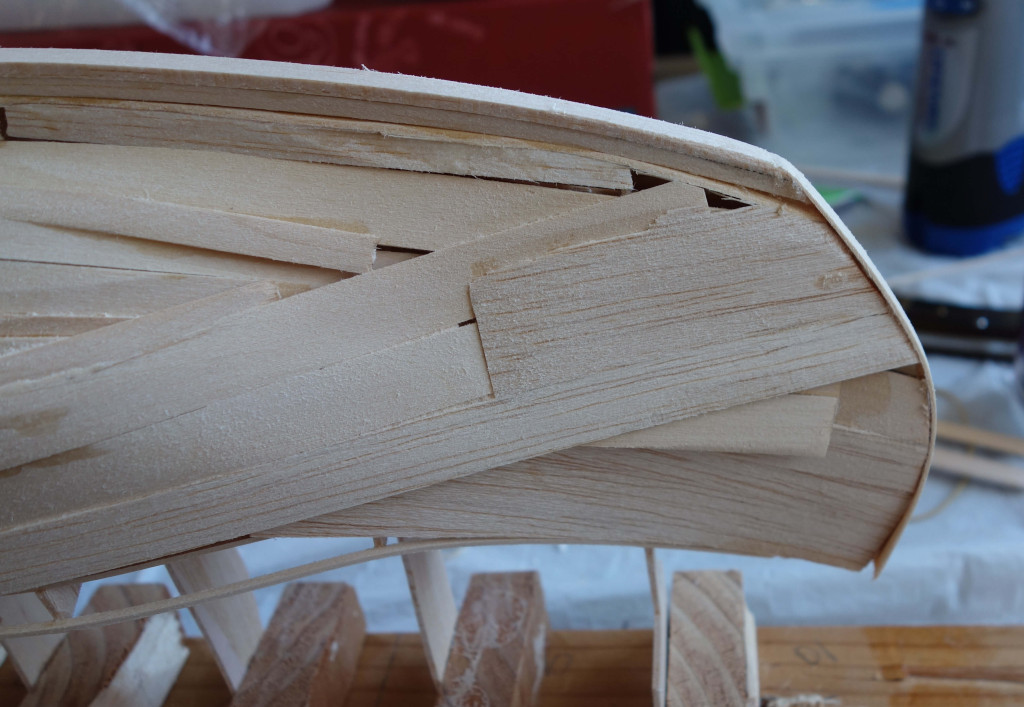
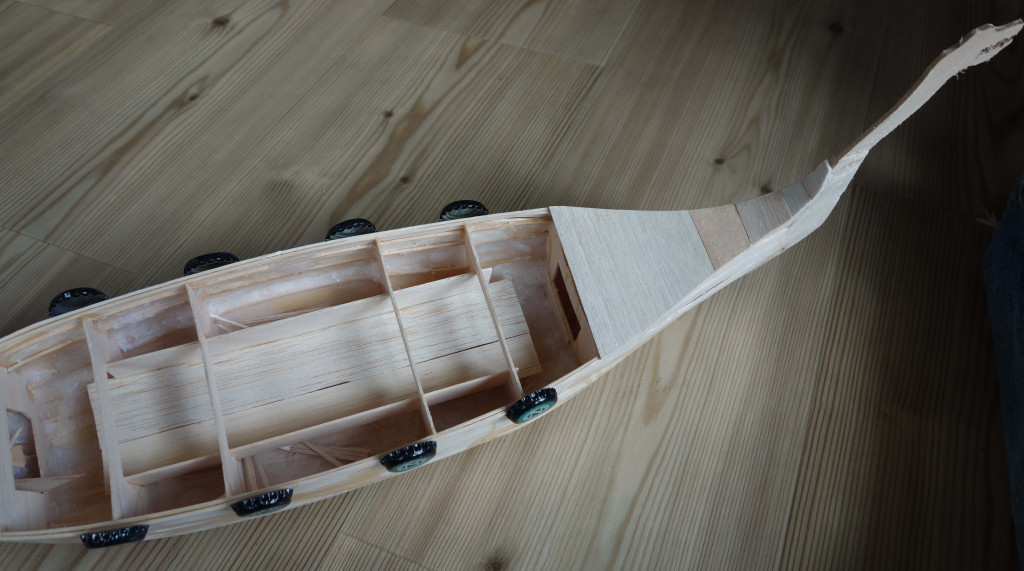
I added the planks starting from the middle of the hull and working my way up the sides. Again gluing two bulkheads at a time, starting from the middle. It had a hard time bending the bass wood enough to lay each plank along the one before it. I ended up overlapping many of the planks with a less extreme curve. I didn’t worry about planking along the super steep keel part to start.

As you can see, I didn’t align the ends, after the planks were in place, I used a dremel tool to shape the ends.

To fill in some gaps, I used smaller planking cut to length. I found the easiest way was to just eyeball the length, score the wood and then break it by hand. You can see this planking in the pictures below.

The keel

I used 1/4 in. wide balsa to build up the keel on the steep part of the bulkheads. Then I capped the keel with another 1/4 in. piece. Once this was in place I used an exacto knife to trim the excess and then sanded it to be flush with the planking. I then added thicker pieces on top to make the keel deeper.

I also added some thin pieces to the end of the bow and stern to smooth them out a bit.

At this point I cut the boat away from the jig with scissors.

The towers

While adding the planks, I didn’t worry about building up the towers on the bow and stern. I added some pieces after the fact that added probably 6 in. of height. I then used the dremel tool to shape them. I broke the bow dragon while shaping it, so I ended up creating a new one with thicker wood and just glued it to the bow.

Waterproofing

I wanted the boat to float, and use materials that were ok to burn in a pond with fish. I figured that paraffin wax was a good material for waterproofing.

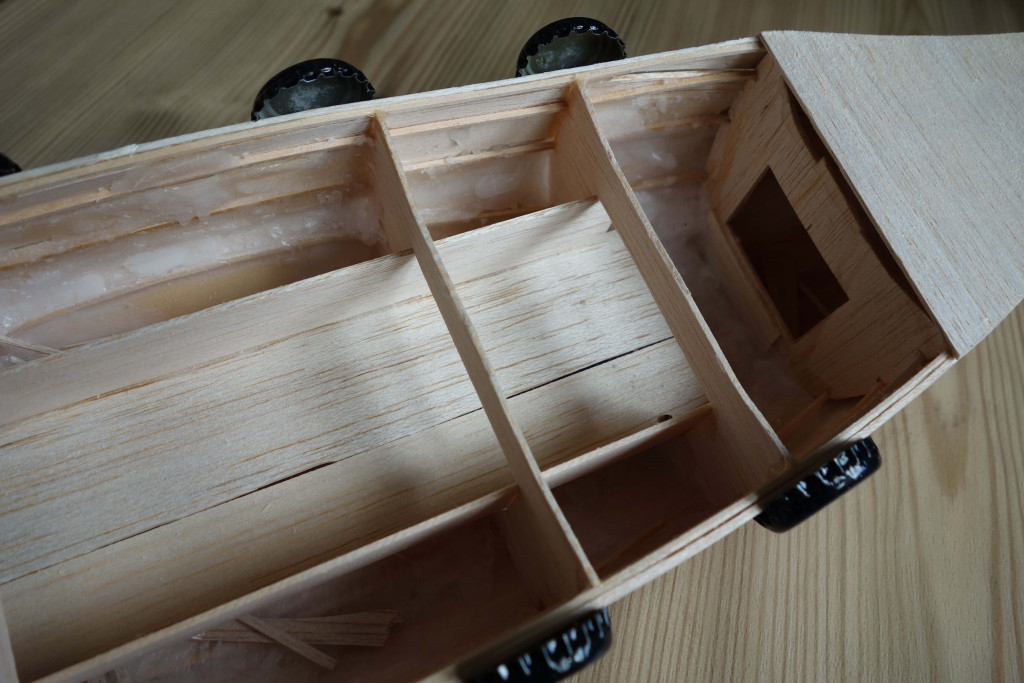
I started by lining the boat with tissue paper and pouring wax over it. I thought that this would create a barrier and that I could then add wax on the outside. I then poured wax over the outside to fill in the bigger gaps.

The wax on the outside of the boat helped prevent the wood from soaking up water. I found the best method was to pour some wax on the boat and then work it into the cracks using a small piece of wood like a squeegee.

The tissue paper didn’t stick well to the hull, and it allowed small leaks, so I removed it and just pouring wax on the inside and moving it around to fill in the holes.

Throughout the waterproofing I floated the boat a couple of times to identify leaks. I used a lot more wax than I would if I wasn’t burning the boat, but I wasn’t too concerned about how the inside looked.

Finishing touches

I added some decking on the bow and stern to give a more finished look, and also built up the deck on the inside to hold Freddie. I added bottlecaps as shields along the side.

Viking boat plans

Intro

Here is the backstory of why I am building a viking boat: Balsa viking boat

I wanted to create my own plans, partially for the challenge, but also because I someday want to build another RC sailboat. I built my first RC sailboat out of balsa using bulkheads, strakes (stringers), and planking. This worked well, so I decided to use a similar approach.

Drew plans by hand

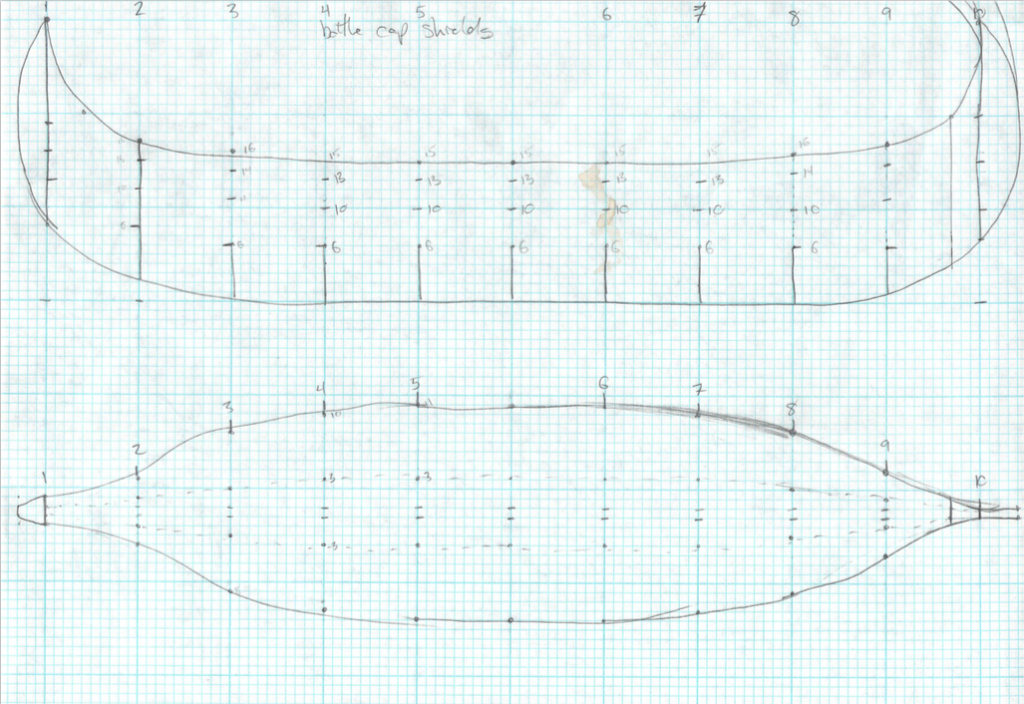
I started by looking at pictures of viking boats online. I got a pretty good sense for the overall shape and sketched out a profile view of what I wanted my boat to look like. I then created a corresponding top view of the boat. I used graph paper so I could easily cross reference dimensions of the different views.

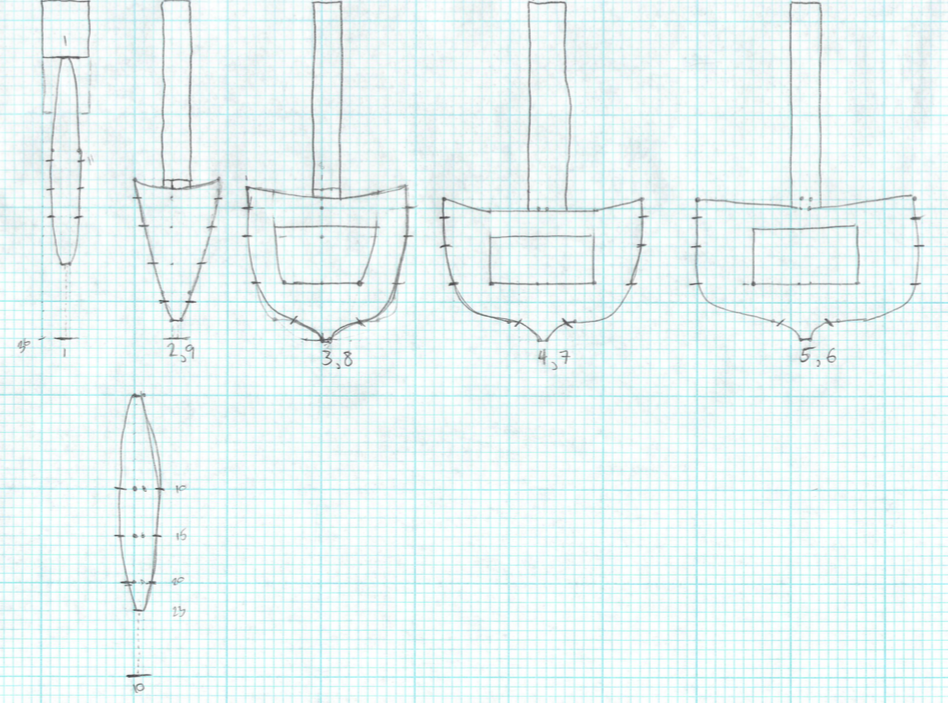
I then sketched out the bulkheads, matching the dimensions that I had established with the top and side view.

viking boat - hand
Top and side view of viking boat. Bulkheads are numbered 1-10.
viking boat bulkheads - hand
hand sketched bulkheads. The numbers represent the sequence, 1 being the bow, 10 the stern. The rectangles on top are for attaching the bulkheads to a jig during construction.

full pdf: viking boat plans – hand

Imported plans into Illustrator

I wanted plans that were symmetrical, easily printed, and easily modified, so I recreated my sketches in Illustrator.

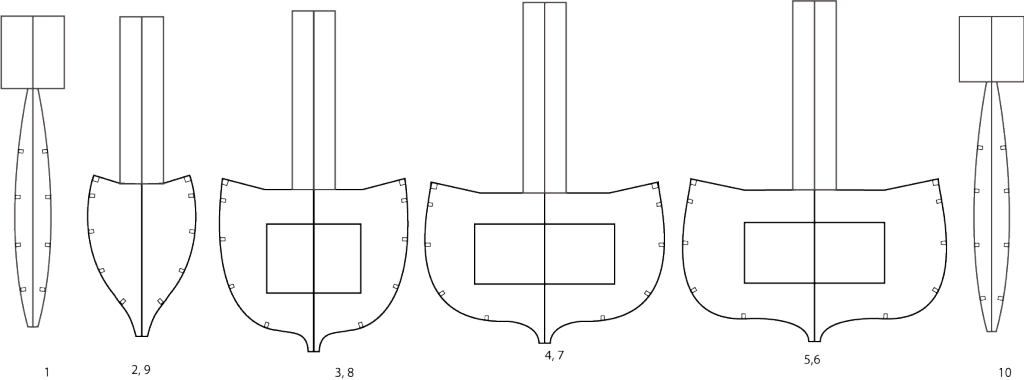
I started by scanning the sketches as a pdf. Then, using the pen tool, I traced over the left side of each bulkhead. I then copied the left side, reflected it vertically and placed it next to the original, creating a symmetrical drawing.

Symmetrical bulkheads

.pdf of plans: viking boat plans

If you would like the illustrator version, let me know and I will be happy to send them to you.

About the plans

The number under each bulkhead is the sequence of the bulkhead from bow (1) to stern (10). The bulkheads with two numbers are the same for those positions, for example bulkhead 2 and 9 are the same shape.

The rectangle at the top of each bulkhead is used to secure the bulkhead to the jig during construction. These will be cut off after the boat is built.

The small squares along the edge of the bulkheads are notches for the strakes. These allow the planking to sit flush with the edge of the bulkhead.

The rectangles inside of bulkheads 3-8 are cutouts for decking.

Balsa viking boat

Backstory

When my mom was in highschool she dissected a frog that led her to pursue her career as a veterinarian. She kept the frog, Freddie, in a jar above her desk. She retired recently and as closure on her career, wanted to provide a wake for Freddie. I thought a viking funeral in my parents’ pond would be appropriate, and I offered to build the viking boat.

Process

  1. Designed plans
  2. Built boat
  3. Put Freddie in the boat, set it on fire, and watched it sink